It’s been two years since the last time progress was made on the kitchen. We still didn’t have any cabinet doors, and recent developments have caused this to be a more pressing matter…

Here’s the recent motivation for getting doors on the cabinets. At least the lower ones.
We had focused on the lower cabinet doors the last time we made a push, and gotten to the point that they were all primed. Over the past 18 months I did the final sanding, so they were bascically all ready to be painted. It’s kind of silly they’ve been sitting so long, but other things came in between.
In any case, it was now time for the final push. If you need to remind yourself what the cabinet doors looked like when we started, you can go back to the original post. First, there are two coats of the white Eco Brilliant on the frame. This is the same paint we used for the rest of the kitchen framing, super shiny but that also means you can see every little imperfection.
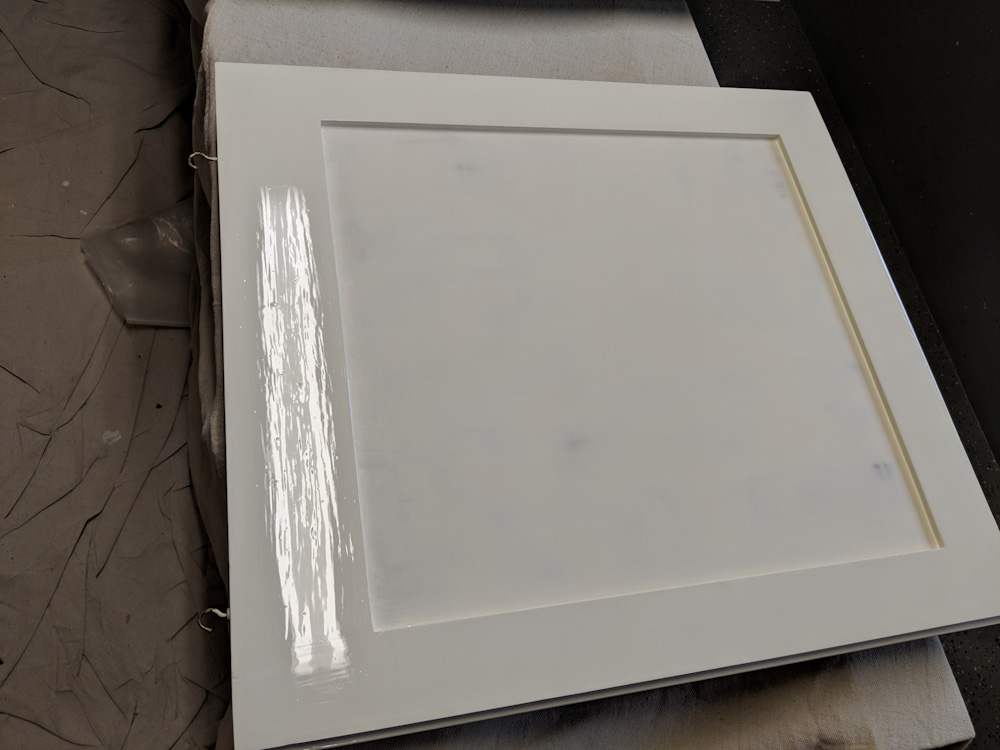
The cabinets with Eco Brilliant on the frame. Every little dust speck and imperfection shows up here, so it’s pretty humbling.
The Eco paint is really nice to work with, dries pretty quickly and has no odor. Once the door is painted, it gets to set up while horizontal, and once it won’t run the doors are hung up to minimize the amount of dust landing on them.
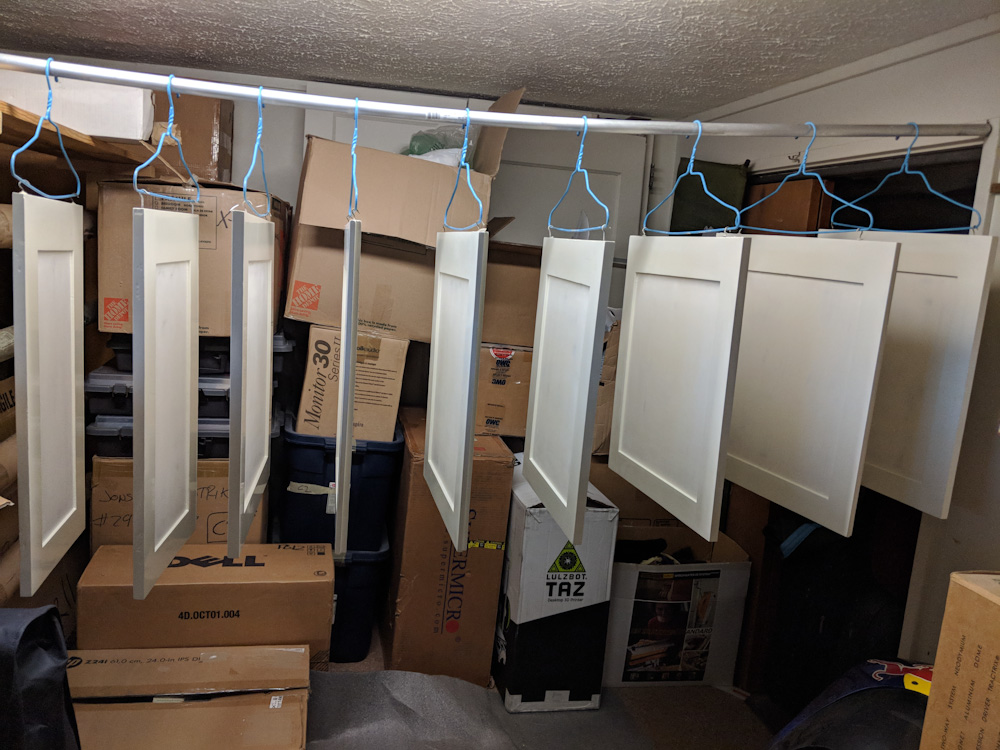
The doors were left to dry in the dehumidified room (but with the dehumidifier off to not make them shrink too much.)
With the frames done, the next step was the green Eurolux paint in the center (not sure what the term is in English, in Swedish it’s called the “dörrspegel”, door mirror.) This is a matte paint, so is a little more forgiving when it comes to the surface. On the other hand, you need a steady hand to cut the edge against the white so it actually took quite a while to paint.
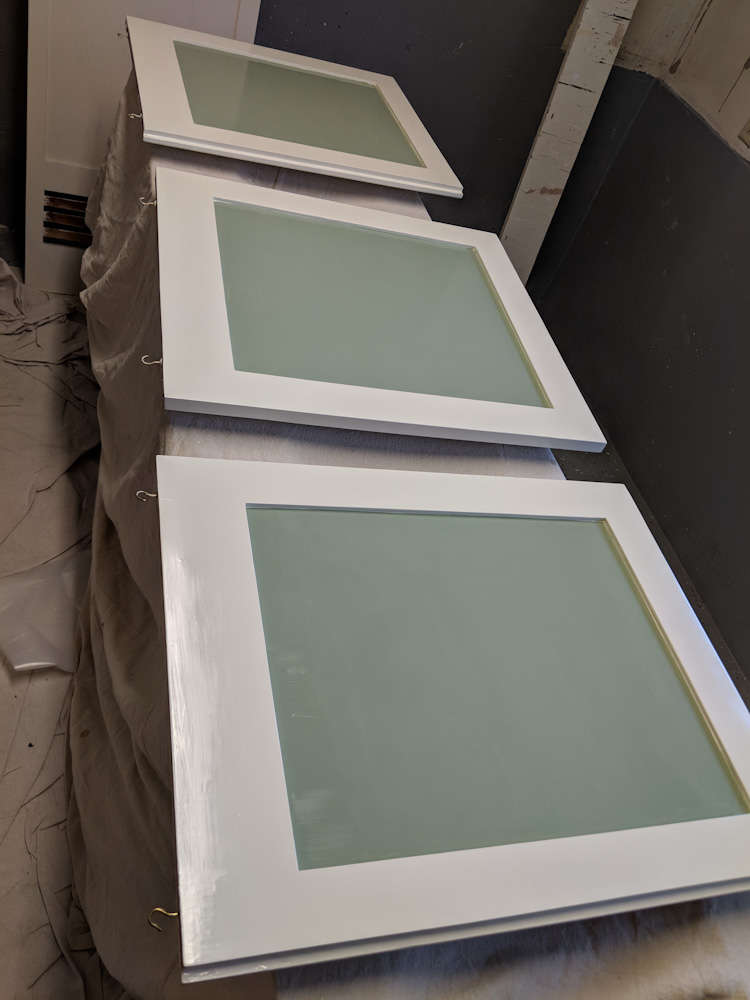
Painting the green centers of the doors.
With two coats of those done, the painting stage was over. Next: drilling holes for the hardware.
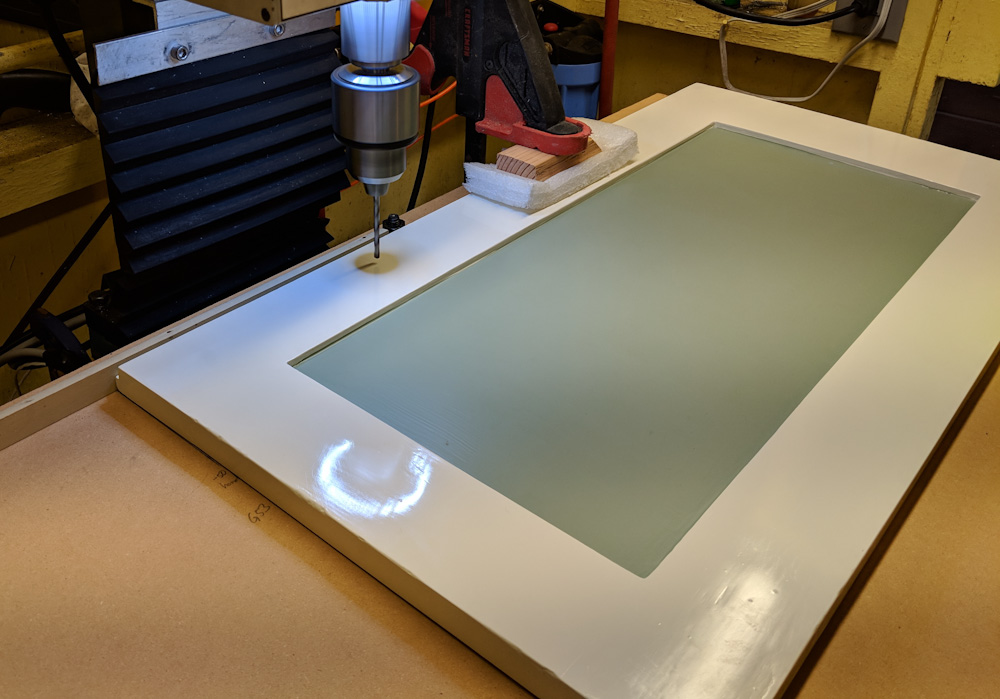
Back when we trial did the first door, my Dad and I made a fixture out of a large MDF board that mounted to the table of the mini mill. I cleaned that out and reminded myself what the measurements were. It might be overkill doing this on the mill, but it meant that the holes would have the correct spacing and that the handles and hinges would just fit right. Once I had the procedure down, it probably didn’t take longer than doing it by hand since then you have to be very careful.
The first step was to drill the two holes for the handles, 128mm apart.
First step was to drill the two 4mm holes for the handles. By clamping the door against the guide, aligned with the mark, the position was reproducible to reasonable accuracy. What’s really important is the relative location of the holes since that determines whether it will fit or not.
The hinges used a 35mm boring bit to cut the hole for the “cup”, and two small pilot holes for the screws that hold them in place.
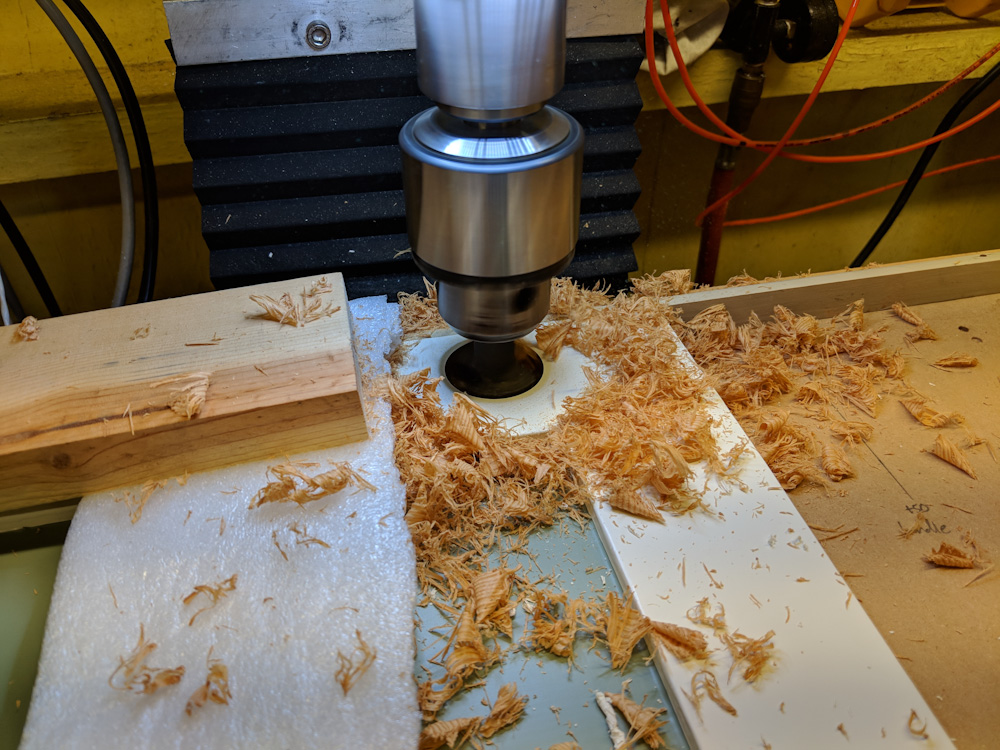
Boring the hole for the 35mm hinge cup. This needs to be at least 13mm deep, and the doors are 18-19mm thick. It’s not super close, but there’s not a whole lot of margin.
I did all this by hand-typing commands in to the mill, and there were only two screwups. I mistyped the spacing for the hinge screws by 1mm in one instance, which wasn’t so bad. The more serious one happened when I typed a “z” instead of an “x” and crashed the drill chuck into one of the doors. Luckily it was the inside, since I was drilling the hinges, but the new servo had enough torque to push the 2.5mm drill clean through the door before it broke off. The tip did poke through the front, but only barely, and it’s the lower hinge down by the floor, so it’s not very visible. I’d worried about doing something like this, but considering what could have happened (like drilling a 35mm hole straight through the door) it’s not so bad.
In contrast to the holes in the doors, the holes for the hinge clips in the frames had to be hand marked and pilot drilled, which took a while. I completed this without any screwups, although in one case I managed to precisely hit the head of a screw that we had used when adding the cover pieces around the range…

Mounting the hinge plates in the door frame. This was a manual measure-and-drill procedure.
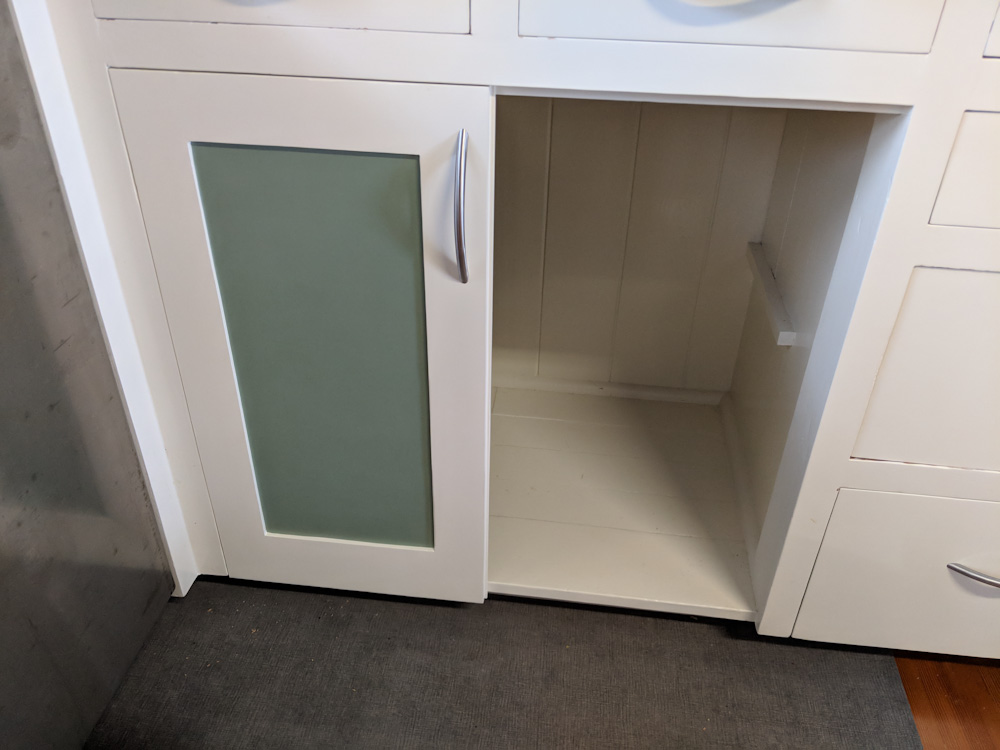
The first door is in place, eight to go.
The hinges have a bit of adjustability in every dimension (in/out, up/down, left/right) so it’s not a disaster if the position of the hinge plate varies by a mm.
It took basically two full days to do all the drilling and mounting, but now all the under-counter cabinets have doors!
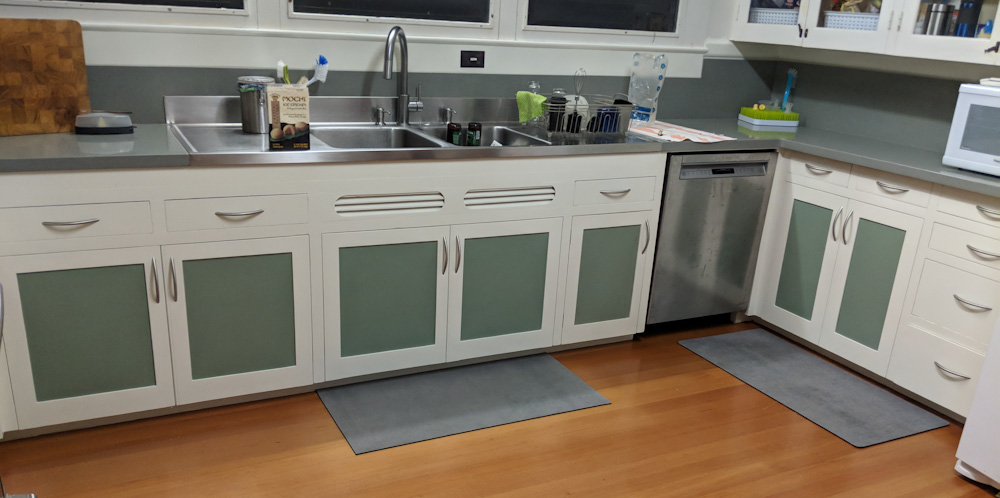
All the under-counter cabinets now have doors!
There’s definitely some variations in the gaps, so you can tell that it’s all hand-made, but it looks pretty good! An unexpected result is also that the kitchen became noticeably brighter compared to having those black holes under the counters.
So what’s next? We’ll savor the completion of this long-standing project for a few days, but there’s more to do. We could start working on the above-counter cabinets (not just the doors, but the cabinets themselves still need to have the lead paint stripped, too) and have those done in another … 4 years? I think the more pressing ones, however, are the few full-height cabinets to the left of the counters. One of those hold all the cookware, and having Axel pull down the 18″ cast iron skillet on his head would probably not be good.
Det blev jättebra!