So there’s been a 5-month hiatus on posting, but things have been happening. I’ll try to catch up.
During November, the grandparents came for their usual month-long Hawaii visit, and the task my Dad and I decided to tackle this year was to replace the old counterweighted “sash” sliding windows in the two rooms in the main house. The real objective was to remove the lead-based paint on them, since they are high-wear surfaces and the paint had started to crack and peel. The paint in the “library” is especially deteriorated, not just on the windows; it’s peeling all over the walls and the ceiling. But the windows were a start.
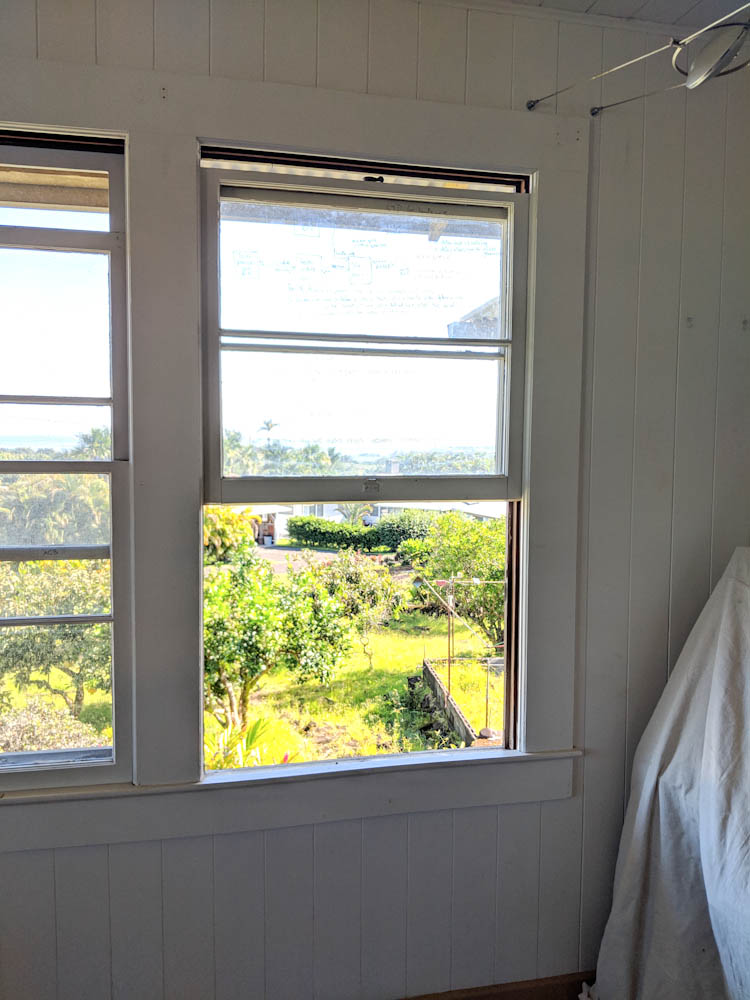
This is one of the original sliding windows (also used as a whiteboard…)
Rather than attempt to strip the paint from the existing windows, we decided it was better to switch them out for jalousie windows. Literally every other window in the house use jalousies and they are superior for the amount of airflow they provide. The only issue with our existing ones are that they are aluminum and have pretty severe corrosion. For that reason we chose to go with Palmair windows made by Breezeway. These use vinyl, powder-coated aluminum, and stainless steel, and the mechanisms are protected so they’re not exposed directly to the elements. They also seal much better than the old metal ones that don’t really make a tight seal between the slats.
The Palmair windows are also reasonably priced, at least compared to the other vinyl alternative one of the local window dealers had, which were almost 3x as expensive. We just had to drive over to Lowe’s in Kona to get them.
Getting the old windows out was an interesting exercise. To remove the sliding windows out of the frame, you had to break off the nailed-in-place wooden trim that held the windows in. Then you had to cut the ropes to the counterweights, tie a knot in them so the counterweights didn’t drop to the bottom of the window, and then take the inner window out. The outer window was then held in place with rectangular wooden rods that were fitted in a slot in the window frame. With the windows removed, you could open an access panel in the side of the window frame so you could reach in and grab the counterweight, cut the knot in the rope, and pull the weight out. These weights were large bullet-like chunks of cast iron, when you slid the window up and down they would clang against each other like some heavy-duty wind chime.
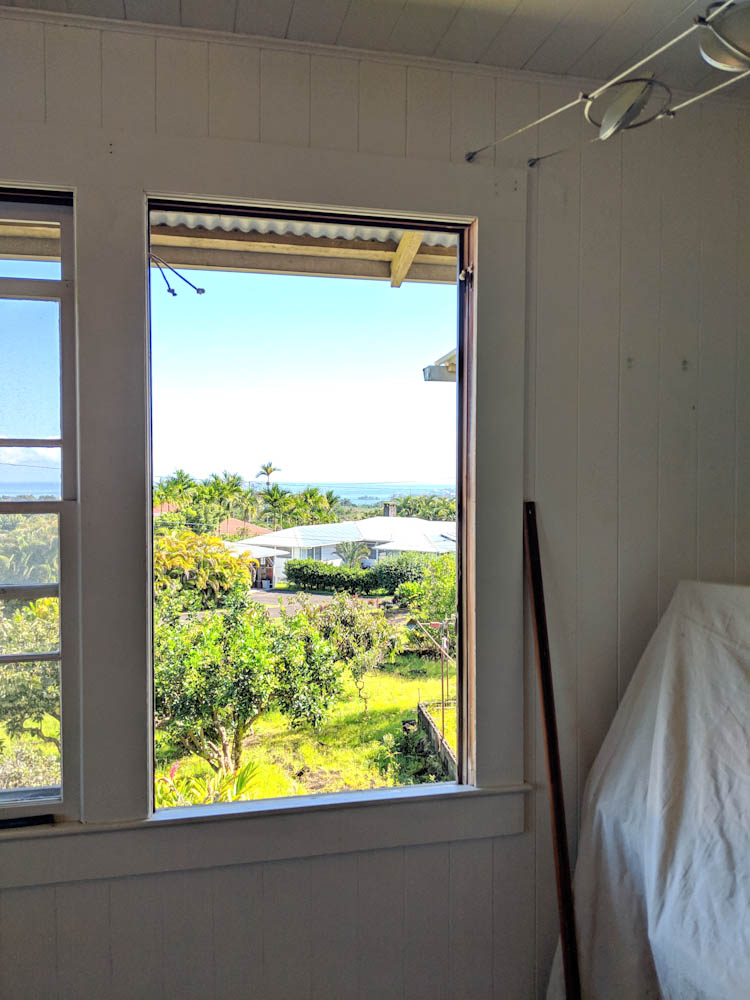
First step was to take the windows out. This required taking the inner window trim out at which point the inner window can be removed, the center trim taken out, and then the outer window taken out. Note the stumps of rope which are still holding the counterweights inside the window frames.
After removing the counterweights and putting the access panels back, we were left with a window frame with a slot all around the perimeter and holes where the counterweight pulleys had been. These needed to be covered, so we fabricated plywood sheets for the sides and top of the window frames.
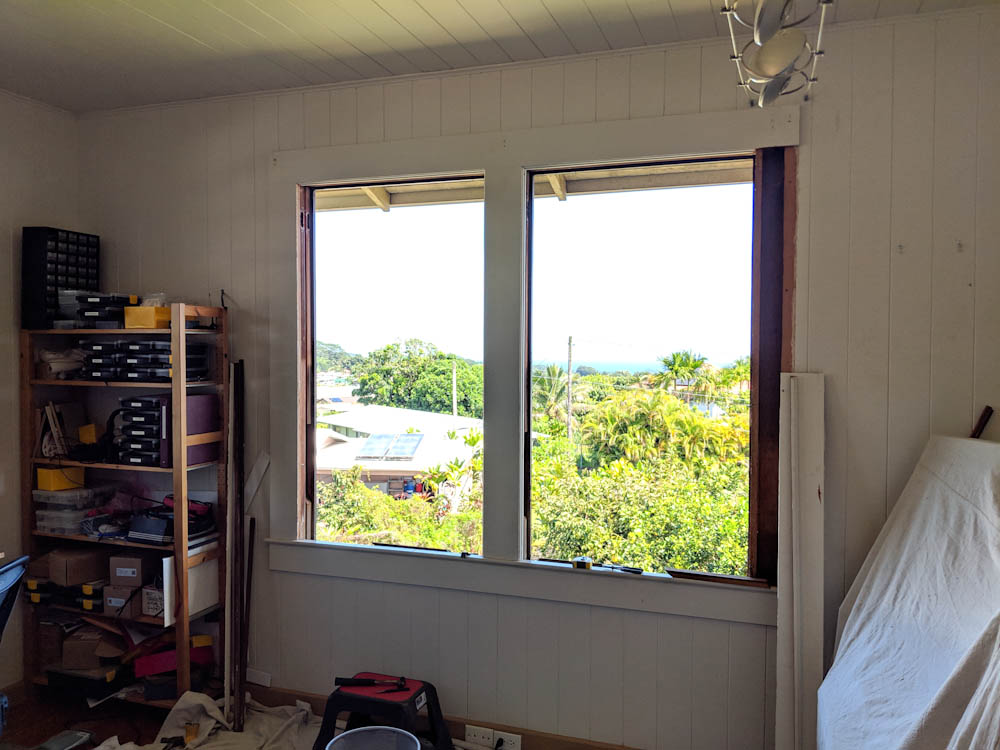
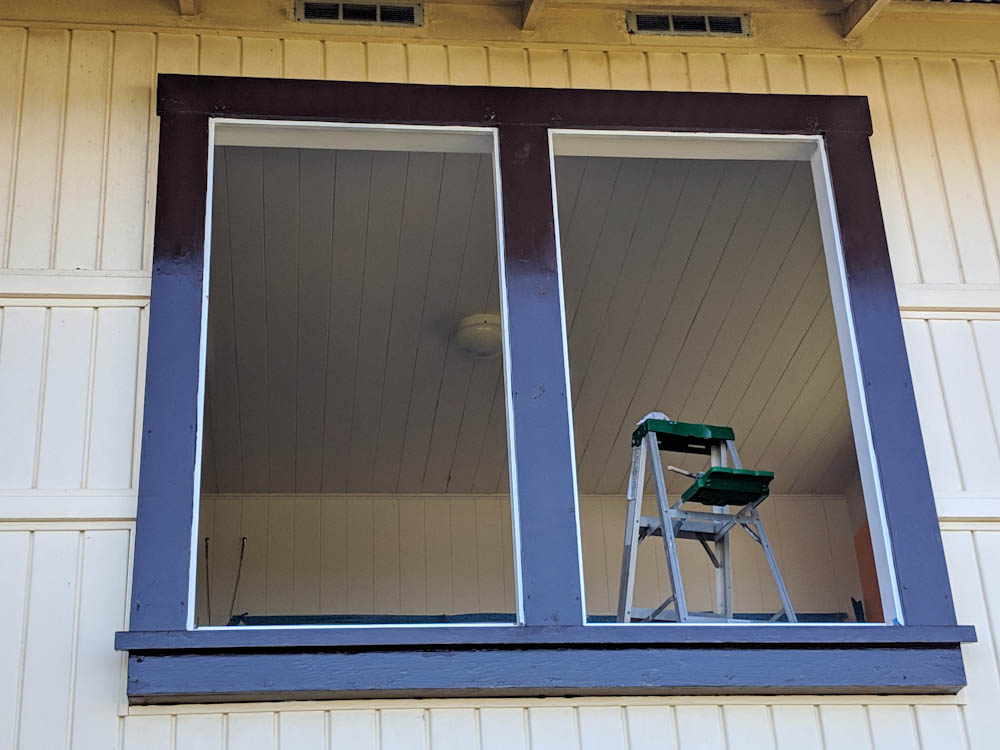
Both windows are out. We also removed one of the planks from the window frame to see what it looked like inside. There was what I assume is 70 years of dust on the bottom of those cavities, but no termite damage. The sides of the window frames have slots for the trim and holes for the counterweight pulleys. These were covered with thin sheets of plywood.
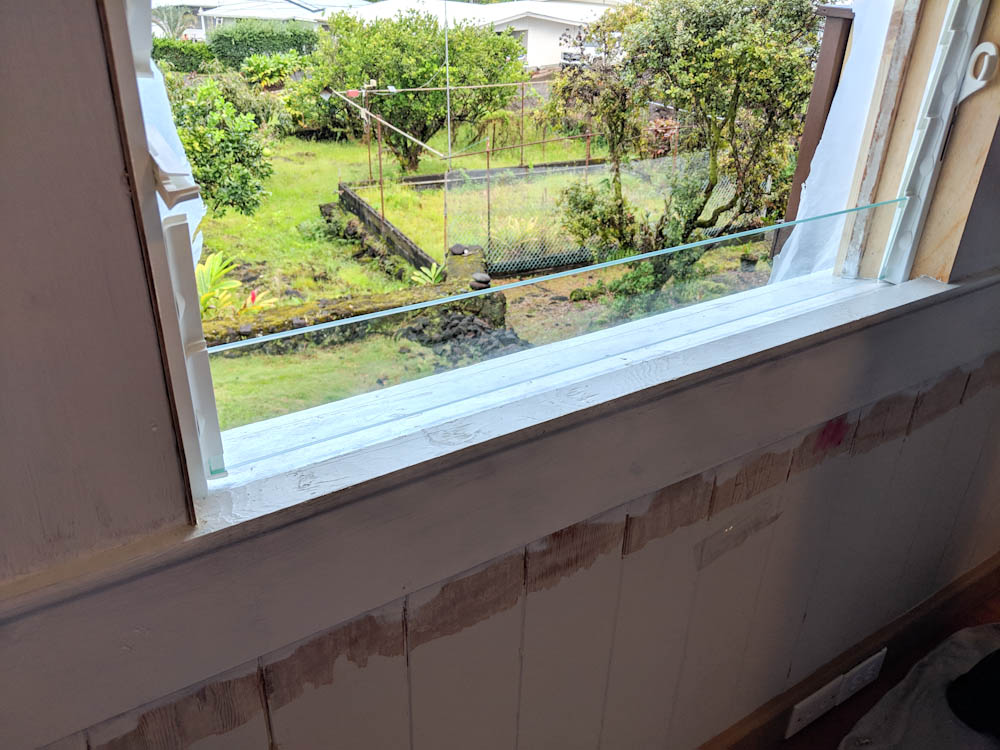
With the side plywood panels mounted, we temporarily mounted the new windows to make sure they would fit and to figure out exactly where to mount the frames. To get the bottom of the windows to seal, we’d also need to add a piece to extend the bottom of the inside window sill outward so we could add weatherstripping against the inside of the bottom of the glass.
In addition, we needed to fabricate extensions to the inside window sill so it would go all the way to the glass. Because this would have sit on top of the outside portion of the window sill, which is inclined by about 13 degrees, it had to be made in a trapezoidal shape to lie against the tilted bottom and line up with the horizontal top of the inside of the window sill. Making 7 of these pieces with the correct angle and thickness by hand seemed like an iffy prospect, so we tilted the vise in the mini mill and used it as a “guide” so we could slide the pieces through the mill and have it take off the appropriate amount of material.
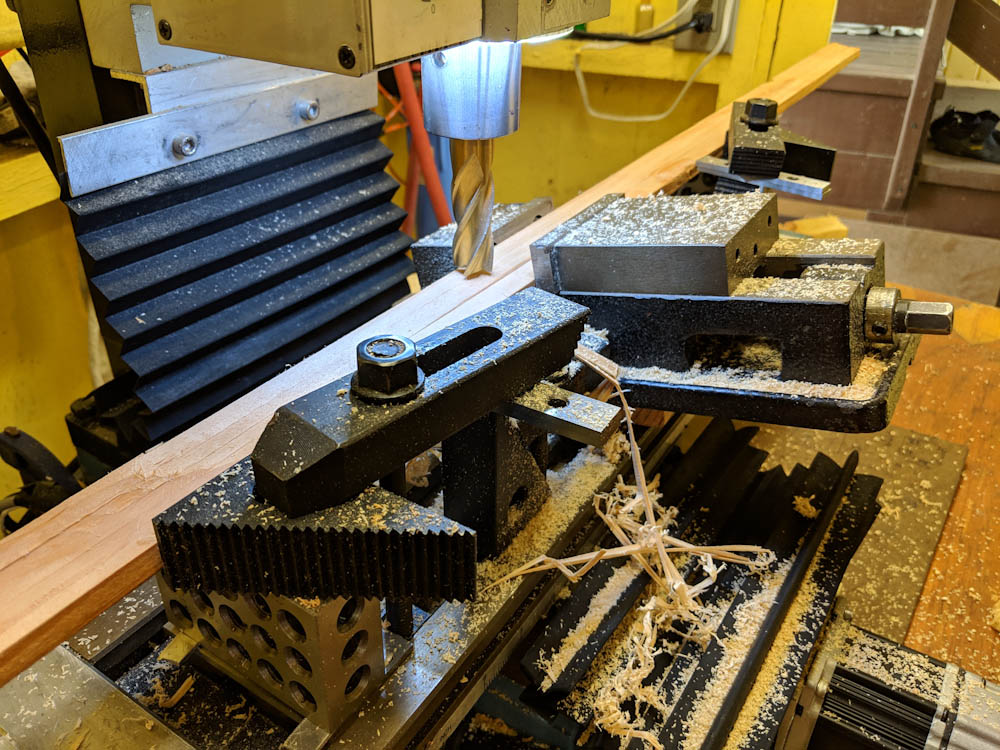
The window sill needs to be widened since the new windows set further out. The existing base of the windows is inclined about 13 degrees, so the trim pieces need to be shaped like a right trapezoid. The mini mill was set up to be able to make the 7 pieces in a reproducible way.
The outsides of some of the window frames were also in such bad shape that rather than try to get the paint off and make the wood look decent, we replaced them. Stripping the outside paint was quite a chore, it’s quite resistant to the infrared heater and you have to heat a lot to get it to soften. The wood is also quite rough so the scraper can’t get the entire paint layer off like it could on the inside where the old paint came off easily.
Having finished the woodwork, we needed to paint the windows, inside and out, before mounting the windows. This seemed like it should be quick, but took quite a while. The inside window frame was first painted with Brushing Putty (which I’ve talked about before) to mask some of the very coarse grain in the wood. This needs 24+h of drying, then sanding. Then the oil primer, which needs another 24+h of drying, and then two coats of the Eco “waterborne alkyd” paint. Since the outside is brown and the inside white, you also could only do one side at a time since otherwise you’d smear the paints into each other.

Before mounting the windows, the window frames were treated with Brushing Putty, sanded, and painted with the same Eco Brilliant Royal White paint that is used in the kitchen. With all the coats and drying time, this actually took over a week. (This also explains why there weren’t any blog posts at this time since the thing under the big cloth in the corner on the right is my computer…)
The outside of all windows are painted Tudor Brown. We’ve previously used a Benjamin Moore glossy latex paint for this, but we’ve not been happy with it as it remains sticky for a very long time and does not seem to hold up well to the elements. Instead, we got a satin version of the same Eco paint we’re using for the internal white trim, matched to the BM Tudor Brown tint. This is an alkyd paid so dries to a hard, weather resistant surface. Hopefully this will hold up better outside.
Since my parents were staying in the other room, we couldn’t get started there until we were done painting and had the windows mounted. This took quite a while longer than anticipated so by the time we could get started on the other room, we only had one week left until my parents went back home to Sweden. This was enough to get the wood work done, but not the painting.
After finishing the 4 windows in the office, we moved on to the 3 windows in the library. As is evident in this picture, the paint in this room is in really bad shape, flaking and molded. More on that later.
Since the paint on the walls and ceiling was in such bad shape in this room, peeling and full of mold stains, we decided that this was a good opportunity to repaint the entire room instead of just doing the windows. So we started stripping the walls. This actually didn’t take too long, with the Speedheater you can cover about 1m^2 per hour, when you don’t have to deal with trim and corners and stuff. The windows went a lot slower.
Holding the Speedheater gets very tiresome after a while, you basically hold it in one hand and strip with the other which is hard on your shoulders and wrists. As we discovered how hard this job would be, we ordered the “arm” that holds it so you only have to reposition it and not hold the weight. However, it didn’t arrive until the job was mostly done. I’ll make a separate post about the repainting of the room.

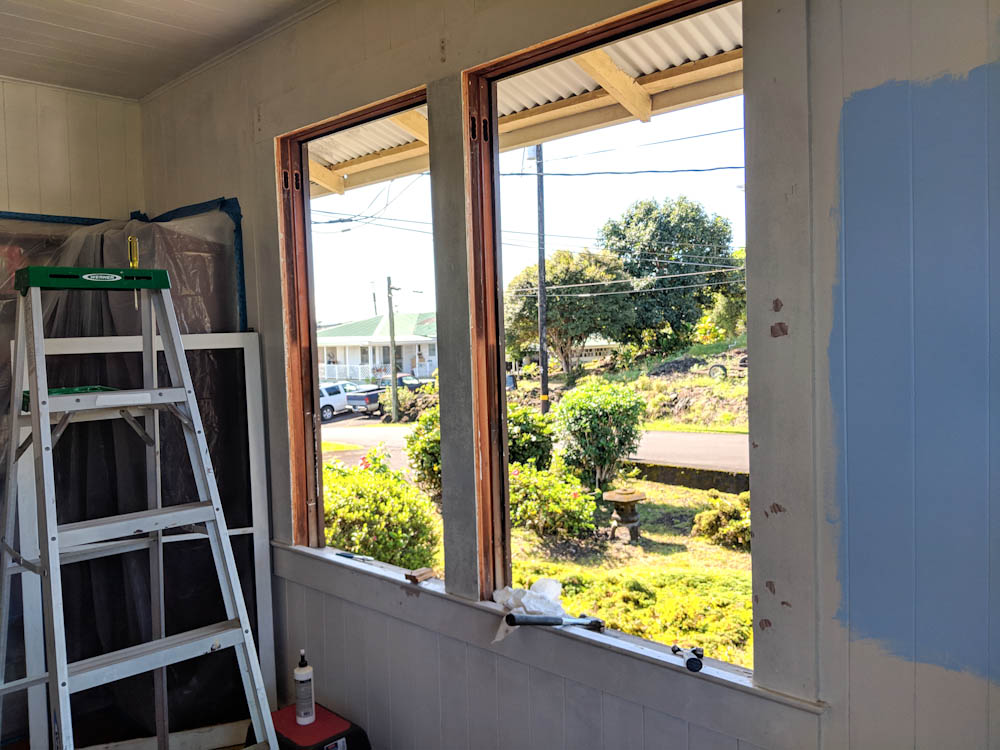
Nearing the end, the windows in the library are painted and the windows are ready to be put in. As you can see, we’ve also started stripping off all the wall paint. More on that later.

Finally, the windows can be mounted, here two are done and I’m just about to start working on the third. The only thing remaining is to cover the small space between the top glass and the top of the frame. This will have to be done similarly to on the bottom, but is not urgent since only in a major hurricane would the wind blow hard enough that rain would hit the window that high up under the eaves.
In the end, I think this was a major upgrade. The old windows weren’t just peeling, when the wind was blowing they also would shake in their mounts, giving off a rattling sound that isn’t so nice if you’re trying to sleep there. The jalousie windows will give a lot more airflow (although we haven’t had occasion to need that since it’s been “really cold” here. Cold for Hawaii, that is.) The new paint also looks really nice. I can’t even imagine how nice the whole house will look when we’ve repainted all the trim, door frames, baseboards, etc with this paint. So we’re really pleased with the new windows. Stand by for the next post about painting the room.
Pingback: More home improvement: Painting – Patrik's projects