In the last post, I described how we’ve finally gotten some momentum back on the long-stalled kitchen refinish. In this post, we continue with painting.
The existing kitchen paint, under the top layer, contains lead. This was the reason I wanted to get rid of it, at least on the surfaces where the paint was in questionable condition or where you are most likely to chip it. Stripping off all the paint would be a lot of work, so we only did the cabinet floors and the faces and frames. The paint on the interior walls of the cabinets was in good shape, so there we decided to just clean with TSP, sand it, and paint over.
The stripping of the lead paint was done with the Speedheater, an infrared paint stripping tool (made in Sweden! 🙂 ) that heats the paint so it becomes soft and detaches from the surface and can be scraped off with these really effective scrapers. Because the paint is softened, scraping like this doesn’t produce lead-containing dust, just large chunks of paint. You still have to make sure you collect this so it doesn’t get crumbled into pieces and tracked around everywhere, but it seems to be the cleanest method of getting rid of lead paint that doesn’t involve using machines with internal HEPA filters and whatnot. Plus, it’s actually really quick to get rid of the paint once you get into the rhythm.
After the paint is removed and you’re basically down to bare wood, you still have to go over it with a rough sand paper to get off any remaining loose little paint chips, so we did that very slowly while wet-wiping up the generated pieces.
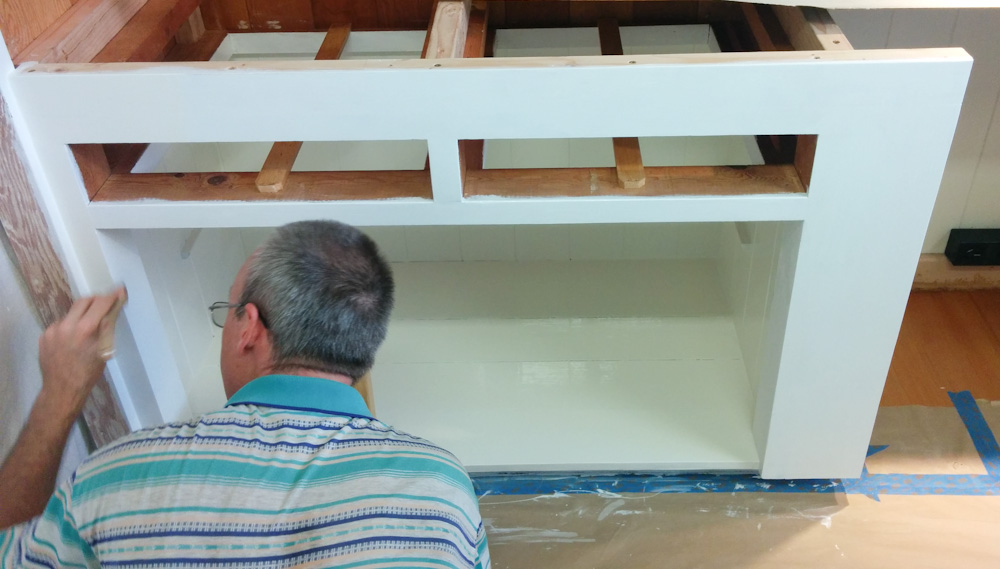
The interior of the cabinets were then ready to be primed with the Fine Paints of Europe Oil Primer but, as I mentioned in the last post, the faces needed some help to get them really flat so they received two coats of Brushing Putty first. This is like a really high-build primer that we also use on the cabinet doors and you can really get a superb surface with it. In this case, the wood we used to make the face of the raised counter frame was really uneven and after 2 coats we called it good enough even though there are still noticeably uneven places.

The cabinets after priming, ready for the top coats.
The top coat is the Fine Paints of Europe “ECO Brilliant“, a water-based alkyd paint that’s very shiny and levels beautifully. Like an old-school oil-based alkyd, it dries to a hard surface, which is what you want on a cabinet, but you can paint it without having the whole house smell like mineral spirits, which is awesome.
In hindsight, having a “brilliant” surface might have been a mistake. It looks awesome, but it also shows every little imperfection in the surface. Certainly we could have gone with a slightly more matte surface inside the cabinets, not that it matters much either way there.
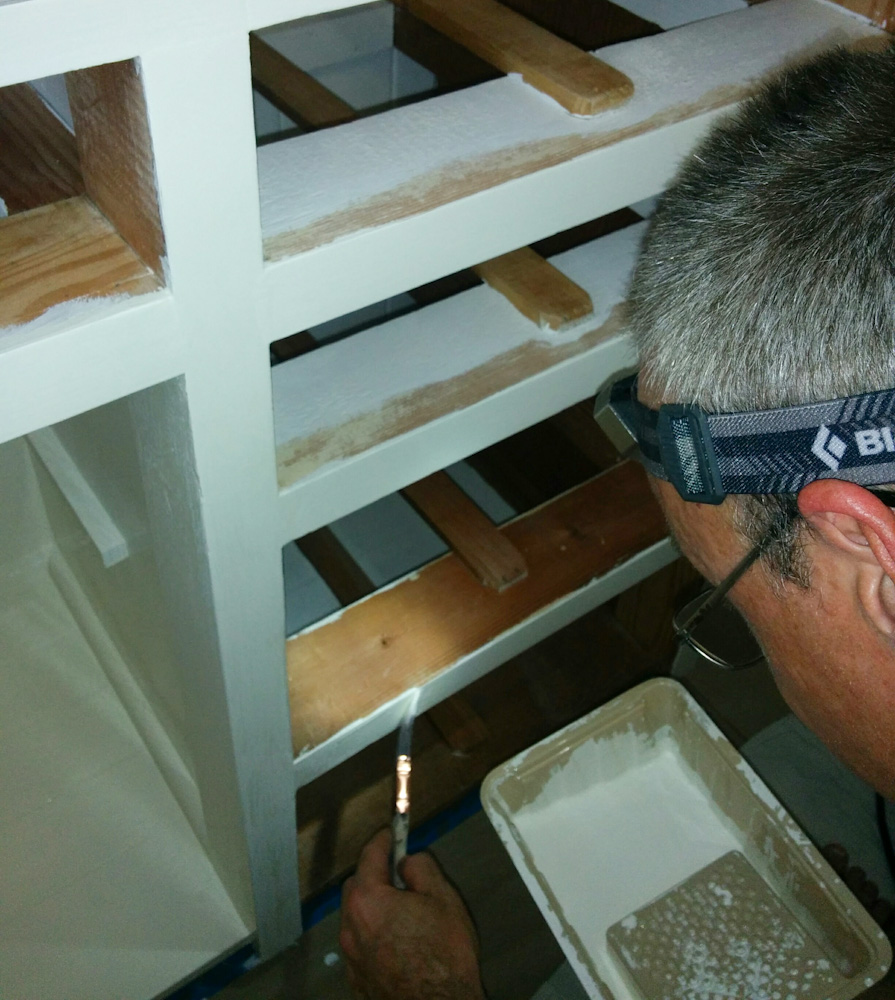
The first top coat is going on. If you look beyond all my gray hair to the cabinet floor, you can see how shiny the paint is. This isn’t because it’s still wet, it really is shiny like that.
After the first coat has dried, it’s sanded with a very fine sand paper (like 300) to get rid of any brush strokes and imperfections before the second and final coat goes on.
When painting the second coat, it’s actually hard to see where you’ve painted, because the dried paint is basically just as shiny as the wet one. Unless you have a light from a very oblique angle, it’s easy to lose track of exactly what you’ve already painted.
I found it a bit nerve racking to put on the final coat, knowing that whatever screwups we made now would be visible. The end result is definitely not perfect, but it’s mostly a case of “I made the mistakes so I know exactly where they are”.
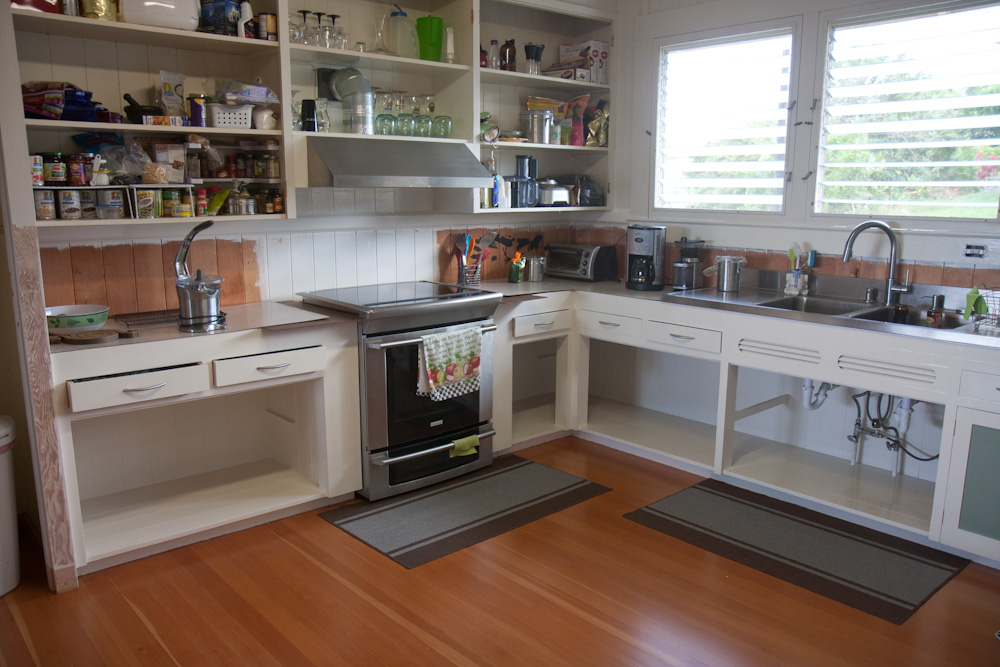
Here’s the “final” result. Of course, we still don’t have cabinet doors. Or real counter tops… But it definitely looks a lot better than it did before. (Note that the one painted “test door” has been mounted on the right. We did that just to make sure the hinges we ordered will work.)
If you don’t put your eyes right up to the paint, it looks fine (except if there’s light falling at the right angle.) The photo below should give an impression of exactly how much even minute imperfections show up if you have the right light.
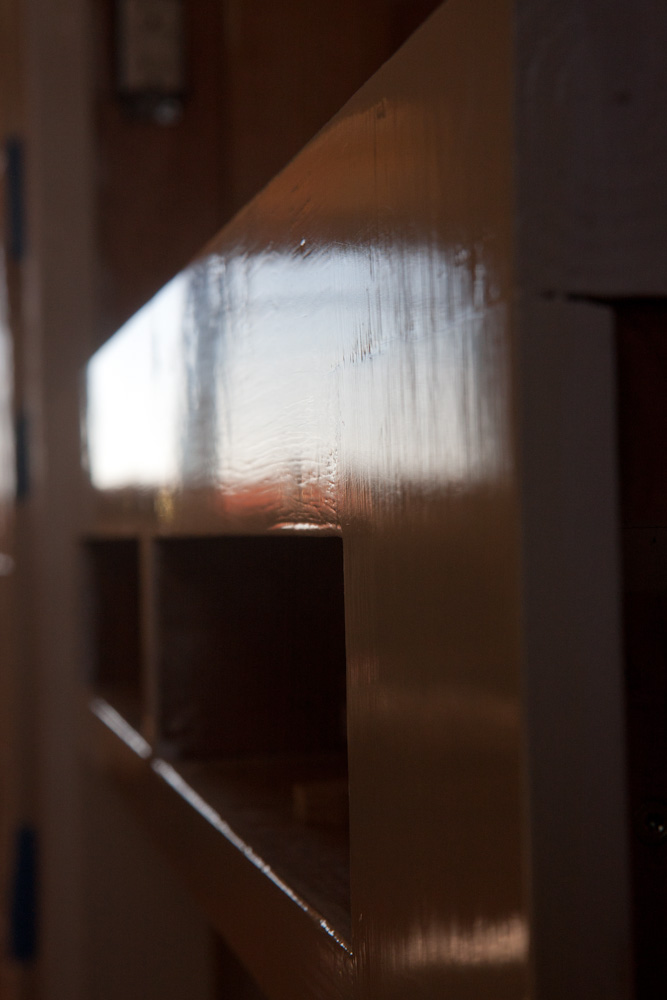
This reflection of the living room windows shows exactly how much you can see the imperfections in the surface, if you look hard enough.
So that’s that. The counter tops are on order, the drawers have also been painted, and there’s been progress on the cabinet doors, but those topics are worthy of their own posts.
Pingback: Back to the Kitchen #3 – Countertops – Patrik's projects
Pingback: Back to the Kitchen Again – Cabinets – Patrik's projects
Pingback: 2022 House update: the kitchen – Patrik's projects