Back in 2014, I built a Franklin antenna, and a small fiberglass post to mount it on our roof, to receive ADS-B broadcasts from airplanes with a flightradar24 receiver.
We recently had our house fumigated for termites, and since this involves enclosing the entire house in an air-tight tent, it was safest for the antenna to temporarily come down.
I’ve had to fix the Franklin antenna a couple of times because the wires connecting the coax to the antenna corrode and disappear. The last time I did this, I meticulously covered the ends in adhesive-lined heat shrink and then encapsulated the entire joint in hot glue. This appears to have worked pretty well. Inspecting the antenna after taking it down showed that the hot glue had gone opaque, but everything seemed otherwise unaffected by the weather.
The post that holds the antenna, though, was in horrible shape. I didn’t do this very well to begin with because I didn’t paint the fiberglass. The epoxy in fiberglass can not sustain continuous UV exposure without deteriorating, so at some point maybe in 2015 I realized that the antenna had been up there for a while and the fiberglass was beginning to look weathered. Not wanting to take the whole thing down I slathered some white primer onto the exposed parts but, since the antenna coax and pre-amplifier was mounted on it, I couldn’t get to everywhere.
Now I could inspect first-hand the effects of 6 years in the tropical sunlight and frequent rains do to unprotected fiberglass. There were actually places where the bare fiberglass fabric was exposed and all the epoxy was gone. This in turn meant that water had gotten under the fiberglass and the foam core was discolored and weathered.
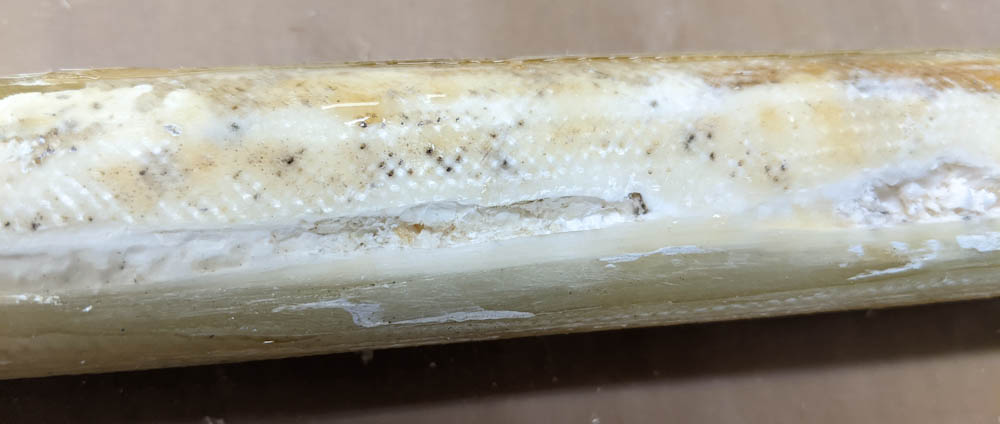
The very badly affected fiberglass post. Here, I’ve sanded away most of the weathered surface save for minor black specks in the fabric pits. In several places the fiberglass was so far gone, and the foam below it deteriorated, that it was best to just sand away the fiberglass completely. These holes can be filled with flox when the surface is reglassed.
It didn’t help that I had not done a very good job fabricating the post, so there were places where the fiberglass had not conformed to the foam core very well. This produced a very convenient air gap between the fiberglass and the foam where moisture could collect.
After some serious sanding to get rid of the remains of the old paint, the weathered epoxy surface, and in places completely sanding away the badly deteriorated fiberglass plies, I could repair the part. After filling all the foam cavities with flox, and making sure to let epoxy run into the places where the foam had delaminated from the fiberglass, I added two plies of unidirectional cloth. (The previous layup appeared to be a single ply of bidirectional cloth, but unidirectional makes more sense here since it’s a beam and all the loads are in bending. I also made sure to make the layup quite wet to make sure to not get any air spaces.
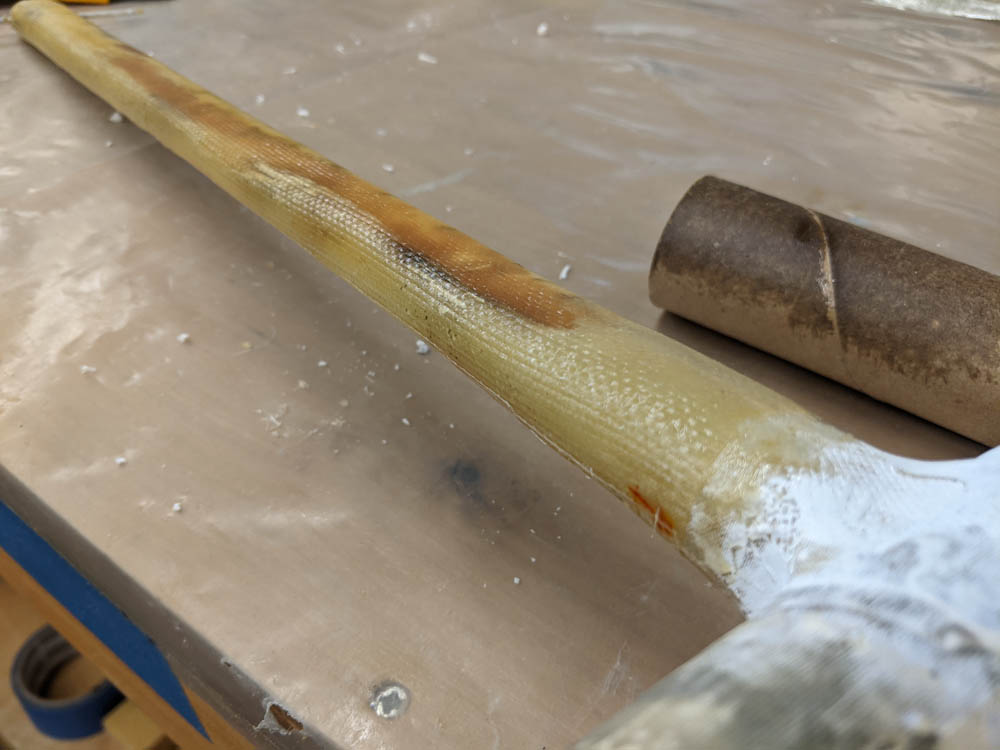
One side repaired. The dark areas are where the cavities in the foam have been refilled with flox. This is 2 plies of unidirectional cloth. The post will now be flipped over and glassed on the other side in the same way.
The post is elliptical in profile. The tops and bottoms were in pretty good shape, but both sides were bad. Since it would be hard to fill the holes in the foam on both sides in a single layup, I did each side separately, wrapping the UND slightly around to the other side.
This time around I’m also going to make sure to put several coats of paint on it…