After starting to assemble the filament storage box, I was distracted by the house fumigation and repairing the Flightradar24 antenna, but this weekend I finally had time to apply the corner tapes to the inside corners.
This is pretty simple, the idea is to apply a strip of fiberglass cloth to join the two sides in the inside corners. To make a smooth transition that the glass can follow, a small bead of micro or flox is used in the corner.
These thin BID tapes are cut at 45-degree bias, so the fibers go diagonally across the tape. This makes it conform to shapes much better, but also means that the strip can be stretched and squeezed a fair amount. Care has to be used when applying the tapes since it’s easy to stretch it as you push it into the corner. It’s also a bit tricky to make sure the tape ends up centered in the corner.
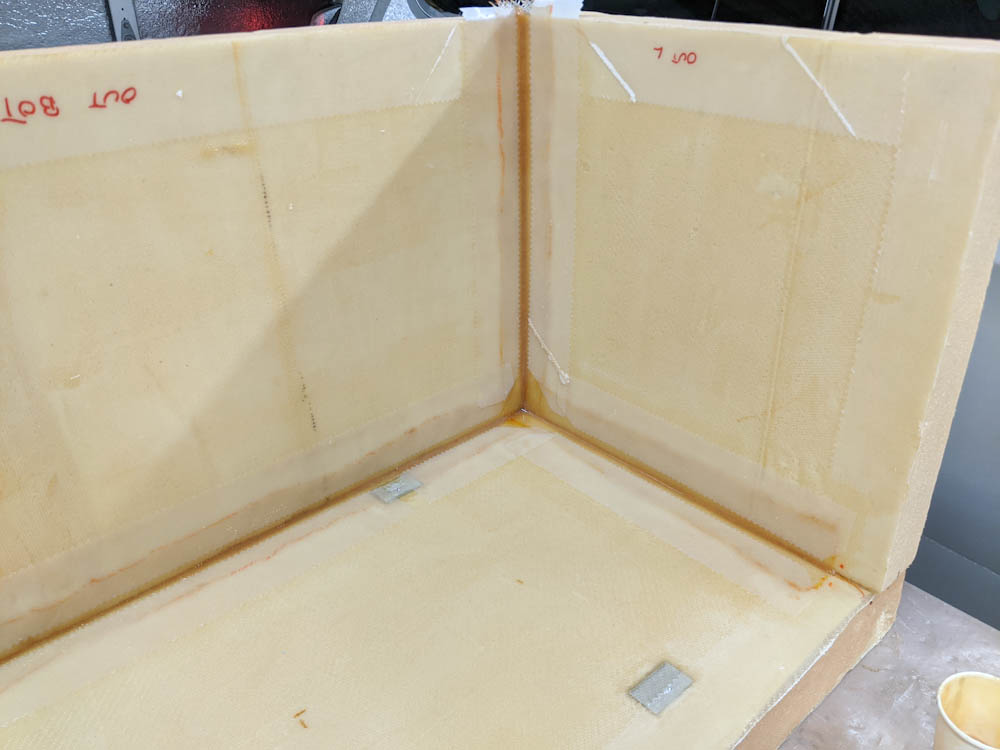
The 4 sides of the box with corner tapes applied to all joints. I also added peel ply to ensure a smooth transition and no sharp glass needles poking up at the edges of the tapes. The tape in the lower right is intentionally short since there needs to be room for the box ceiling on that side.
The only complication was that the screw holes for the heater bed plate are quite close to the edge, close enough that the corner tapes would cover the threaded holes. Getting epoxy into these holes would obviously be no good, so I initially covered them with pieces of painter’s tape, cut the cloth to clear the hole, and also cut the peel ply to avoid getting wet epoxy anywhere near the holes.
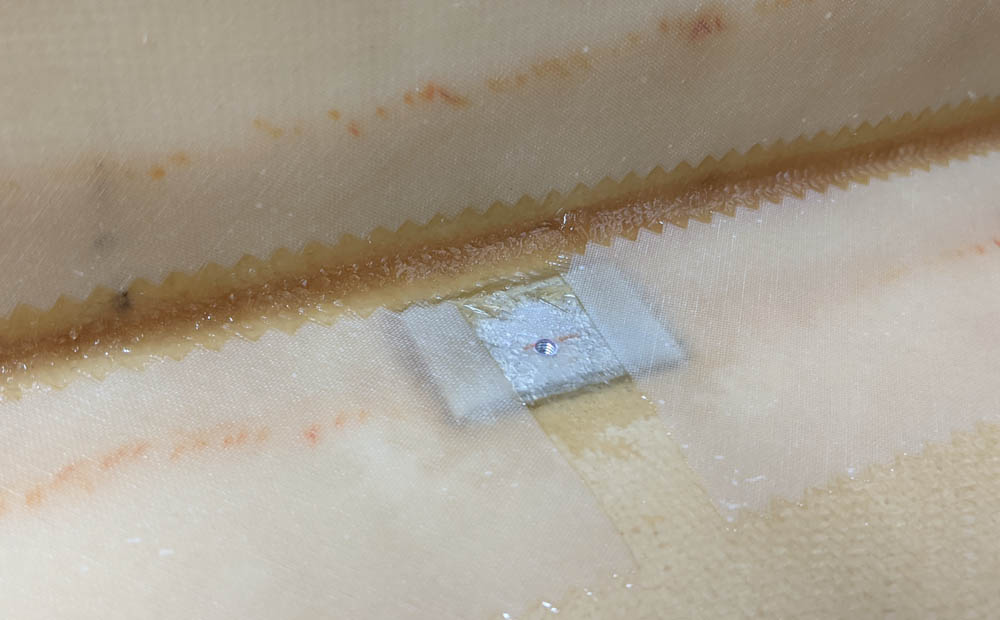
The corner tapes and the peel ply were cut to not cover the threaded holes that hold the heater bed.
Once these have cured, I can mount the final side of the box. Stay tuned, I hope to keep the momentum going now.