Over 2 years ago, when we got the minivan, I intended to upgrade its crappy halogen headlights. (In fact, I started planning this upgrade before we even got it, since I new the headlights were bad.)
To be able to work on this while having a vehicle, I ordered two used headlights from ebay, and on the assumption that I could figure out how to fit them, a pair of Morimoto M-LED 2.0 bi-led projectors for low/high beam, and a pair of Morimoto Mini HB LED dedicated high beam projectors. After that, the project sat on back burner for most of the time, first because of the absurd difficulty in opening up the headlights.
Back in the Passat days, opening up headlights was easy. The lens was held on with butyl rubber and by throwing them in an oven at ~90C for a couple of minutes it would soften up sufficiently to be able to pull the lens off. These days, a bunch of manufacturers have switched to a 2-component glue known as “Permaseal” which is, you might guess from the name, much more permanent. No matter how much you heat up the headlight, it remains stiff enough that you may be able to wedge a tool into the glue line and physically tear it. I attempted this and basically failed. Only after a major mutilation of the headlight did I manage to get the lens off, cracking a piece out of the lens and ripping parts off the base in the process.
For the second headlight, I did what other people have done and simply cut the lens with an oscillating saw instead.
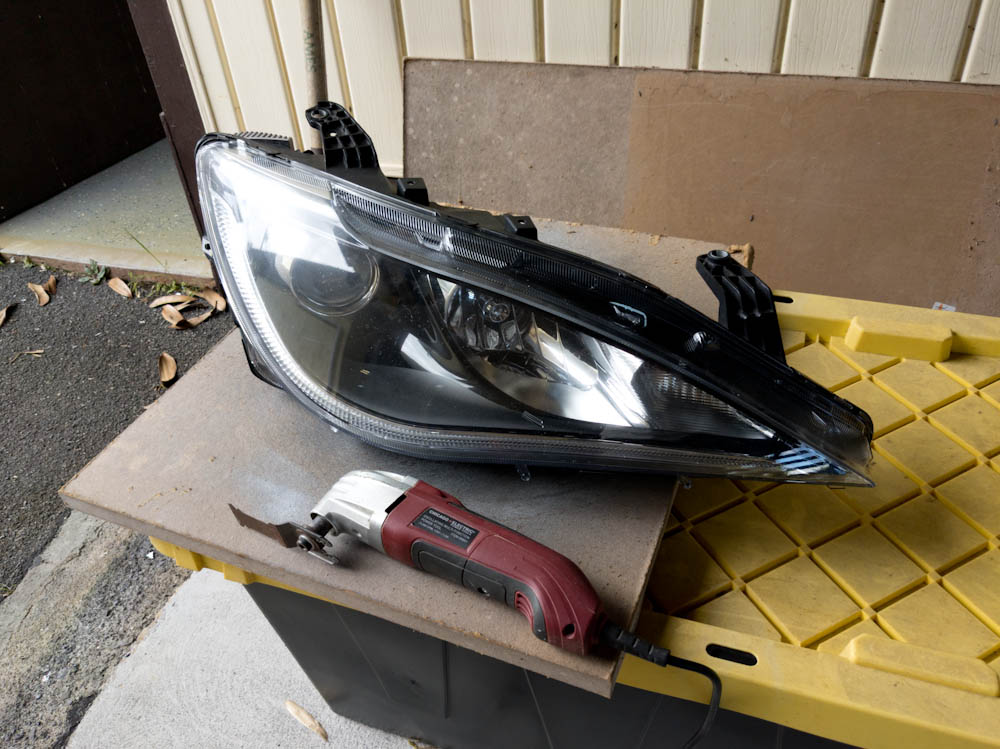
After the extreme difficulty of getting the lens off on the first headlight, on the second one I just cut the lens with the oscillating saw instead. Much faster and much less damage to the overall headlight.
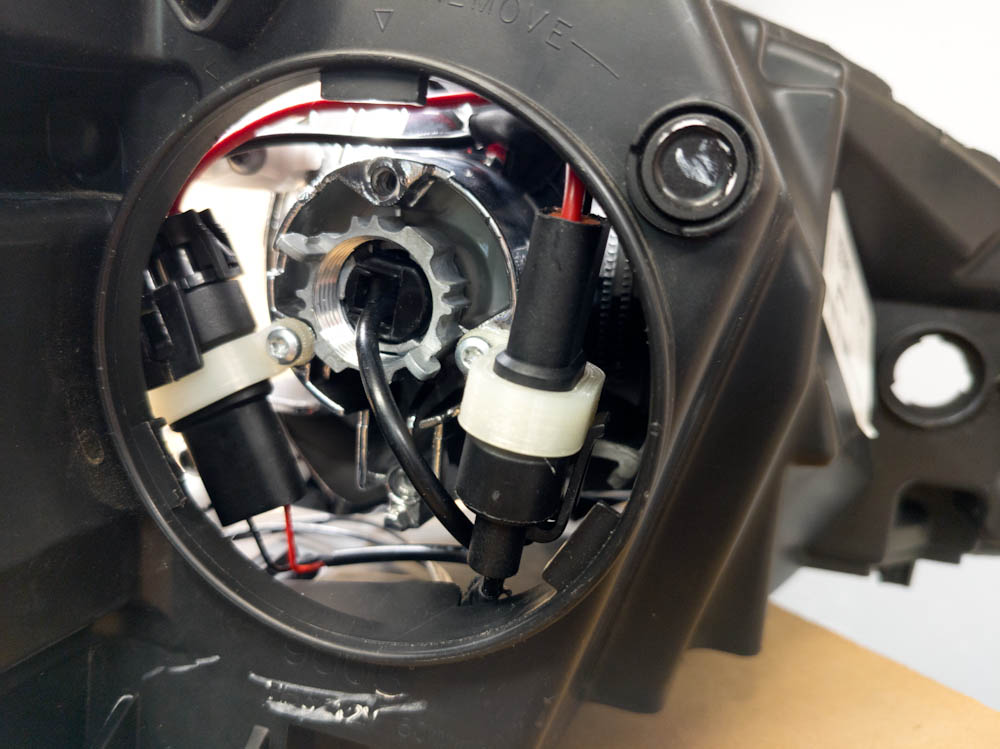
Looking at the headlight above, the projector on the left is the low beam, while the large reflector in the middle is the high beam. The small reflector on the right is the turn signal. The idea here is to simply replace the stock projector with the M-LED, which has a similar size lens, and to fit the Mini HB projector where the high beam reflector is mounted.
While the M-LED lens is similar size as the stock projector, the length is different. The projector is mounted on a plastic frame, shown below.
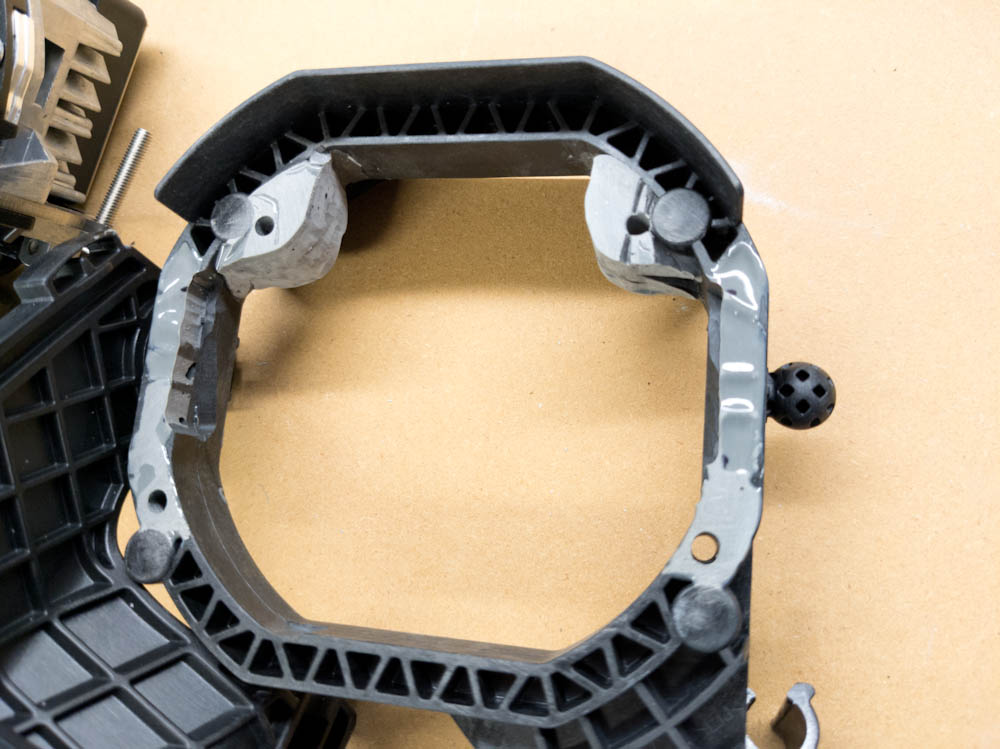
This is the frame to which the low beam projector was mounted. To mount the M-LED, it needed to be cut out a bit in the middle and have material added for the top holes. JB Weld to the rescue.
Because the M-LED is shorter, I also mounted it on the front side of that frame rather than on the back like the stock projector. (The four round pads are the back sides of the projector screw holes.) The layout of the holes are naturally different, so I had to make up new holes, but luckily I could use the back of the stock screw holes as the reference plane for getting the projector aligned.
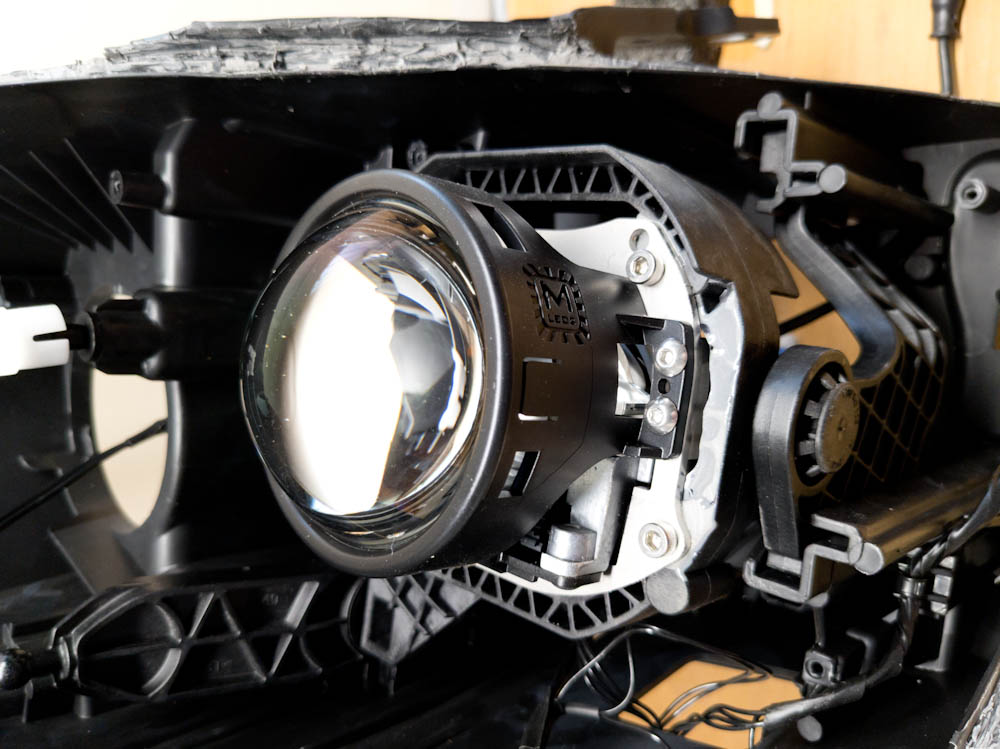
The M-LED projector mounted where the low beam projector was.
While the M-LED is shorter than stock, it’s still long enough that mounting it on the front face of the frame still makes it protrude further forward than the stock one. To get it to fit, I had to cut back the shroud as much as possible. Luckily, that was enough. If I had to cut it more I would have had to start cutting into the frame and moving the projector back instead.
The Mini HB projector is easy to mount, you just put it into the bulb hole in the reflector. To get it to look nice, there’s a matching “gatling-style” shroud (similar to the projectors used in the NC23 retrofit), but when you add that shroud it’s a very tight fit to the covers on top and bottom. A large amount of cutting of shrouds and the headlight housing was necessary, but in the end I got it all to fit. 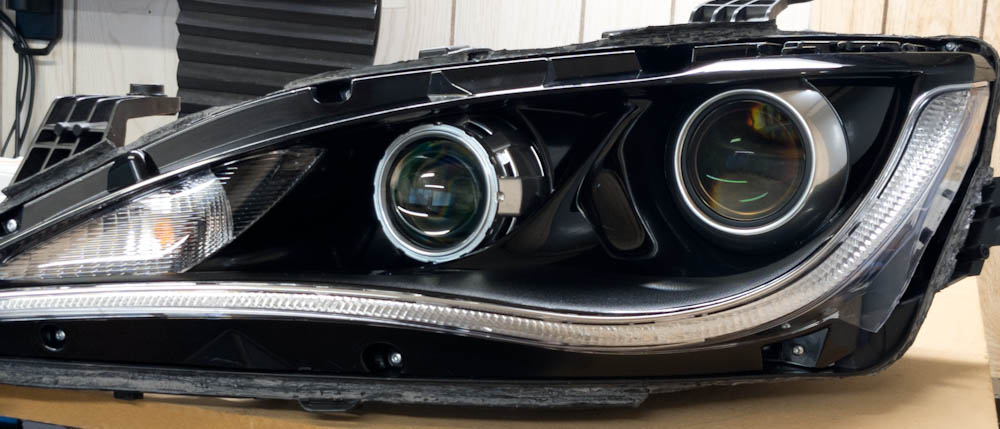
Both the M-LED and the Mini HB projectors mounted. Looks pretty clean.
If you look at the original light at the top of the article, the high beam housing also had a large chrome-colored housing around it. This is not ideal because it makes all the changes very visible. It also detracts from the look of the light. This all got painted black to match the rest of the housing. Only the projector shrouds were kept chrome, to make it look as much stock as possible. I kind of wish there was an option for a smooth, round shroud for the Mini HB instead of the “gatling-style”, but there isn’t. In the end, I think it looks pretty clean anyway.
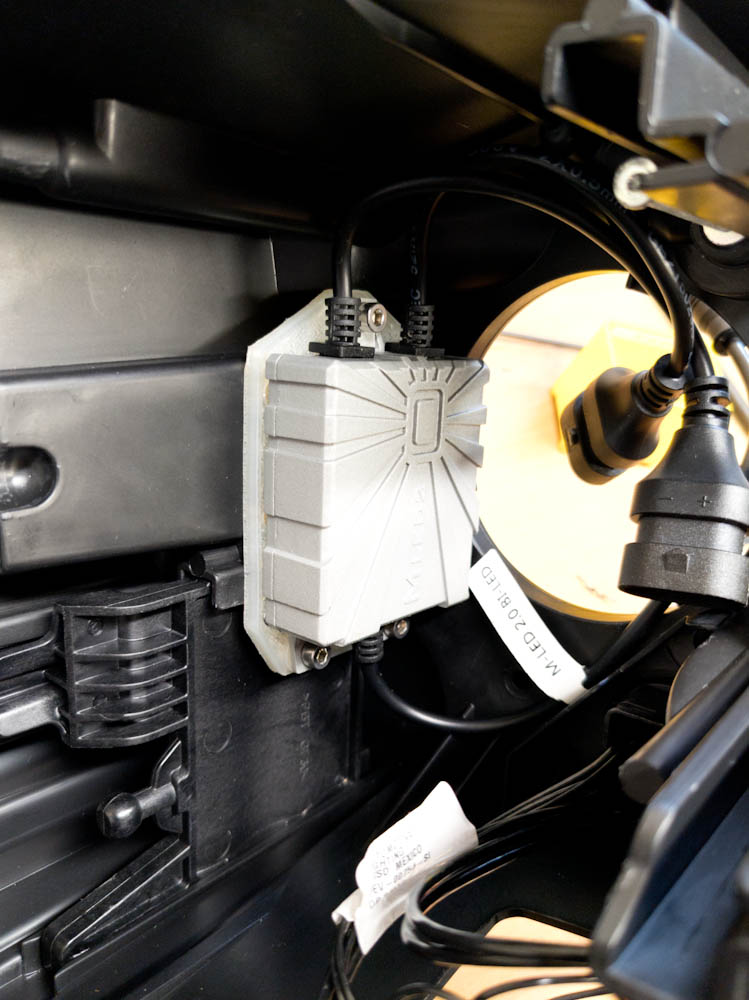
The M-LED projector has a power supply box that was mounted to the inside of the headlight housing behind the projector.
As far as wiring goes, the M-LED power supply has two 9006 headlight socket inputs, for low and high beam, so that makes wiring it very easy. The low beam input gets plugged into the stock low beam bulb connector, and for the high beam I had to make a splitter so the stock high beam bulb connector can be plugged into both the M-LED high beam input and the Mini HB input. Then I 3d-printed some brackets to hold the connectors and screwed them to the back of the lights so they’re not rattling around inside the housings.
To avoid the connectors rattling around inside the headlight housings, I 3d-printed some brackets that hold the connectors to the screw holes on the back of the lights.
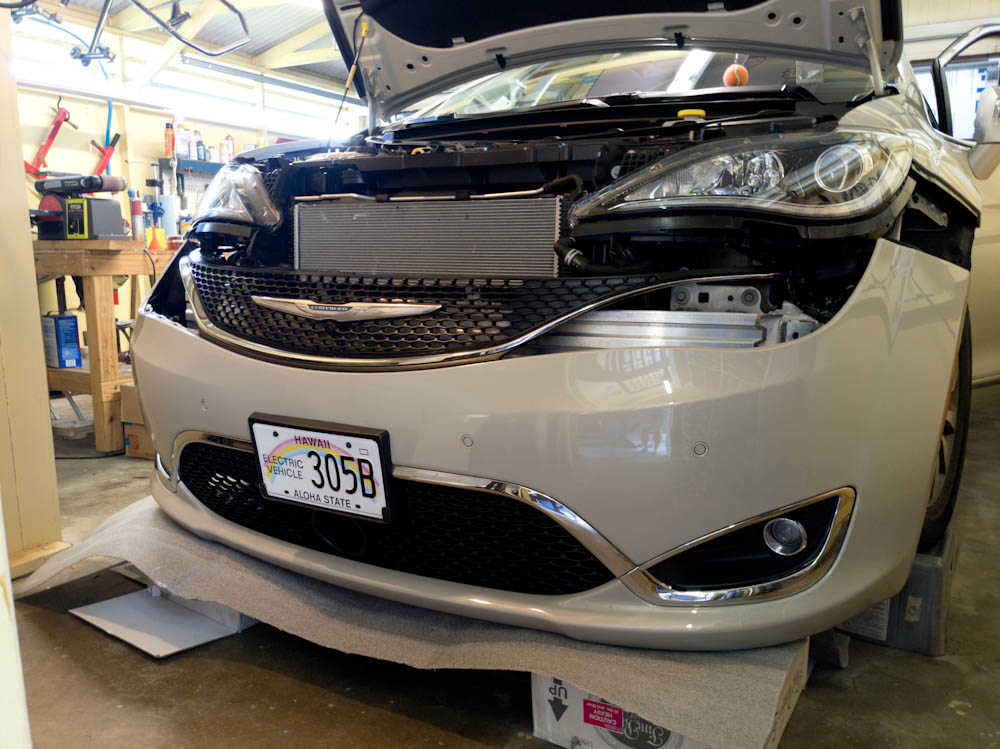
To swap the headlights, you need to drop the entire front fascia. This is a bit time-consuming, but not very difficult.
Once all the wiring was completed and the paint cured, everything (especially the projector lenses) was cleaned up and the headlight lens glued in place with Permatex Right Stuff. It was actually easiest to close up the headlight I sawed off since it wasn’t mutilated like the one where I cut the Permaseal joint.
To switch the headlights, you have to drop the entire front fascia which was a daunting prospect but with the help of instructions and youtube videos wasn’t a big deal. It was even possible to do it without disconnecting anything (except the lights, obviously) which meant I could get by with not powering down the hybrid system and disconnecting the high voltage battery, which was nice.
I even had the privilege of having to do this twice because once I started adjusting the headlight aim it became clear that I had forgotten to engage the horizontal adjustment screw on one of them, so no amount of turning it moved the lights. Second time around was much quicker, I can tell you that.
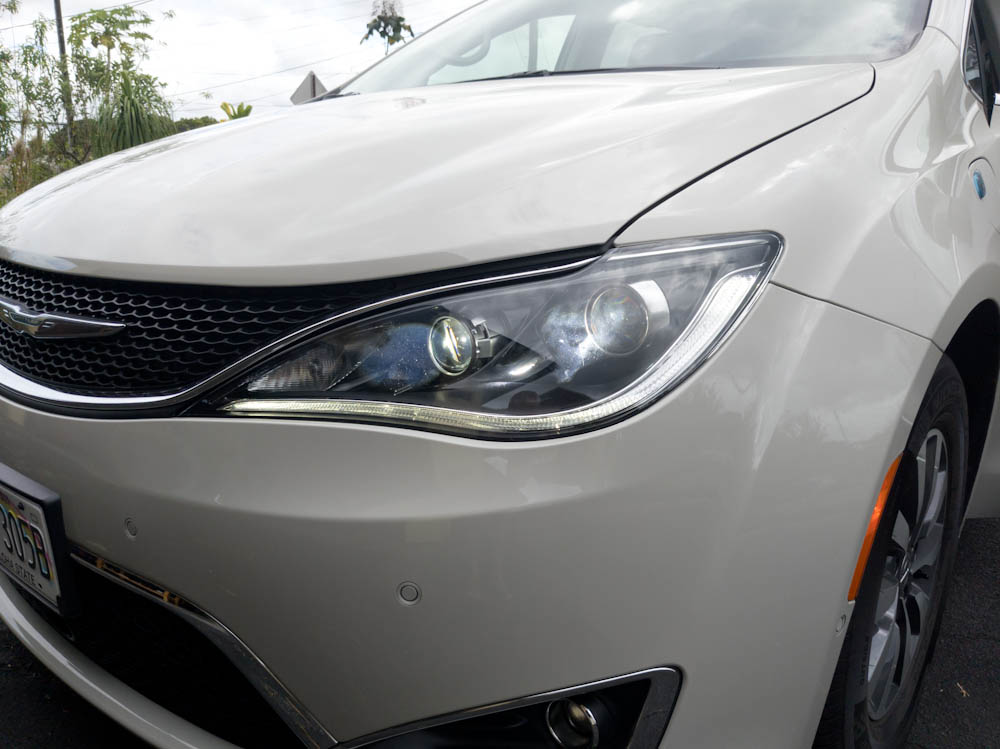
New headlights in action.
So how does it work? They’re awesome. Everyone agrees the stock projectors are bad, but the M-LED low beam is very wide and even, and the high beam with both lights on is also something else. I’ll try to get a good picture of the beam pattern, but I have to dig out my 40D to get a good view of that. So it took 2.5 years, but it was worth it.
Bra med starka helljus så man får syn på alla älgarna på Hawaii i tid!