I finally got the “aircraft drill bit” (which is a very long drill bit. Why they are called that, I don’t know) needed for the modifications to the oil delivery in the engine case.
Apparently, type 1 VW engines have marginal oil supply to the rocker arms in the heads. Oil gets there through a circuitous route through the center camshaft bearing, to the lifters, through the pushrods, and into the rocker arms. The first problem is that rather small oil passage through the cam bearing. People have long since figured out (like 50 years ago) that you can double the supply by drilling through the case to the cam bearing on the pulley end, too.
At least most of the time, you can. There’s apparently manufacturing differences in the castings that make it so that if you try this on some engines, you’ll drill out through to the outside of the case instead, basically ruining the case. After measuring a bunch of times, I convinced myself that it would be OK on our engine.
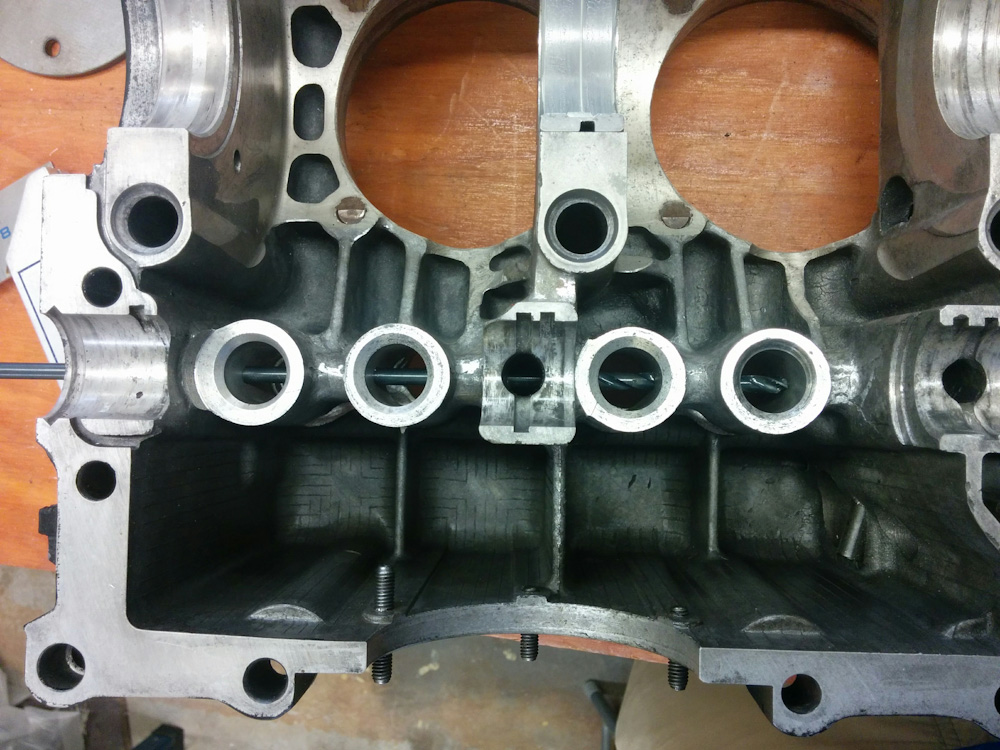
This picture shows the basic idea. The 12″ drill bit is inserted from the flywheel end of the case, which has been drilled through all the lifter holes. The lifters get their oil through the hole in the cam bearing saddle in the center,, which is supplied with oil from the other side of the case. The idea is to extend the holes through the lifter bores to the right, and then extend the other hole in the cam bearing saddle on the right to intersect with it. While the hole in the bearing saddle is quite large, note that it is only supplied with oil through the small, square passage cut in the bearing surface.
There are two intersecting holes you need to drill to complete this operation. Both have the potential to ruin the case. Starting with the long drill bit, you extend the holes through the lifter bores as shown in the picture above. To ensure you don’t drill enough, the required depth of the hole is carefully measured and marked on the drill bit.
As I was drilling this hole, the bit made a sound that sounded like when you break through the surface. Which it wasn’t supposed to do! Envisioning dollar bills flying off, I turned the case over but found no hole. It must just have been porosity in the casting. I bravely continued drilling the few more mm needed, without incident.
Next step was to extend the hole in the cam bearing web. Here you’re really drilling straight towards a pocket in the outside so it’s really important to not go too far. Ideally you’d break through to the first hole before that happens, but just to make sure I marked this drill bit with the required depth, too.
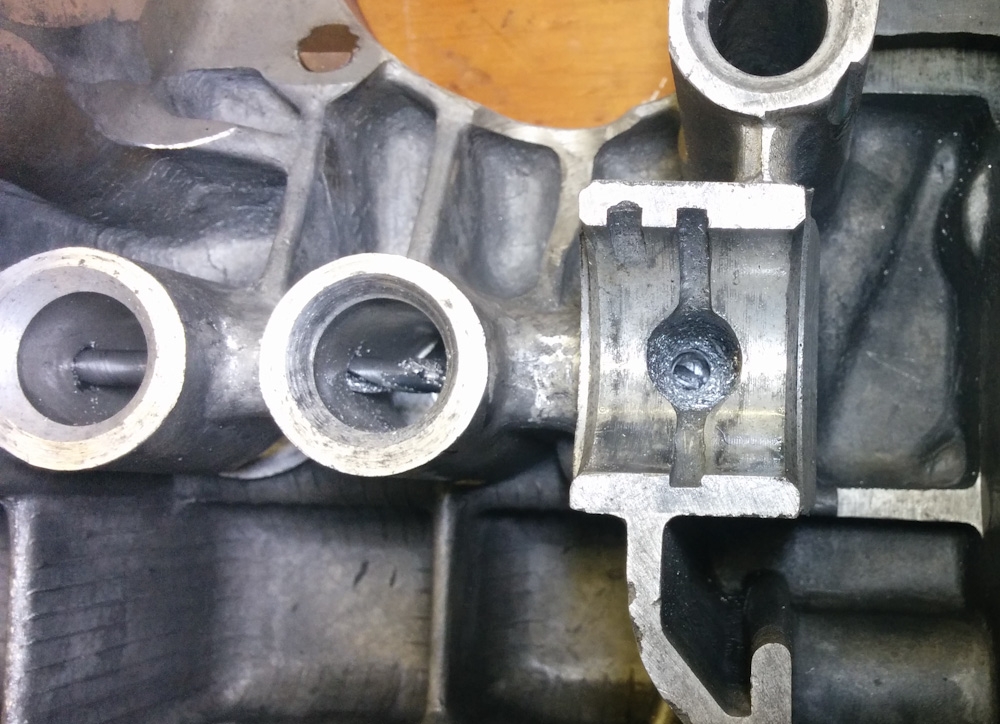
Success! After drilling into the cam bearing web, the tip of the long drill is visible through the hole. Next step is to widen the small, square hole in the bearing surface.
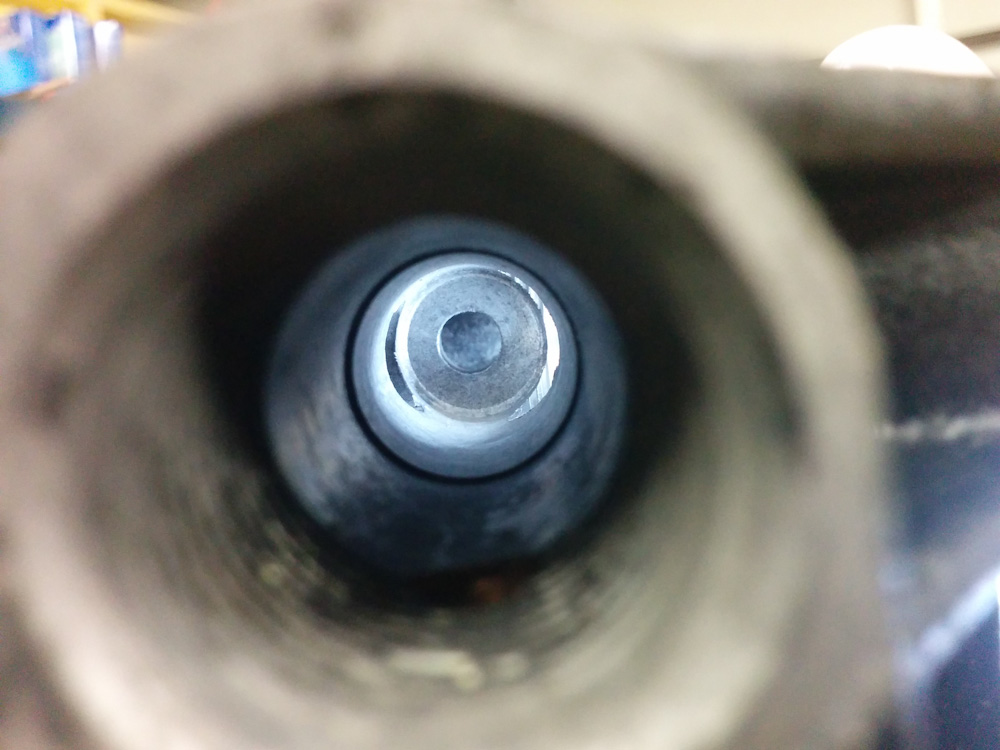
Aiming towards the extension of the holes in the lifter bores, it didn’t take long to indeed break into the other hole. Phew. Now the lifters on this side of the engine has twice as much oil supply as they did. To further improve the oil supply, the square passages in the bearing surfaces were also widened a bit.
This drill operation was the final step I’ve been waiting on before all-out cleaning the oil passages from the swarf left over from fitting the Force One bearing and tapping the case for the oil plugs. Using a spray bottle of mineral spirits, I flushed out all the passages, as well as the cavities on the inside of the case. It was pretty cool, the tub I was using was shimmering with flushed out suspended metal flakes! After blowing out all the passages, it was inspection time.
This is the bore for one of the oil pressure control pistons. Looks clean.

This is the main oil gallery supplying the crankshaft and camshaft bearings. Looks nice and clean.
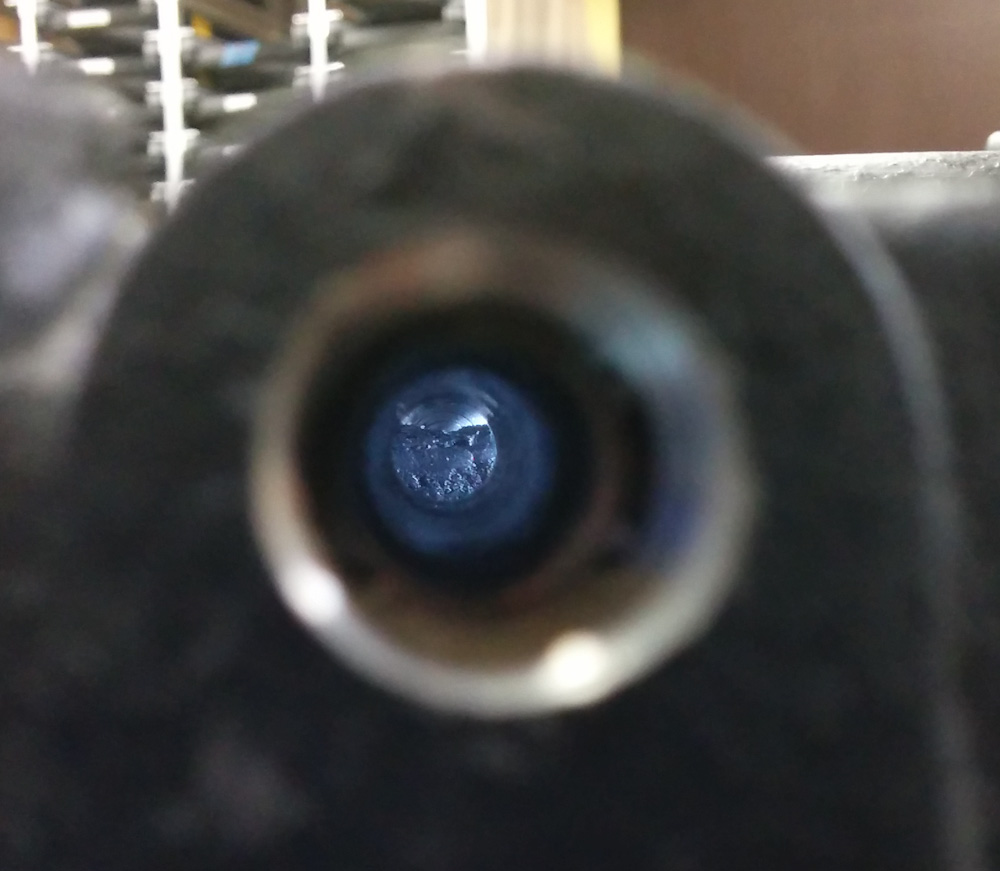
This is route to the oil cooler. This one had some stuff left in it that needed to be cleaned out.
Overall things looked pretty clean. I found a few passages that had little bits of crud in them that had to be brushed out with a pipe brush, but we should now be good to put in all those plugs again.
With that, the case got some paint touch-up since all the handling since it was painted had chipped paint off exposed parts.
That completes the work on the engine case. Part two of the oil mods is to modify the way in which the lifters supply oil to the pushrods. More on that later.
Pingback: Engine guts 6: More head work – Patrik's projects
Pingback: Engine guts 7: More oil mods – Patrik's projects