After getting the idle air control stepper motor working as desired in the last post, it was time to clean up the installation a bit.
First, the stepper motor had to be wired up. This necessarily involved yet another hole in the airbox to get the wires out. I drilled a hole next to the previously drilled hole for the intake air temperature (IAT) sensor and ran the 2-pair wire through.
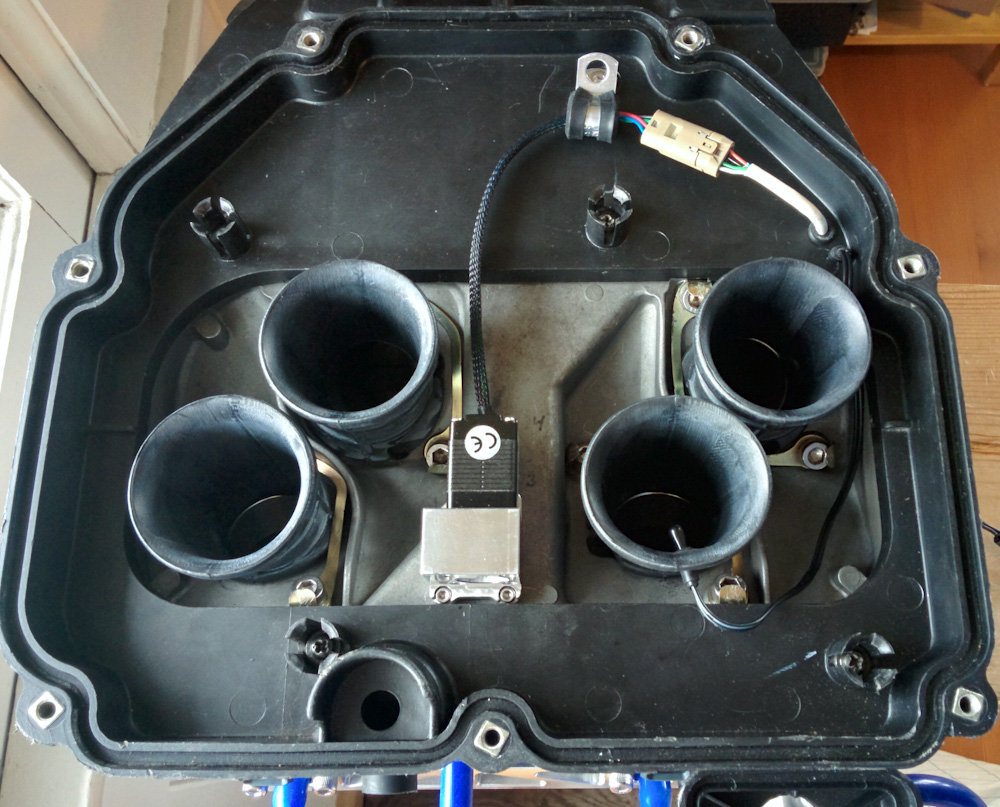
The idle air control stepper motor wire goes out through a hole in the airbox next to the intake air temperature sensor. To be able to remove the plastic cover, there’s a 4-pin connector inside the air box.
The stepper motor wire is held in place with a wire clip, only I can’t tighten it because you can’t hold the nut on the bottom after the plastic part of the airbox bottom is mounted. It holds the wire fine even slightly open, though. I just want some support on the wires so they don’t vibrate all over the place.
While I was at it, I poked a hole in the #3 cylinder intake trumpet for the IAT thermistor. I wouldn’t do that to the OEM ones, but these are a set of cheap aftermarket trumpets I ordered along with the NC23 carb seal kit from LiteTek in Thailand. This way the thermistor will be in the air flow and somewhat shielded from the metal parts that might radiate heat if the bike has been heat soaking.
The wire going through the airbox is just a short stub.
After wiring up the stepper motor, I also hooked up my QuadraMap, which is a little box with 4 pressure sensors. This is a solution to the problem of how to measure a reliable manifold pressure (MAP) on engines with individual throttle bodies. (It was mentioned in the comments in part# 22.)
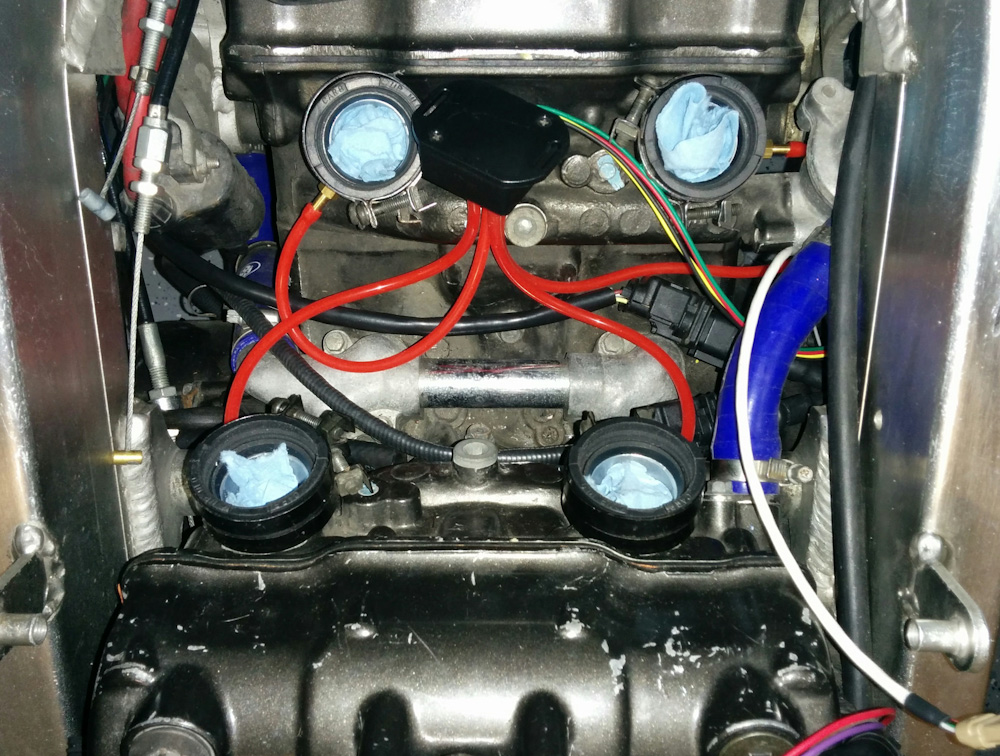
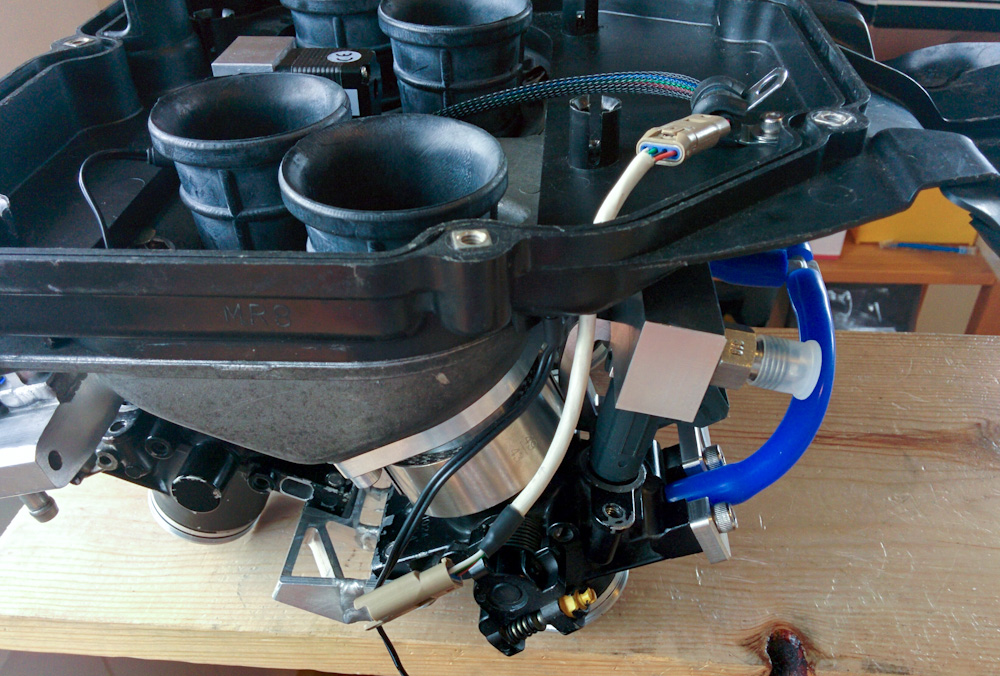
The small black box is the QuadraMap, which contains four pressure sensors. Each sensor is connected to the intake port on its corresponding cylinder with the red 2mm ID silicon hoses. The QuadraMap will be mounted on the bottom of the throttle body assembly.
The QuadraMap has two outputs. The main one is the reading of whichever pressure sensor is reading the lowest value at any given time, which will generally be the one connected to the cylinder that’s on the intake stroke. Because the Microsquirt samples the manifold pressure once per intake event, it’s difficult to get a sane reading with individual throttle bodies if you only have a single sensor, but with the QuadraMap you effectively have an individual sensor reading for all cylinders, in a “time multiplexed” fashion.
The second output is a digital signal that goes high whenever the manifold pressure for cylinder 1 goes below a settable value. This can be used as a fake “camshaft sensor” for phase detection, making it possible for the Microsquirt to know which of the 2 revolutions in the 4-stroke cycle the engine is on. This is needed for full sequential fuel injection, where the injection is timed so the fuel is sprayed when the intake valve is open, but isn’t immediately useful in this case because the Microsquirt only has 2 injector outputs. This requires running the front and back cylinder injector pairs in parallel, so I can’t use sequential injection anyway.
The list of remaining tasks is growing shorter: I still have to weld together the fuel pump housing, which as I feared is turning out to be quite tricky. I’ve started but have ended up with some seriously bad welds in the numerous inside corners, so I’m afraid it’ll leak.
Once that’s done, the final task is to link the four throttles together. I still don’t have a good idea of how to do that, but I’m sure with some experimentation it’ll work out.