We left off the fairing story with the rear support glassed in place and a big hole cut for making the screw mount. Over the past couple of days, I continued working on the the hole.
After pondering how to do this, I decided on a three-step process. Because the sensitive thing is the outer shape of the fairing, step one was to make a plug with the correct contour of the fairing. I did this by taping up the outer side of the hole and filling it with Bondo from the inside. After removing the tape, I could sand it to a match the desired contour.
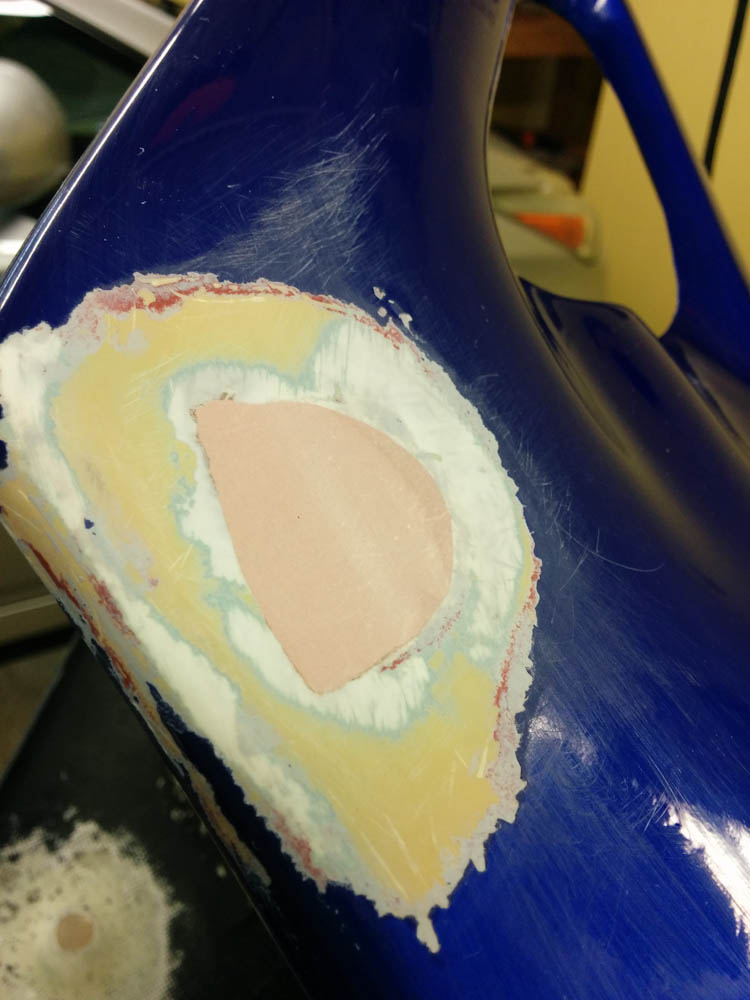
The Bondo plug that determines the outer contour of the fairing. The only purpose of this part was to be able to make the matching mold.
Once that was made, I rubbed the Bondo surface with ski glide wax (good to know it comes in handy for something in Hawaii) to prevent the mold from sticking to it. The mold was then made by covering the just-made surface with another blob of Bondo added to the outside.
This blob of Bondo covers the plug made before, but is added from the outside.
Once the second blob of Bondo had cured, it was time to pop the plug out. (Bondo is great for doing this kind of stuff, it cures so quickly that it’s possible to do this kind of thing and basically not wait at all between steps.) With a little prying, it came right off and left a nice surface that the fiberglass could be laid up against.
This is what was left after the inner blob of Bondo was popped off. The fiberglass can now be laid up against it and it will match the desired outer surface of the fairing.
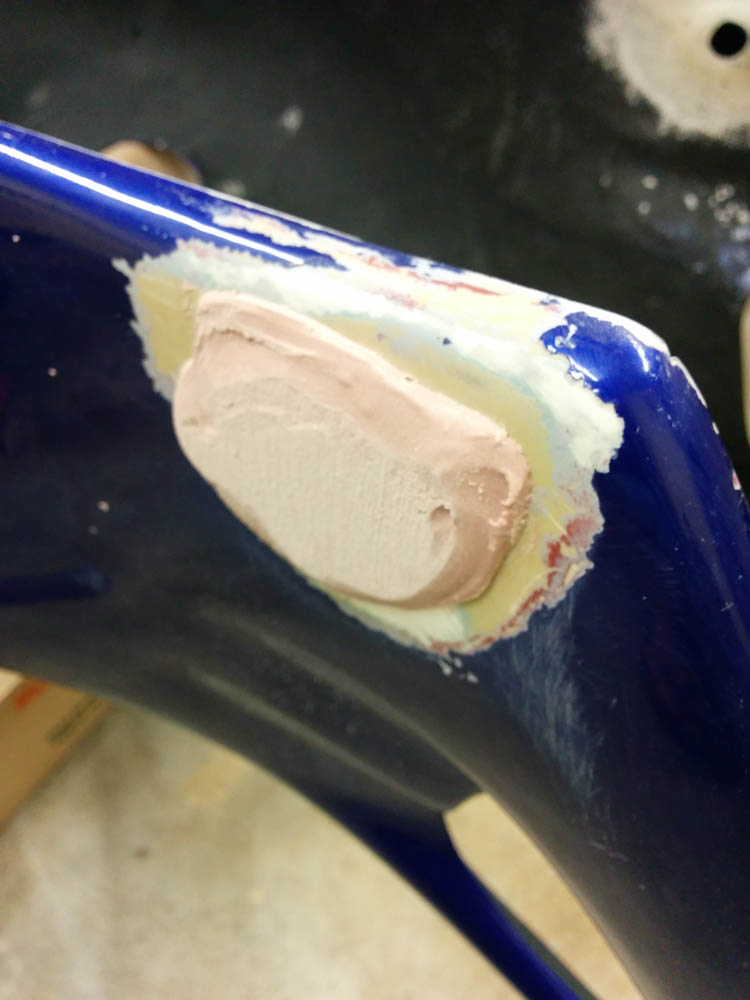
So far, so good. Now came the tricky part: locating the screw hole. I put the fairing back on the bike, did some measuring, and drilled a hole where I thought the screw should be. This turned out to be sufficiently accurate. The rubber grommets around the screws are almost an inch in diameter, so I next used a 1″ hole saw and cut out most of the Bondo mold I had just made.

With the fairing on the bike, the location of the hole was measured and a 1-inch hole drilled.
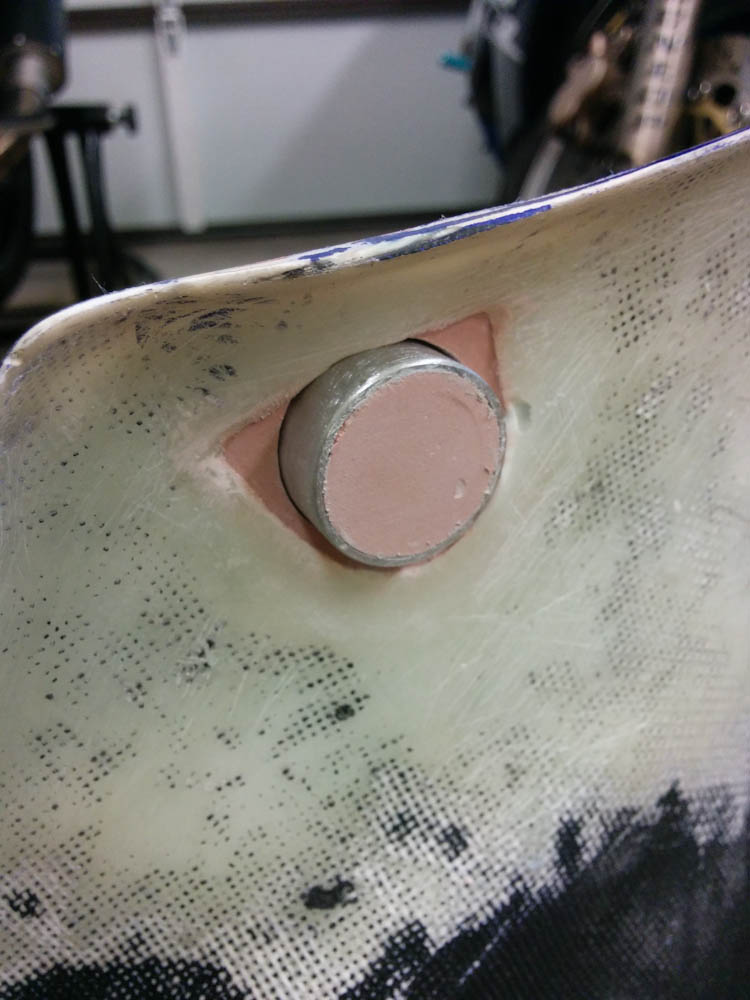
To make the outline of the depression from the hole, I now cut a short length of 1-inch OD Aluminum pipe, plugged the end with another blob of Bondo, and fit it in the hole. By inserting it into the hole until it hit the frame support and then backing it out about 2mm to account for the thickness of the rubber grommet, I got a pretty good idea of how it should fit. I then Bondo-d it in place.
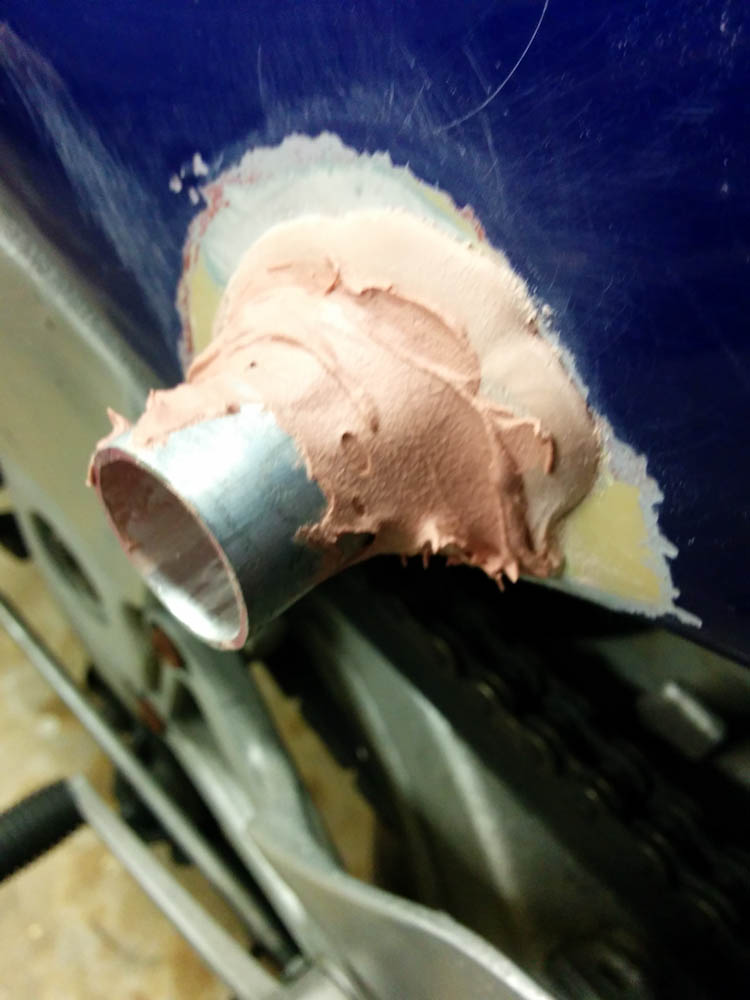
After locating the pipe with the correct depth, it was fixed in place with more Bondo. (Apologies for the unsharp photo.)
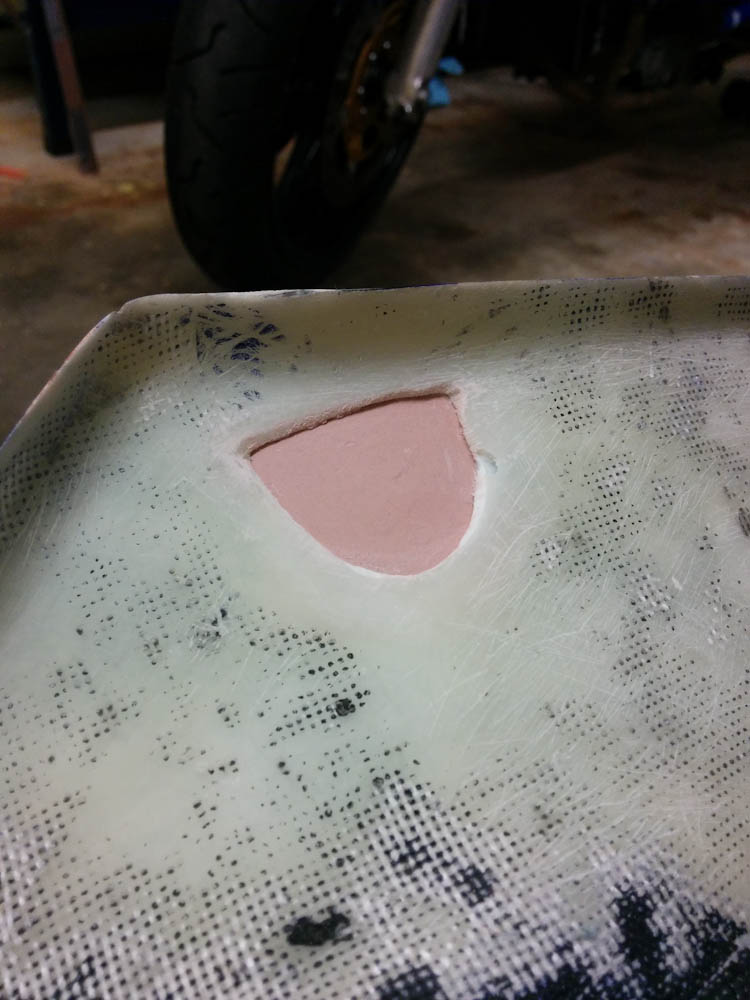
This is what the inside looked like. Fiberglass can now be laid up over the pipe. The little space around the pipe is not ideal, any epoxy that makes it in there will need to be sanded down after the pipe has been removed.
Finally, it was time for fiberglassing. This was quite tricky, because it’s hard to make the fabric conform to the curvy shape. I filled the bottom corner against the pipe with micro to make a fillet, but there’s not really much to do about the corner on the top. I guess I could have ground a more rounded top contour on the pipe. I definitely ended up with some air bubbles at the curve. We’ll see how it turns out once cured.
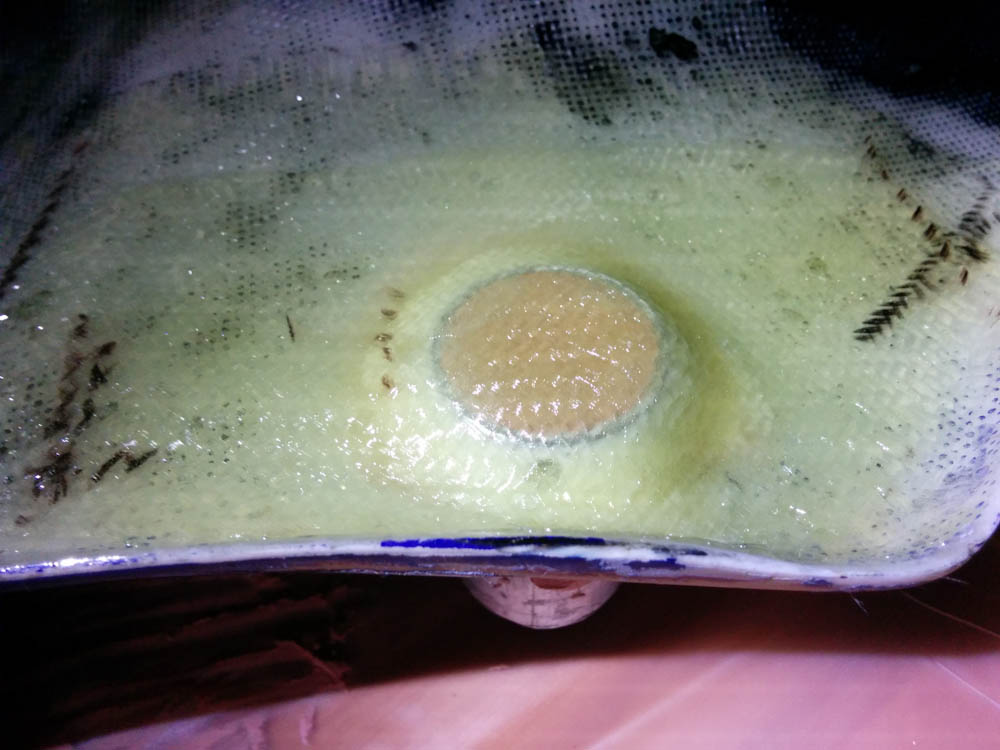
The final product, with micro fillet around the base of the pipe and 3 layers of BID (plus two strips right around the pipe) There are definitely some air bubbles in there.
I also now realized that I should have subtracted the thickness of the fiberglass when deciding how deep to make the hole, so it’ll be a bit too deep. That’s not actually a big deal, because I actually want it spaced out a bit from the fairing to clear the subframe. The worst-case scenario is that I underestimate how much the epoxy will bond to the pipe so that it ends up permanently bonded there…
Pingback: NC30 fairing job #4 | Patrik's projects