Along with needing to machine the engine case to fit the Force One bearing, there was one additional task needed to fit the propeller to the new hub. The Aerovee hub centers the prop on six bushings around the bolts, while the Force One hub has a 2″ centering pilot. Neither of our two propellers, which were manufactured for an Aerovee hub, had such a pilot.
We consulted with Sterba and Sensenich, who basically said that, if we sent them the propellers, they would just cut out such a pilot centered on the existing hole. At that point we decided that if they’re just going to mill it out, we can do that ourselves. Setting the prop up in the CNC mill and dialing in the center of the hole to 0.1mm should not be a problem, neither cutting a 2″ diameter hole in wood.
I started with the Sterba (since it’s 1/3 the cost of the Sensenich…)
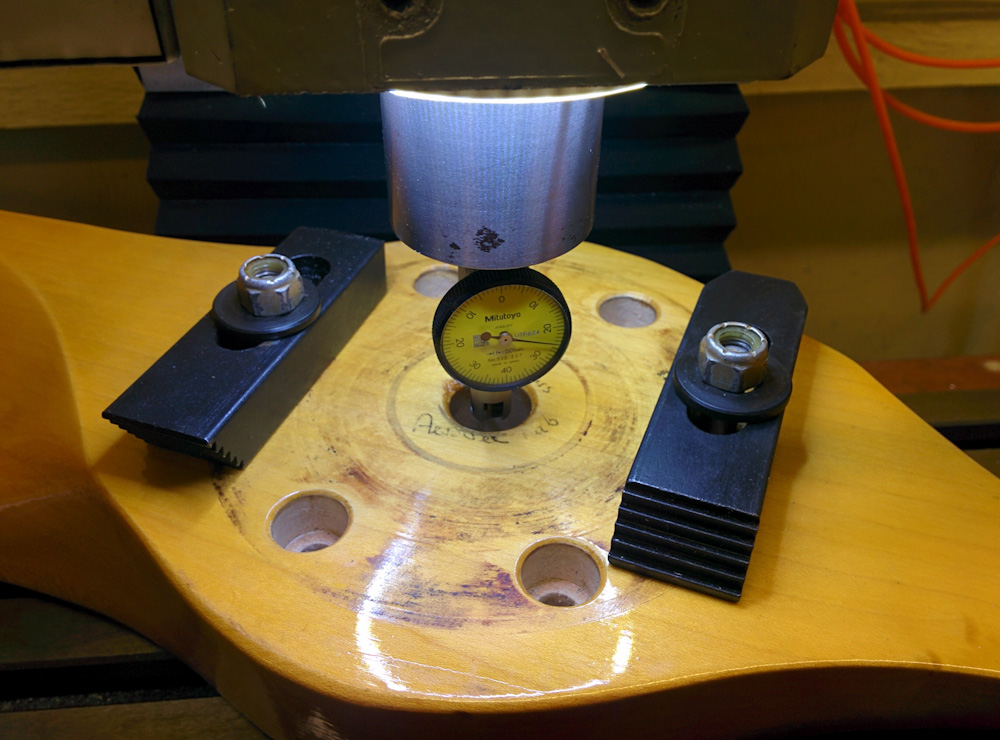
Dialing in the center of the existing hole in the Sterba prop. This was first done with an edge finder, and then the dial test indicator mounted in the spindle to verify. The hole isn’t perfectly smooth (it’s wood, after all) but centering within 0.1-0.2mm was not a problem.
After the coordinates were zeroed on the center of the hole, it only took maybe a minute to run the program that cut the hole. For good measure, I added a generous chamfer.
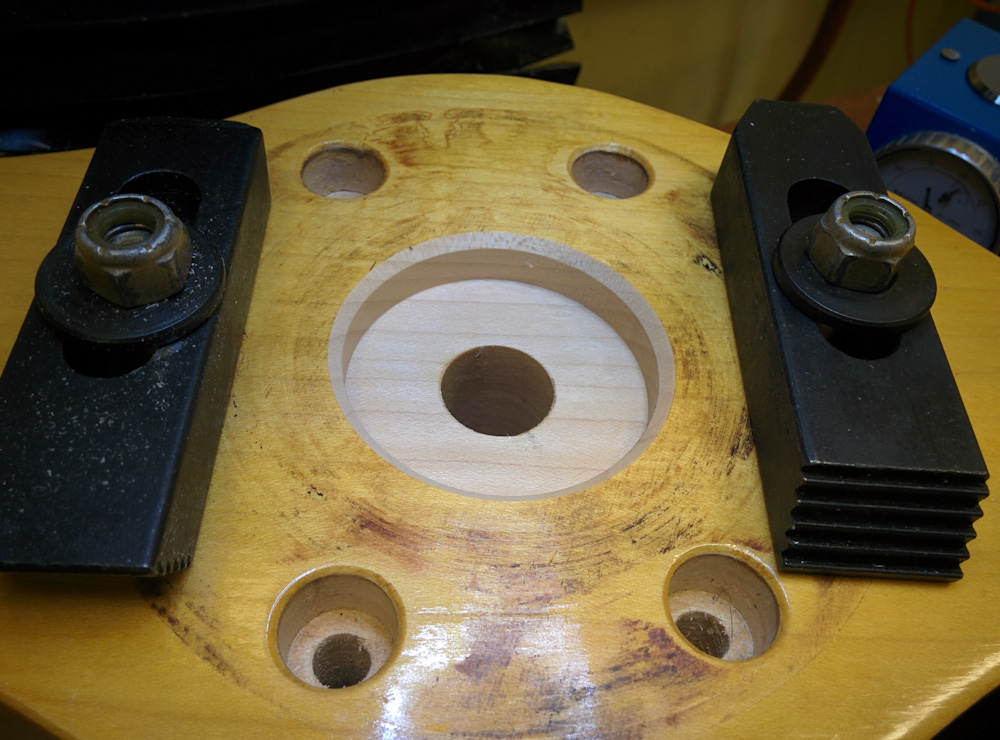
After running the program, we have a nice-looking 2″ diameter hole.
Since it worked so nicely on the Sterba, I continued with the Sensenich. Here, it was needed to shim the bottom of the prop slightly to get the top to be flat. I don’t know if that’s related to the fact that it was slightly crushed or just the normal tolerance of the parallellism of the front and back face.

The Sensenich prop, also finished. This is the first time it’s unequivocally visible that it’s actually made of wood under that urethane coating.
So milling into $1500 worth of propellers was a bit nerve-wracking, but went well. I finished up the work by adding a thin coating of varnish to the exposed wood.
When I tried to mount them on the Force One hub, the center pilot fit snugly. However, I could not push the bolts through their holes due to a mismatch between the holes in the wood and the hub. I initially thought maybe the hole had been incorrectly centered after all, but even if I pulled the hub off the center pilot, the bolts did not fit. It also could not be the fault of the hub, because they didn’t fit the Aerovee hub either.
The nature of the mismatch was that the holes along the grain (in-line with the blades) fit well, but across the grain, both props were too large by maybe half a mm. Given that wood changes dimensions significantly when the humidity changes, I assume this mismatch is because the holes were drilled when the wood was drier than it is today. After a bit of Googling, I actually found a paper that had studied this exact thing on Sensenich props that were shipped to the Middle East for use on UAVs. The paper even has a table of equilibrium moisture content of wood at different relative humidities. At the average RH of maybe 80% we have in Hilo, wood has 16.5% water, but at 40% it’s only 8%. The dimensional change of the hole distances across the grain in the study was over 5x compared to the holes along the grain, and would correspond to about 1mm in radius on our props.
The installation instructions for the Sensenich prop don’t mention anything about hole positions changing, only the hub thickness, but it turns out those from Sterba do.
“Because of the slight differences in prop hubs and spinner bulkheads, it may be necessary to lightly file out one or more bolt holes in the propeller.”
So that’s what I did. I first used a stainless steel pipe brush chucked in the cordless drill to clean out the holes good, then carefully filed the holes with a round file until all the bolts would go in and not bind. This took quite some time, I probably spent about three hours repeatedly filing, trial fitting the hub and bolts, noting where they were binding, and filing again.
While no installation instructions mention this, it seems important that the bolts not bind in their holes since this both makes it hard to torque them accurately and also prevents the tension from being transmitted to the spinner. As they settle through vibration and temperature changes, they would then lose torque, presumably when the engine is first started up.
Anyway, it all seems good now. It would be good to balance the prop, but you really need to balance the entire hub and you can’t mount the prop on the hub before mounting the hub to the crankshaft, so I don’t know how to do that except with one of these fancy dynamic balancers that we don’t have access to.

The Sterba, trial mounted onto the Force One hub after filing the bolt holes. The Sterba prop is a beautiful piece of workmanship. The wide journal on the hub is for the large “front” bearing this hub uses.
Now if we could only get the engine case back from the shop…
Pingback: Engine guts 3 – Patrik's projects
Hi Patrik, GPAS is no longer owing to Art’s health issues. I wonder if you have a dimensional drawing of the Force One Hub you might share? I have a GP powerplant with that hub. I’m still sorting a propeller to fit. Any help would be appreciated.
Hi Shaun,
I don’t have any info on the hub itself beyond the CAD drawing of the cutout I made in the propellers, which is just the diameter and depth of the centering hole. If you have a hub without a prop you can just measure. I looked in the CAD file and my cutout was 50.90mm diameter (0.1mm larger than 2″) and 10mm deep.