Over the last month, posting has been sidelined by my parents visiting which, as usual, was accompanied by lots of home improvement work. My dad and I got some work done on the Aerovee too, though.
As suspected, the local VW shop deemed the crankshaft unserviceable (apparently the center journal wasn’t just way worn, it was also not round) so we decided to replace it with a Force One crank from Great Plains Aviation Supply. The difference is in how the prop hub is attached.
The stock Aerovee is a shrink-fit onto a pretty much original VW crank, while the Force One uses a taper. This means that, unlike the stock crank, disassembling a Force One is trivial. Just remove the bolt and pull it off. The Aerovee one has to be pressed off, and in so doing it’s easy to damage either part so the interference fit is no longer secure.
The Force One also replaces the stock “#4” bearing, which is tiny, with a much bigger one. This gives the crankshaft better support for bending loads induced by the propeller, although whether this is necessary or not seems to be a subject under debate.
A big win for our situation, though, is that the Force One bearing also has an oil seal at the front. This will prevent any moisture from entering the engine that way.
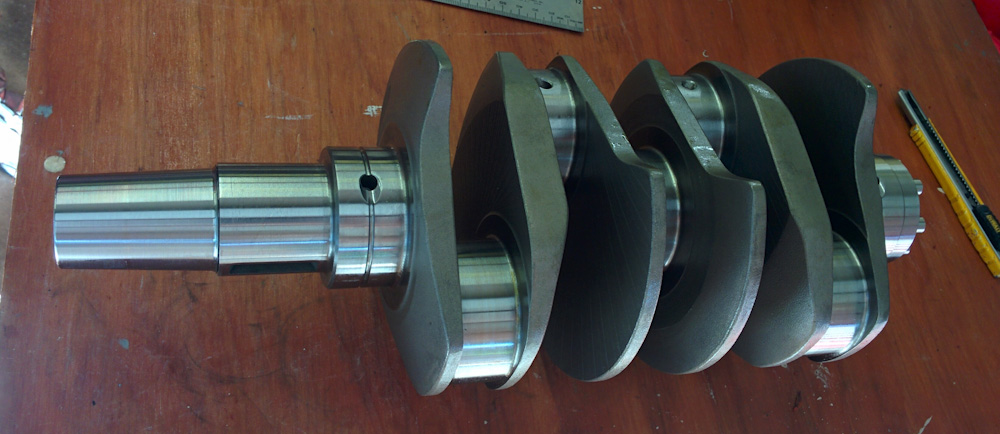
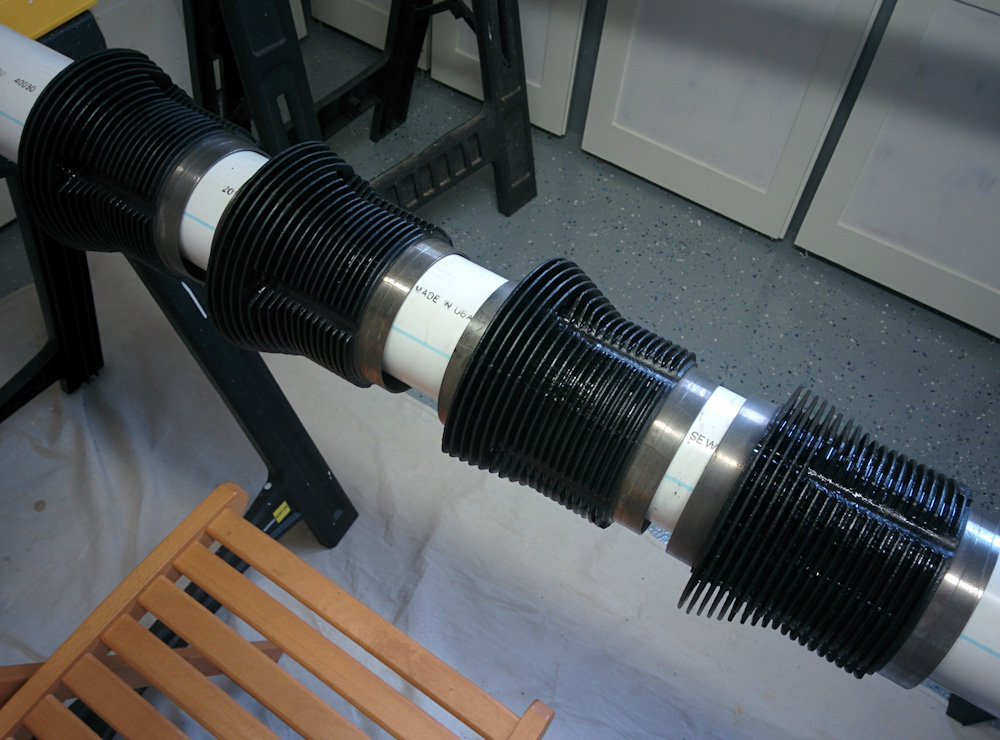
The new Force One crankshaft from Great Plains. The long, tapered end on the left is the propeller hub attachment, then the journal for the large Force One bearing. Actually, the bearing journal surface is on the propeller hub, not on the crankshaft.
To fit the big bearing, though, the engine case has to be machined out. That’s something the shop has to do, and there it has been for the past three weeks.
In the meanwhile, I’ve been working on some other things that needed to be done.
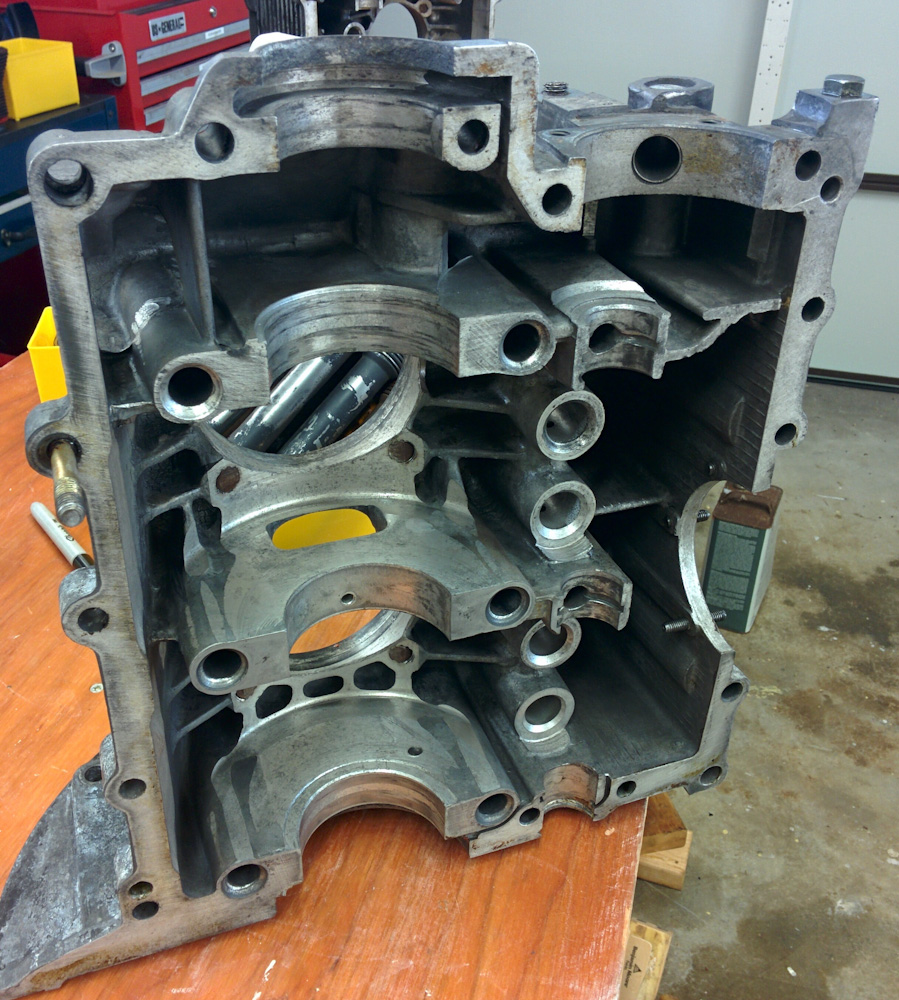
One of the case halves after cleaning.
The cylinder barrels, which are cast iron, were very rusty. The magnesium engine case also showed signs of corrosion and the old paint was peeling off. After pressure washing the case halves, most of the paint was stripped off, and corrosion removed with a steel brush. They were then cleaned with hot water and detergent, dried, and all holes masked off for painting.
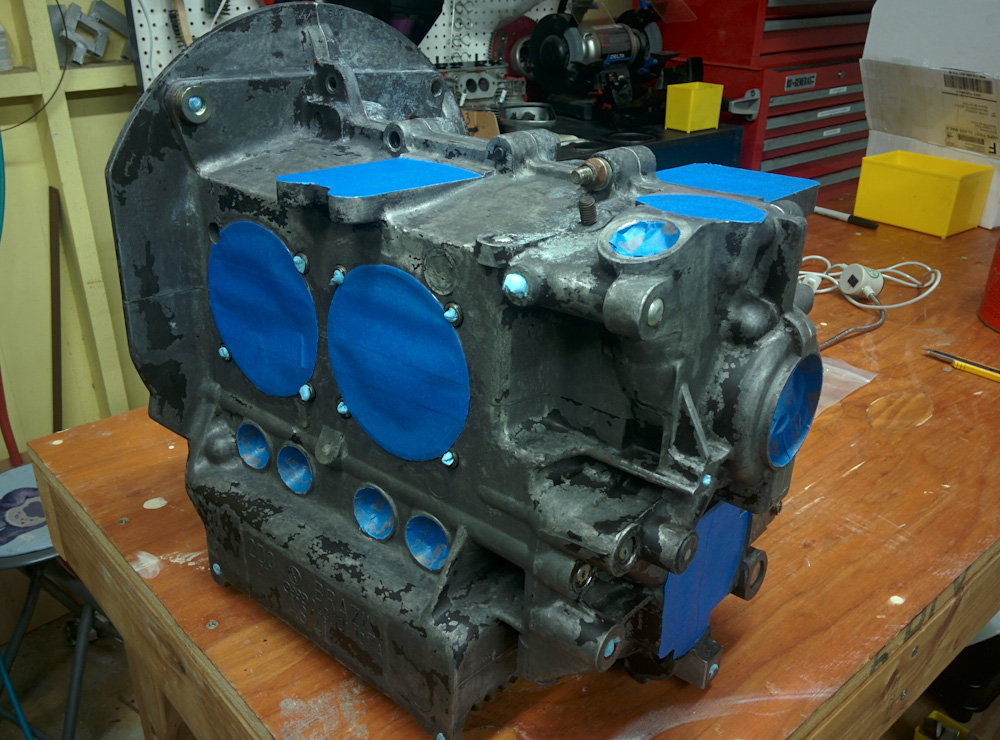
Before spraying the case, every little hole had to be meticulously masked.
This gave me a reason to pull out my HVLP paint gun, which wasn’t even unpacked since we moved. (It was last used when spraying the panel on the NC23.) I’m not entirely sure it was worth putting up all the plastic to not get paint anywhere.
According to VW legend Bob Hoover, VW engines should only be painted with a thin layer of flat black paint, like Rustoleum. Anything else will impair cooling and make the engine run hotter. Specifically, he says to not use “high-heat” paint meant for exhaust systems and BBQs, because it has ceramic fillers that act as insulation.
After spraying. A few spots had to be patched with a small brush.
Putting up plastic, thinning the paint, etc, took longer than spraying. But it looks pretty good though. (Of course, after painting the case went to the shop, so presumably it’ll be all scratched up when we get it back.)
The same considerations for painting hold for the cylinder barrels. (Even if the paint prevents some heat conduction, rust is much worse…) The rust was removed by soaking them in rust remover until the rust was gone. The high-temp silicone used to seal the bases was carefully rubbed off and they were washed to get rid of any remaining oil.
After drying I didn’t have time to paint them that day so I put them in our dehumidified room, but the barrels still had surface rust the next day. Oh well.
Painting them is kind of a pain, because to get paint down between the cooling fins you need to scrub back and forth with a fairly long brush. You pretty much inevitably end up adding too much paint in order to get full coverage down in the base of the fins, so after leaving them to dry you find big drips. And missed spots. I think it took four times before a flashlight examination down between the fins didn’t find bare spots. They look pretty good though. We’ll see how long it takes until they are rusty again…
The cylinder barrels had the rust stripped off of them and were also painted flat black. Getting coverage between the cooling fins is not easy.
After the paint is dry, it’s supposed to be baked at ~70C for a few hours to harden for maximum durability. I wasn’t particularly excited about putting these in the kitchen oven since the paint will outgas during baking. I ended up pulling out the 1500W space heater I used to heat the workshop shed on Kornblum for epoxy work (also not unpacked after the move) and putting the cylinders on a little table inside a large cardboard box. After figuring out how the space heater should blow into the box without recirculating too much hot air, which would cause it to trip the thermal protection, it actually worked very well. The parts reached a temperature, as shown with the IR thermometer, between 70 and 78 C.
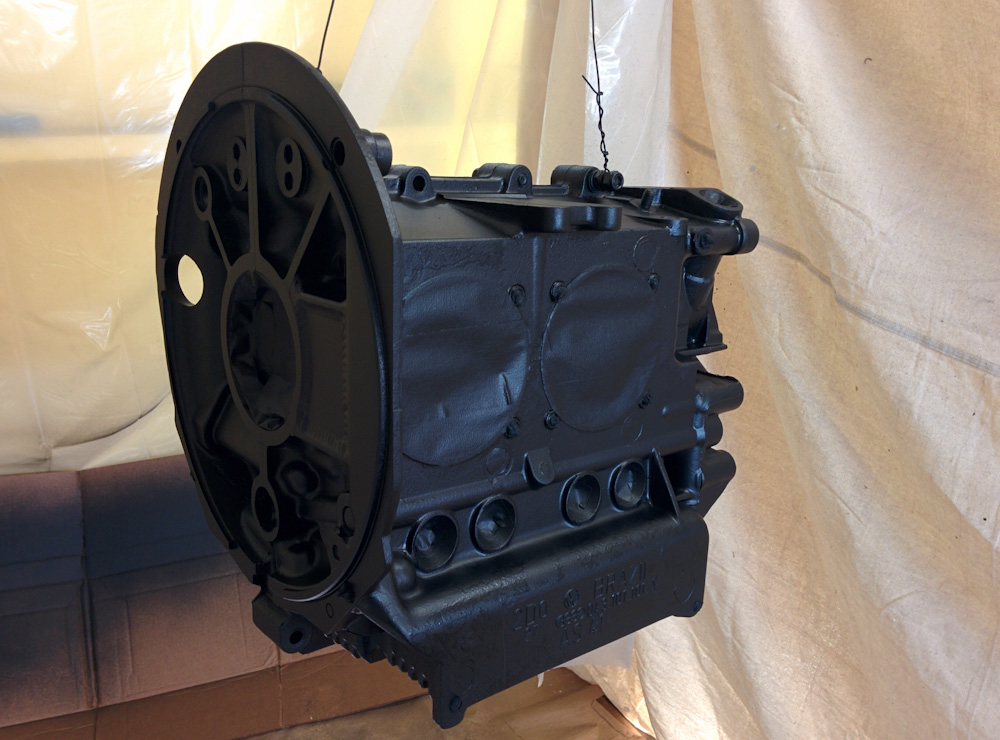
Once the engine case is back from the shop, I’ll patch up whatever paint damage they’ve done and then bake it, too. It should fit just fine in the same box.
So that’s the cosmetic work. We’re also going to add an oil filter, since it’s obvious from the condition of the bearings that the oil was pumping crap. This required some custom fabrication to mount the oil filter and route the oil. More on that in the next post.
Pingback: Fitting the propeller – Patrik's projects
Pingback: Aerovee Oil Filter – Patrik's projects