Since the last filament storage post, the storage tube assembly was microed into place. I covered the foam around the hole with duct tape to prevent getting micro on the foam surface, and poured slurry into the holes.
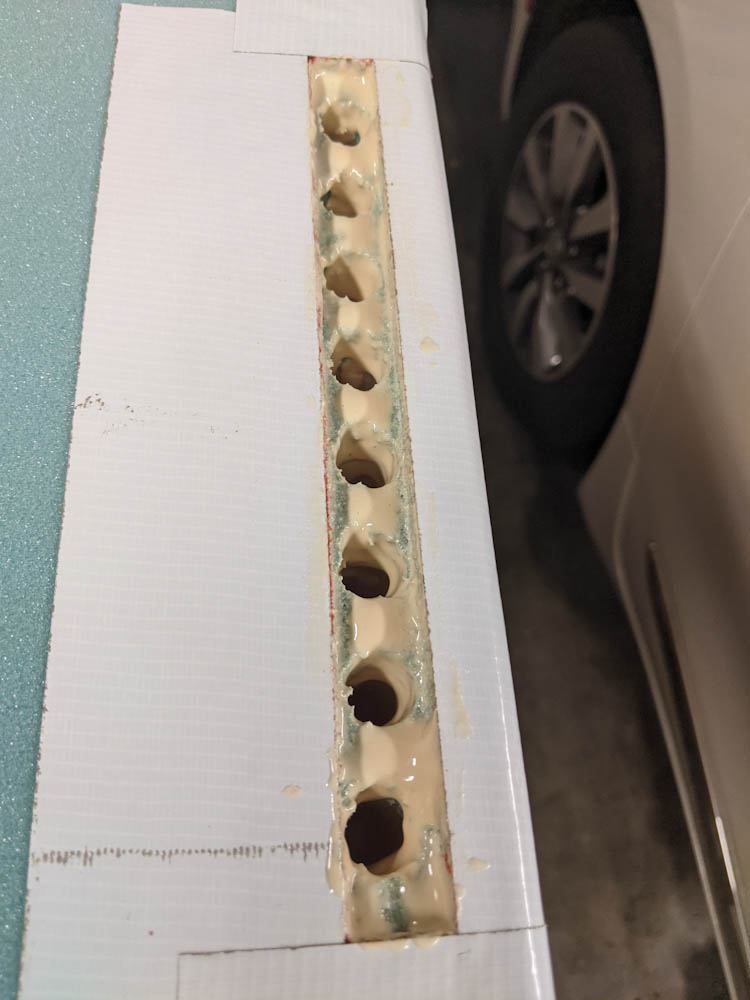
The foam has been covered with micro slurry, and a substantial amount of slurry also poured into the holes so the space is completely filled up when the tubes are inserted.
The idea was to get enough slurry into the holes that it just filled all the empty space when the tube assembly was inserted. I had to trial-fit the assembly a couple of times and add more slurry, but eventually I got to a state where slurry was coming up out of all 8 holes right as the aluminum bracket was going into the hole.
It then took some pushing to get the part seated to be level with the foam surface, wiping up more micro that squeezed out, but eventually I covered it with plastic, but a big weight on, and left it to cure.
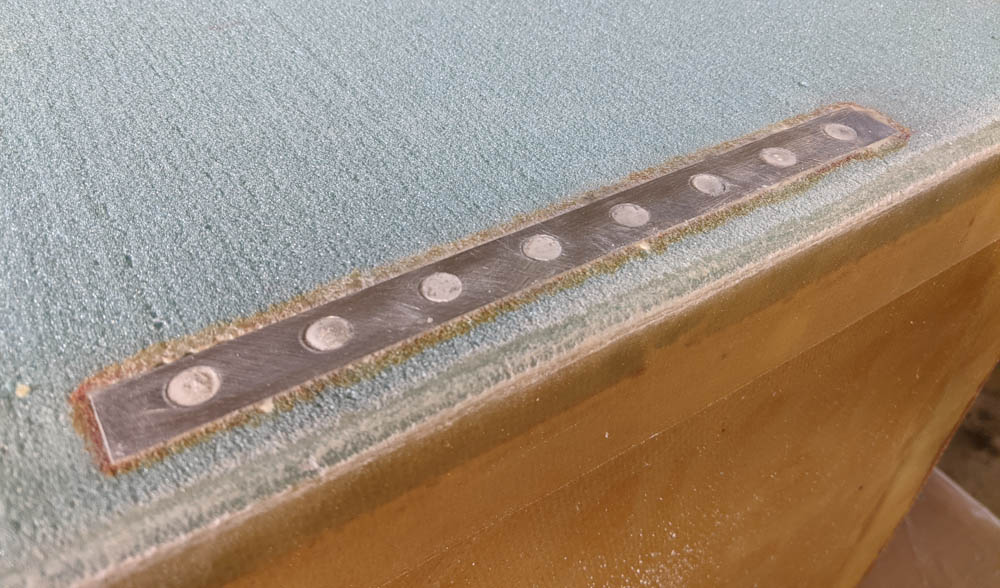
The storage tube assembly after cure. The sealant in the holes will be left until this surface is glassed over.
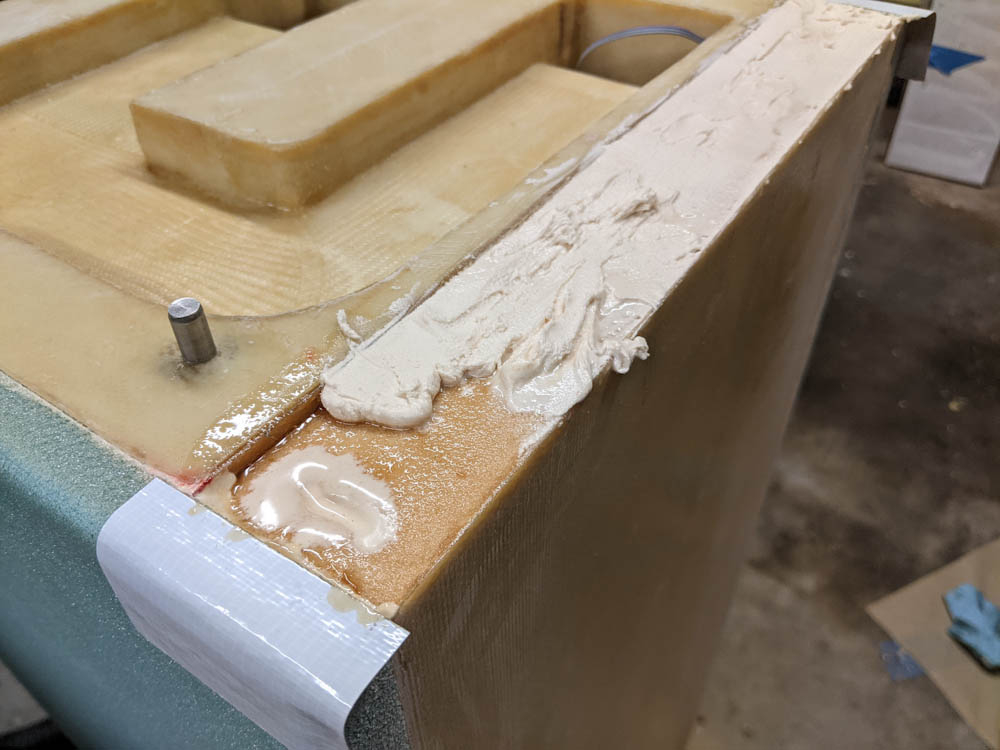
There was more work to be done on the outside of the box. One task was to glass the left side, which has so far been bare urethane foam. This is a pretty straightforward piece of glass with a flox corner on one side. The biggest complication was that the bare foam edge of the 2″ thick back piece was not very level and had to be filled with a lot of micro. It was hard to get that even so there’s a bit of a bump in the glass there.

The left side of the box glassed over. The back edge is a flox corner, while the top and bottom lap slightly onto the blue foam. The glass on the top and bottom will later overlap these. The back region also had to be filled with a lot of micro where the back side didn’t match very well. This fill ended up pretty uneven.
I also had to glass over the opposite side by the dehumidification duct, where the foam edge of the 2″ back piece was also still bare. Because of the difficulty of getting the micro fill even on the left side, I decided to split this into two cures.
First, the depression was filled with dry micro and covered with peel ply. This was a trick I was reminded of when I recently watched the “Building the Rutan Composites” movie on Youtube. By covering the micro with peel ply, you can smear it out evenly without the surface rolling up when you scrape it. This makes it way easier to ensure you get an even surface. You simply add more micro and use a straight edge to smear it until it’s even. If you get extra micro, it simply gets scraped off the edge.
The foam edge being covered with micro. The object here is just to get enough micro to fully fill the depression.
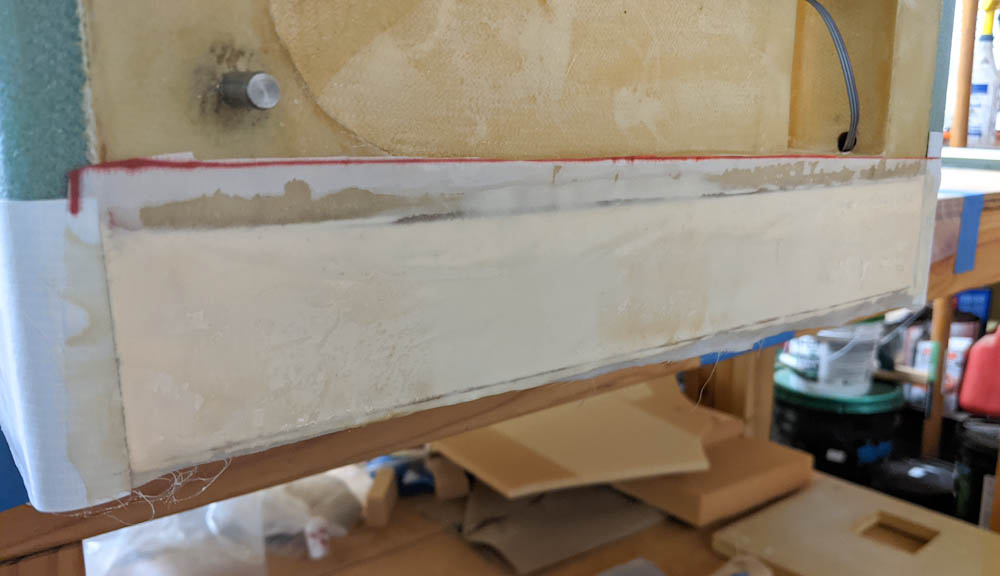
The dry micro has been covered with peel ply and scraped to be even with the glass edges.
Once the micro has cured, the peel ply was removed, the edges cleaned up and some excess micro that had migrated onto the glass sanded off.
Since the back edge should be a flox corner, I had to then dremel off the micro and foam in that area to get a clean joint with the glass on the back face. Dremeling through the micro is substantially harder than just getting rid of the foam, but not a big deal. This now makes a very nice channel that can be filled with flox, and then two plies of BID were added.
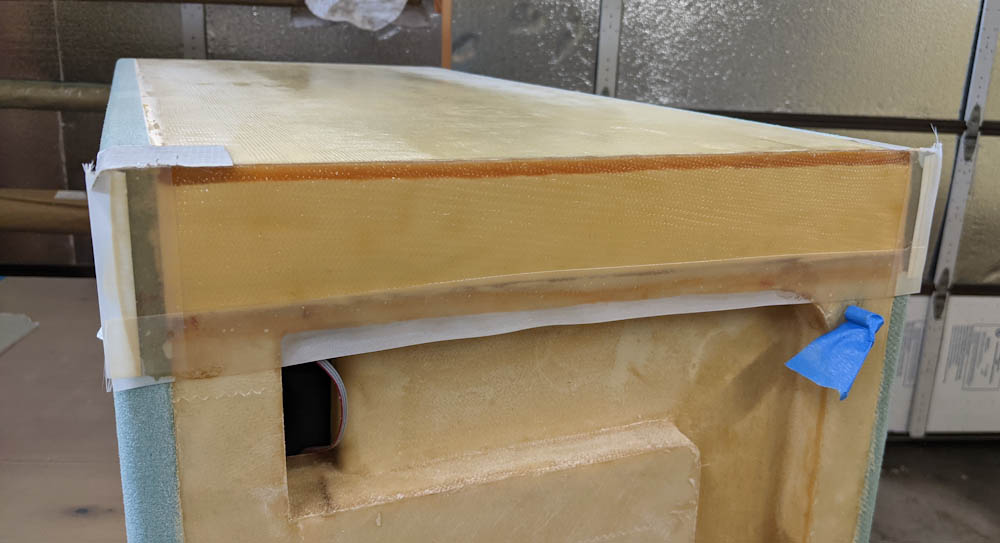
Here, the fiberglass cloth has been added on top of the micro and the flox along the back edge (top edge in this picture). Peel ply has been added to make sure the edges of the glass were clean.
The next steps are to glass the large top and bottom areas. The top is ready to go, but the bottom still needs to have the penetrations for the filaments to come out of the box made, and I still haven’t decided exactly how to do that.