The last post ended with a test run with the cowling on, almost melting the temporary Nylon 3D-printed intake runners. It was time to get to work fabricating the real ones.
Once I had established that the engine ran well with the plastic ones, I had ordered four 90-degree, 2″ radius, 1.25″ OD mandrel bends in 18gauge 304 stainless from Burns Stainless. These come with 4″ and 12″ legs on the bends.
From the design in Fusion360, I knew the exact angles and lengths of the four runners, so now I just had to cut the bend to the right angle and weld the appropriate length straight on.
Speaking of cutting… When I welded the slip joints on the NC30 exhaust, I cut the stainless tubing with my Evolution RageII saw using the blade designated for stainless steel. This worked, but the blade only did maybe 10 cuts before it basically stopped cutting and started melting its way into the stainless. I returned the blade to Amazon and got another one, and talked to the Evolution people who said that as long as you don’t force the cut and make sure the stock is securely fastened, it should last much longer. Well, being super-careful about cutting, it didn’t really.
Given those blades are over $100, I gave up on using that saw for stainless. Instead, I ordered a benchtop band saw from LittleMachineShop.com (the guys I bought the mini mill from) It’s $250, and the band saw blades are $10. It cuts much slower, but there’s already proof that the blades last much better than those for the Evolution saw and the cuts are very nearly as clean as those made with a sharp Evolution blade.
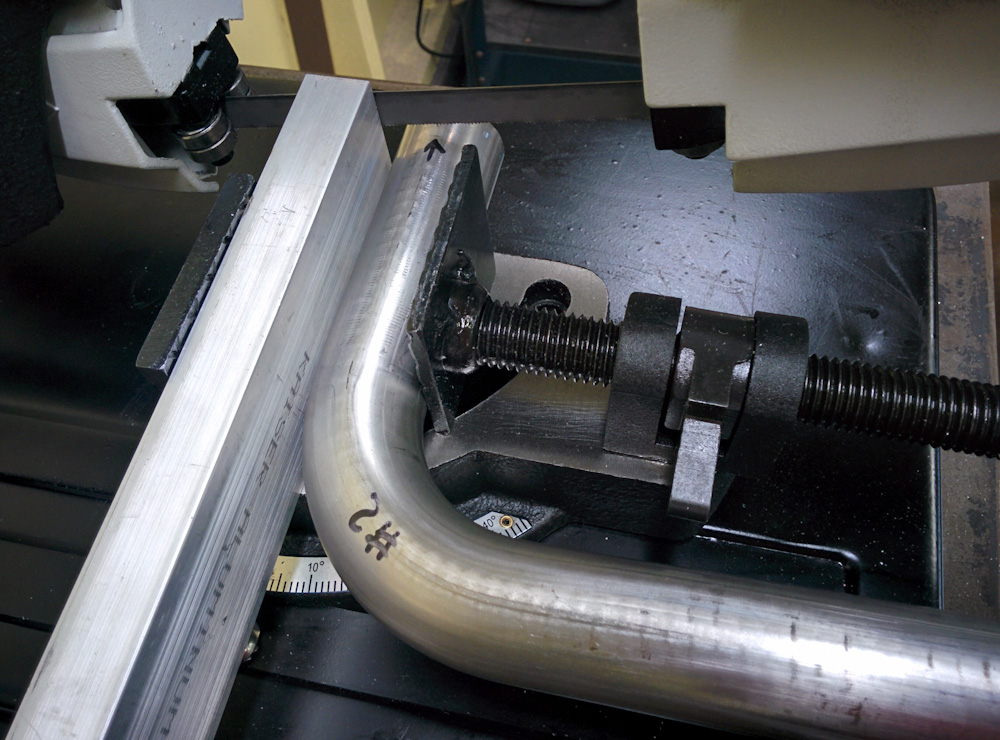
One of the intake runners mounted in the band saw for cutting.
Setting up the cuts was a bit tricky since they were all at different, totally arbitrary angles, like 51.7 and 71.4 degrees. I used a cheap digital angle finder from Home Depot to adjust the angle of the vise on the saw against the blade. It took some fiddling, but the cuts came out to within a few tenths of degrees which basically is the accuracy of the angle finder anyway.
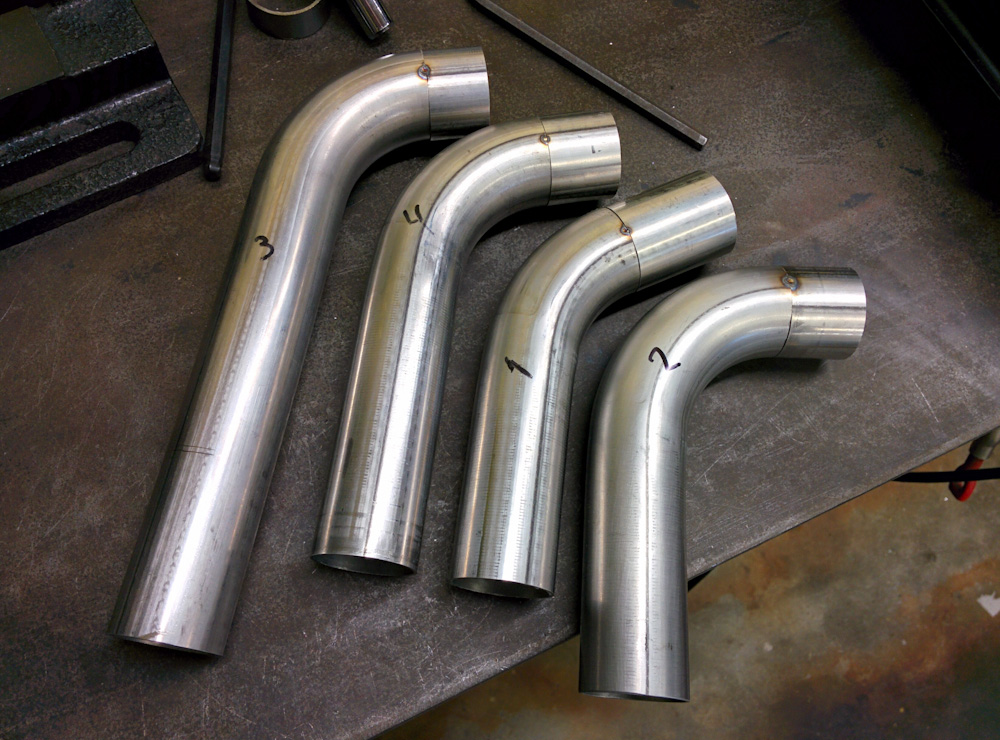
The four intake runners tack-welded together and ready for test fitting.
With the cuts done I tack-welded the straight sections on and took the whole thing down to the airport to test fit. Everything fit OK, although the #2 and #4 ones could have been a few mm longer for a perfect fit. That’s well within the slop of the silicone couplers, so no big deal.
Then it was time to weld them. I had just replaced my second Argon bottle that I use for purging the inside of the pipes. Apparently there’s a nationwide shortage of Argon and that little bottle cost over $200 to replace. Expensive hobby, this TIG welding thing…
I did some practice welds since this is 18 gauge (0.05″ or 1.2mm wall thickness), which is the thinnest material I’ve ever welded. They say it’s very critical that the tubing fitup is good, you should basically not be able to see any light through the joint. Any gaps will vastly increase the chance that you blow a hole.
The other problem I’ve always had when trying to weld stainless is that it’s really hard to see what you’re doing. When welding aluminum, everything is shiny and bright and it’s easy to see what’s going on. With stainless, you use much less current and it just seems less reflective. On my practice welds I managed to weld way off the joint because I couldn’t see it at all.
I came up with a few tricks to help this. The first, and obvious, one is to make sure you have really good work lighting. The second one was to tape a piece of fabric to hang down over the back of the welding helmet to avoid reflected glare from lights and windows behind you. Finally, I discovered that if I before starting the weld closed my eyes for ten seconds or so and then opened them and immediately started welding, they would have adjusted to the darkened helmet better and it was much easier to see.
Once I could see where I was supposed to weld, it was much easier. Purging the inside of the pipes is kind of a pain when they’re this small because everything gets really hot, the purge hose falls out, etc. The regulator on the purge bottle is also the really shitty regulator that came with the welder, and on the first pipe I didn’t realize that it had totally stopped the flow of gas after a little while and I ended up with the “sugary” carbide precipitation on the part of the inside of the weld that is exactly what you want to avoid by backpurging. Maybe it’s worth investing in a better regulator; given that a little bottle of Argon is $200 it might pay for itself in a little while to know exactly how much gas flow you have…
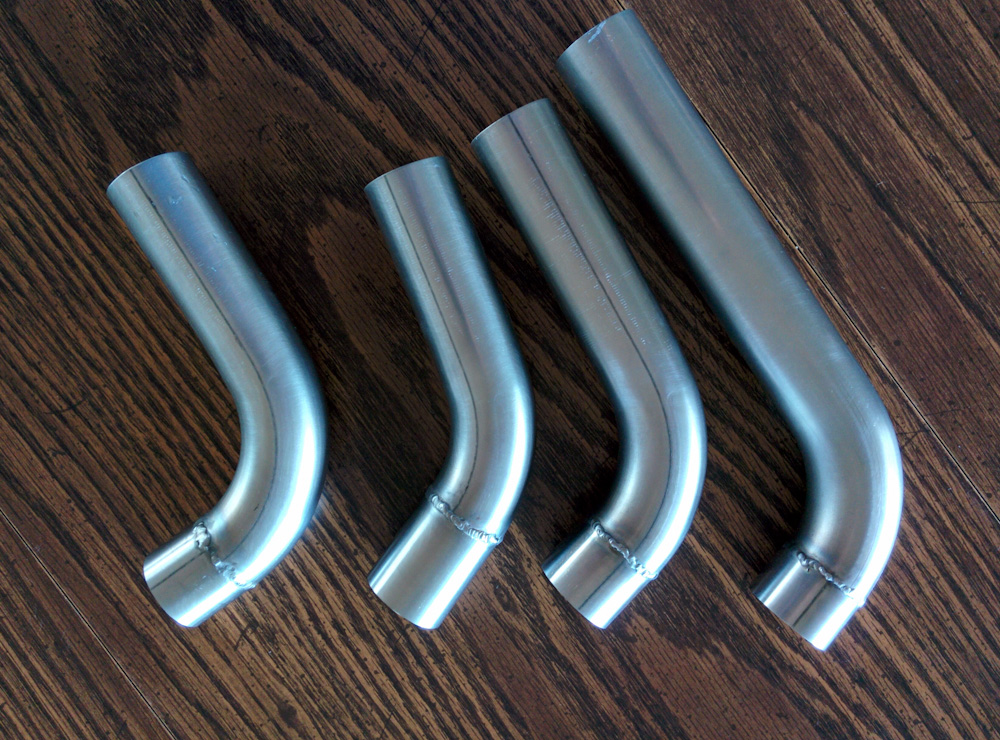
The final welded runners. The welds aren’t awesome but they’re decent. There are a few places where I melted through enough that there’s a bulge on the inside but most of the joints are good. With the exception of the one where the purge gas stopped, of course…
In any case, the welds got done and they’re not total disasters. They’re at least air tight which is the most important thing…
After mounting it all, I recorded a short video to better show how all this looks on the engine:
So that should hopefully complete the fabrication part of the intake project. Now it’s time to tune the carb so we get the right mixture and then see if we can run it with the cowling on without melting the plenum…
Pingback: A spark plug interruption – Patrik's projects