With the vacuum leak fixed, I was excited to try another test run. But first, a small side track.
The “RDAC” box that connects all the engine sensors to the MGL Enigma comes in two flavors, one that has a manifold pressure sensor and one that does not. The one in N132EA does not, but from reading the manuals (and looking at the pitot-static connections on the Enigma itself) I had a sneaky suspicion that the MAP sensor used was the same Freescale sensor that I used for the MAP sensor on the NC30. The manual said it was a 0-250kPa range sensor, and coincidentally I happen to have a spare MPX4250AP. Opening the RDAC box up, sure enough, there were unused solder pads where the MAP sensor should be, although only 5 and not 6 pins like the MPX. However, I determined that the pinout was compatible (only 3 pins are used on these particular models) so I soldered it in, reconnected the RDAC and fired up the Enigma.
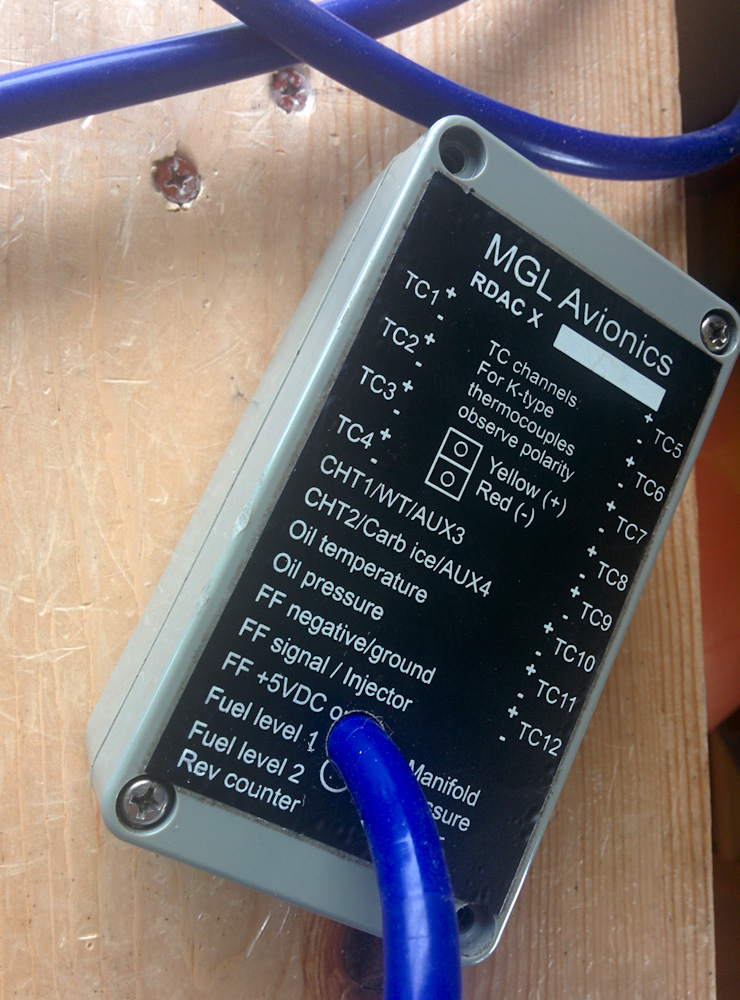
The RDAC, now with MAP sensor. I only had to solder the Freescale sensor in and drill a hole in the lid.
I was extremely pleased to see a MAP reading that matched the atmospheric pressure reading within a kPa, and sucking on the MAP hose made the reading go down. Perfect, now we have a MAP sensor (and the sensor is only $15 compared to the $65 or something MGL charged extra for the MAP version.)
After drilling a hole in the plenum (two holes, actually, I also mounted an LM355 temperature sensor so we can read manifold temperature) and 3d printing a small hose barb that I epoxied into the hole, I could hook the MAP sensor hose up to the plenum.
Re-mounting the plenum and connecting the intake runners didn’t take long, so it was time for a test run. However, when I pressed the starter button, all I got was a “click”… The starter relay was definitely kicking in, but the starter did not turn. I wondered what could be causing that connection to not be made when I noticed the main battery lead to the starter coming out of the lug at a peculiar angle.
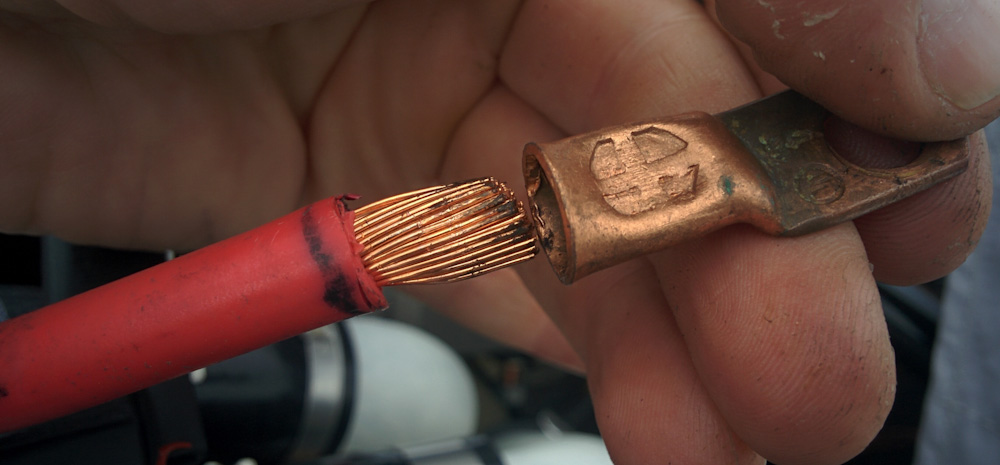
The lug on the lead to the starter was not crimped real well, it was more “crushed” than a real crimp.
Apparently the wiggling of the plenum in and out had been enough to pull the lead out of the crimp in the lug. Now, this should just not be possible, I should be able to hang from a properly crimped #4 AWG lead, but the crimp was not a proper hexagonal crimp but rather looked like someone had stamped a cross in the copper lug.
A proper crimp squeezes the lug from all directions and actually cold welds the strands and the lug together into a single piece of metal. Luckily I happen to have a few lugs I got for the NC30 #6 AWG battery wire which actually fit the #4 AWG starter wire too. I also have up a cheap hydraulic crimper I picked up on eBay, so I could replace the lug easily.
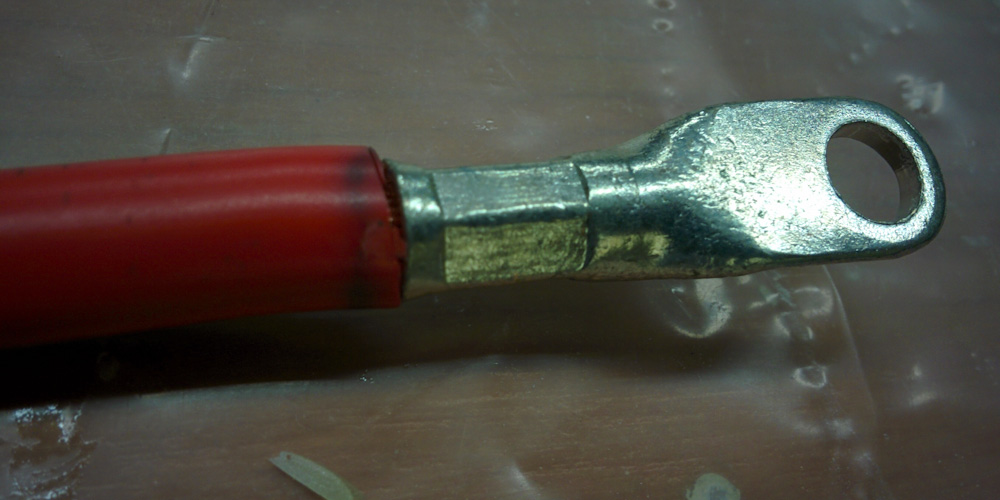
The new, properly crimped lug. Note how the entire perimeter of the lug has been compressed into the wire.
After that small delay, it was now time for the test run. That’ll be in the next post.
Pingback: Plenum test run #2 – Patrik's projects