Well, the good news is that I figured out where the vacuum leak is coming from. The bad news is that it’s the 3d-printed plenum itself that’s not anywhere near air tight.
I guess I should have checked this more carefully, since the fact that 3d-printed parts aren’t water tight is pretty widely known. I had assumed this was because of poor layer adhesion when printing with PLA, and that nylon would not have this problem since the layers adhere very well. Well, I was wrong.
To try to figure out what was leaking, I plugged up the outlets with plastic sheeting and clamped them. When I blew into the inlet on the bottom, the pressure wasn’t building up at all and you could hear hissing all over the place.
The leaks were concentrated in the regions that were printed horizontally. I suspect what’s going on is when the walls are close to vertical, the perimeters are continuous and form a sealed wall. On horizontal parts, however, the space inside the perimeters is “filled” with a zig-zag pattern. I have observed before that whenever the nozzle changes direction as it meets the perimeter, there tends to be a little unfilled hole. Since every layer has a different angle for the zig-zag fill pattern, and the parts were printed with 5 solid layers on horizontal surfaces, I thought the holes on different layers would not overlap, but apparently they do.
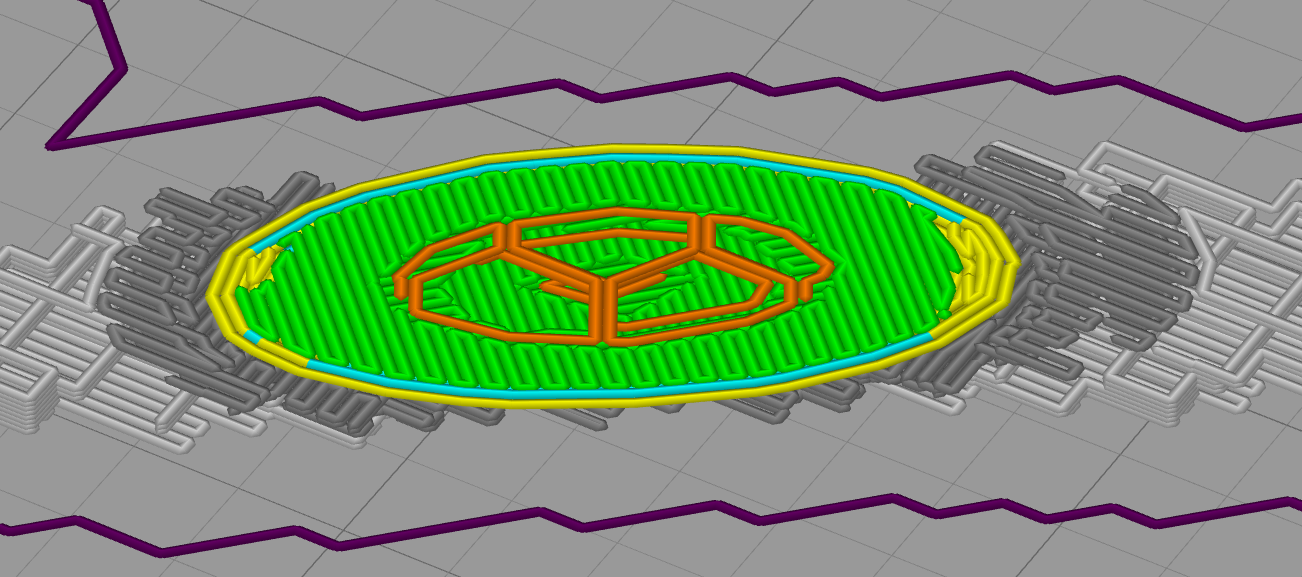
The infill pattern used on the mostly horizontal bottom parts of the plenum. These were the regions that leaked.
Needless to say, this was a disappointing discovery. I contemplated the alternatives (including burning all parts for this project in a ceremonial pyre) and eventually settled on attempting to coat the outer surface of the plenum with epoxy. Epoxy is resistant to avgas, so that would not be a problem, and by brushing it on the outer surface and using the shop vac to suck a vacuum inside the plenum, the epoxy would get sucked into any pinholes and cavities. I had already RTV’d the two halves together, so I only had access to the outside, anyway. It was worth a shot.
I mixed up two shots of West Systems and started brushing it on. I was a bit worried that the epoxy would not “wet” the nylon, but that turned out to not be a problem. In fact, the areas that were porous sucked in resin like crazy. I only applied a few, short, bursts with the shop vac; since the part was so porous I figured that if I left it on it would suck all the resin straight through to the inside which would not be the desired outcome.
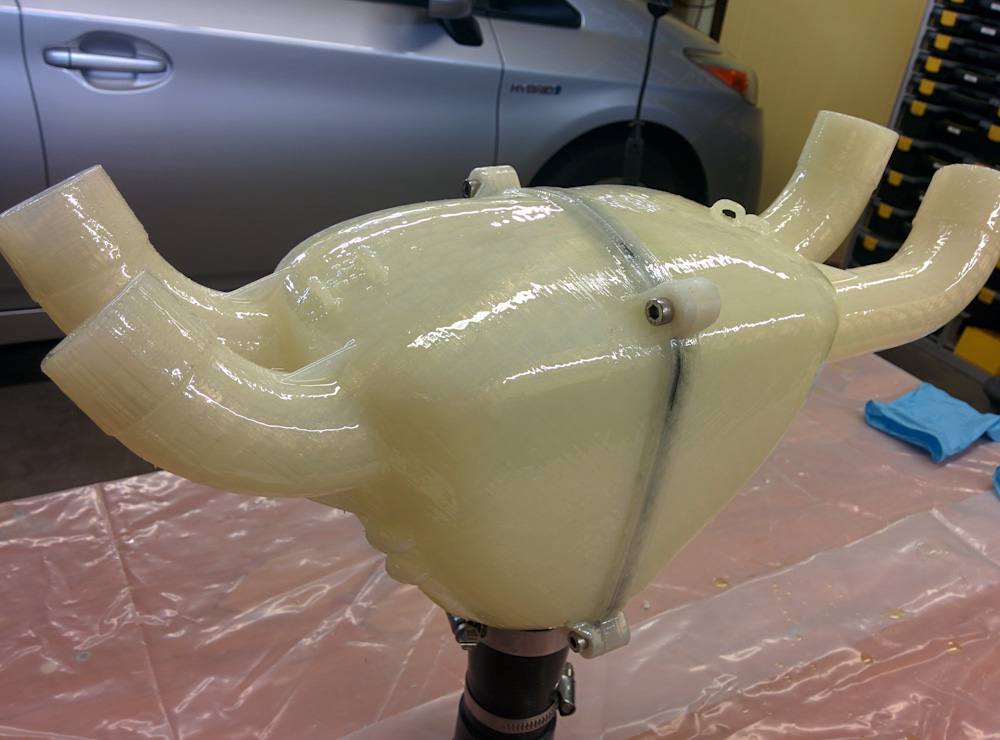
The freshly coated plenum, waiting for the epoxy to cure. It sure is more shiny than it was before, and hopefully also air tight.
After letting it cure overnight, it was time to test it. First I had to sand the outlets, which had prominent ridges from the layers of plastic and did not want to seal against the silicone couplers. After plugging up the outlets, it was immediately clear that it was tons better. Blowing into it now, there’s a clear buildup of pressure. By dunking the whole thing into the bathtub again, it became clear that most of the leakage was at the plastic sheeting over the outlets. However, the part itself was still not completely sealed, there were (small) leaks from a few spots. I noticed only one leak from any of the areas that were previously coated, the others were either from the join of the halves or from right next to the threaded inserts where I didn’t really want to put epoxy for fear of getting it into the threads.
I’ll just have to mix up another shot and redo this once and then I think we should be in business. In the meantime, I’m working on adding a manifold pressure sensor…
wondering about how the plenum was flexing against the vacuum pull in the first test video. Now that the plenum is much more airtight will it flex more? Or will the epoxy make the structure stiffer overall and less flexible?
I wondered that, too. I haven’t put the gopro back, so I don’t know. But I did add a manifold pressure sensor, so now I at least know what the pressure is inside. We’ll never know what it was when it leaked, though…
Pingback: Plenum intermission – Patrik's projects
Pingback: Plenum test run #2 – Patrik's projects