It’s been a while since the last mini mill post. I’ve taken the table off a couple of times to clean out chips that get in under the gibs and re-grease the ways, but it should be clear from the relatively large number of posts of stuff actually made with it that it’s been running really well.
One thing that has kept productivity down, though, is the somewhat cumbersome process necessary for tool changes. Some background if you’re not familiar with CNC machines: Because tools have different lengths, the controller needs to adjust the position of the machine so that the tool tip is at the same position when the machine is commanded to a certain Z-position. This is done with the help of tool length offsets. Tool length offsets work kind of like coordinate offsets, which keep track of the difference between the machine position and the active coordinate system. (If you’re unfamiliar with how these work, CNCcookbook has a series of posts on this.) Tool length offsets shift all the coordinate systems up or down depending on which tool is selected.
If you have a setup that makes it possible to switch tools with perfectly repeatable Z-positions (like the Tormach TTS system), you can measure the lengths of all your tool, input them into a large table of tool offsets on you CNC controller, and just notify it when you switch to a new tool. That would be nice, but I’m not at that point. (Yet, more on that soon.)
The alternative is to measure the tool length every time you switch to a new tool. Essentially, if you have a point with known coordinates, you can move the machine to that point (manually) and then tell the controller “you’re now at Z=0”, or whatever. This will update the active tool length offset, and you can then resume the G-code program. (Some machines can automatically probe for the length, but those systems are either not very accurate or really expensive, and you need a controller that has support for it.)
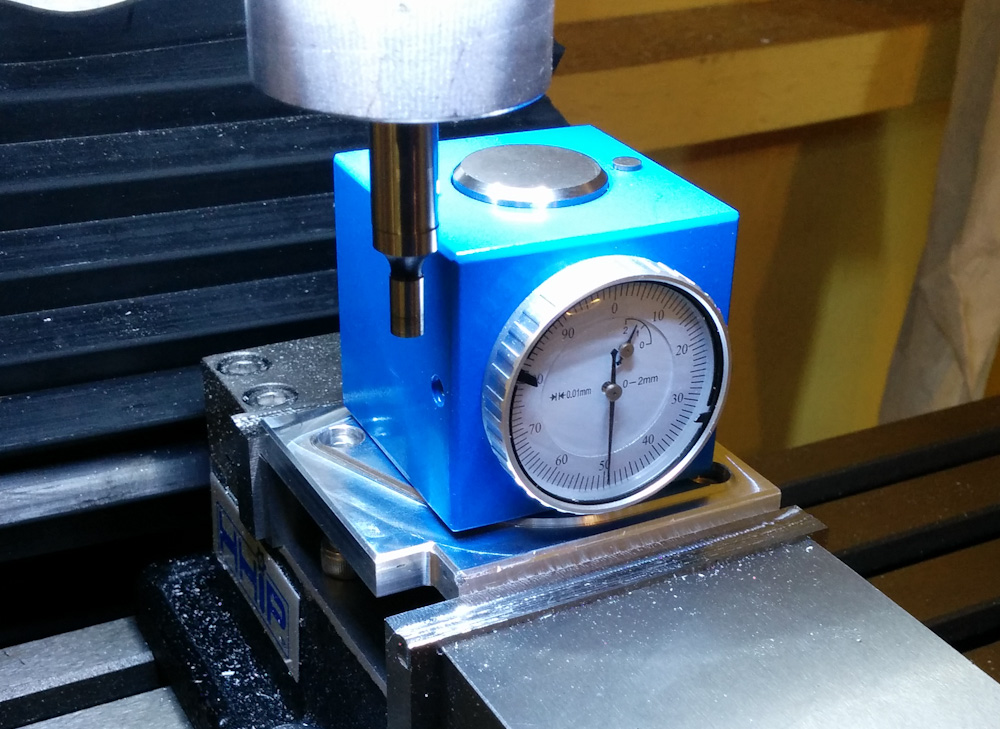
This is the Z-axis setter. When the button on top is depressed so the dial is at zero, it is exactly 50mm above the base, to within 0.01mm.
The way I’ve done this is by using the (fairly cheap) “Z-axis dial setter” shown above. This is essentially a gauge block with a dial indicator, so by zeroing out the needle, you know you are exactly 50.00mm above the base of the instrument. After finding the workpiece Z-axis zero with this instrument and putting that into the G54 coordinate system, I’d put it off to the side on the mill table, move the mill over and zero out the reading, and then set the G55 coordinate system origin to here.
Then during the operation, whenever the program called for a switch to another tool, it would pause. I’d manually type in the commands to raise the mill up to its maximum height (for best access to changing the tool), change out the tool, move over to the G55 X0Y0 and then jog the machine down onto the dial until it read zero. By then telling the controller that “hey, you are now at G55 Z0”, it would adjust the tool length offset to make the current position (in G55) Z0 and thereby also shifting the G54 work piece coordinates by the correct amount for continuing the program with the new tool.
Then I had to manually type more commands to raise the mill up to clear the workpiece, switch back to the G54 coordinate system, and move it over to the original position it was in when the program paused so that it could continue.
This worked well from an accuracy point of view. The repeatability was about 0.01mm, plenty good compared to the backlash in the Z-axis. The main problem was that every time you type manual commands you run the risk of mistyping something and crashing the machine. Which happened, on several occasions. It was also slow.
What was needed was to make the machine automatically move to the tool change position and back. One could imagine doing this by making Fusion360 insert these commands into the G-code program itself, but that would interfere with the fact that Chilipeppr, the web-based user interface to the CNC controller, stops the program when it gets to a tool change.
The other way was to make the Chilipeppr web client send these commands, which is what I ended up doing. This was an interesting exercise; it’s a completely browser-based thing running Javascript, and I’ve never written a line of Javascript in my life. Nevertheless, I managed to figure out how to do it, and now it works!
I made a video to show the Chilipeppr user group how it works:
This should make changing tools a lot faster and less error prone. And as you may see in that video, I’ve picked up a bunch of the TTS tool holders, so soon I should be able to switch between at least the most common tools without measuring at all!