While the ShapeOko worked much better with the Ridgid trim router than with the Dremel, the default spindle mounting brackets for the ShapeOko didn’t fit well because it’s so much wider than the Dremel. To even get it in there, I had to take it apart and remove the height adjustment mechanism. First order of business was to make better ones.
I ordered a 1/2″-thick Delrin plate from Amazon and redesigned the DeWalt DW660 mount that you can download from the ShapeOko GitHub page to fit the R2401. This came down to adjusting the diameter and adding a cutout for the channel where the height adjustment screw runs. I also designed it to have exactly 50mm between the Z-axis rail and the router centerline. The purpose of this is to be able to stiffen up the machine by adding a secondary Z-axis rail. But more on that later.
After a few trial and errors figuring out how deep and fast cuts I could do in the Delrin with my 1/4″ bit (I have a 1/8″, too, but it’s not long enough to cut all the way through the plate) I came up with a combination that seems to work fine: 1mm cuts and 600mm/min feed rate. It appears I could run at least 3mm cuts without losing steps, but then there was enough flex in the mechanism that running in the -Y direction (when the router is “in front” of the gantry) would twist it which, due to the offset of the bit from the Y-axis, would cause the bit to move down into the material and then bounce back, causing a very imprecise cut. At 1mm, though, it wasn’t a huge problem. Here you can see it cutting:
The other problem I encountered was that the “chips” coming off the cutter end up everywhere, specifically between the MakerSlide rails and the V-wheels tending to jam them. It didn’t cause it to lose steps, but it was significantly harder to move the gantry by hand when one of those plastic “clumps” got under the wheels.
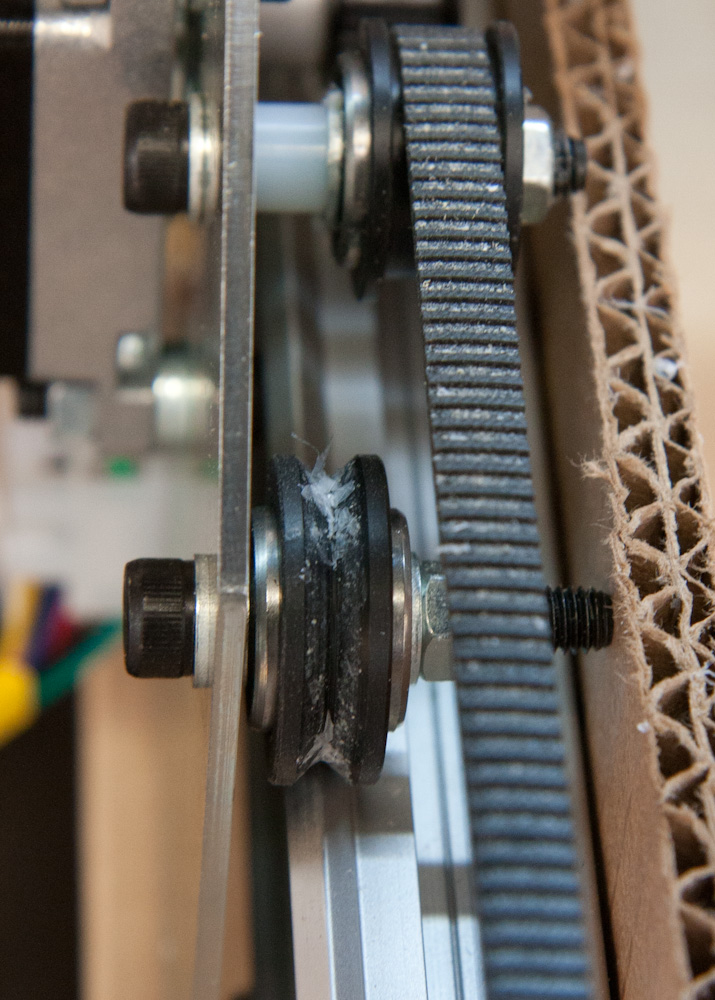
The plastic chips land on the rails and the wheels and then they get pressed into the wheels, causing them to jam.
My first solution was to try to vacuum them up during the run but this didn’t work, for two reasons: First, the router fan blows the air out the bottom and the shopvac isn’t powerful enough to catch all the chips before they get blown out. Second, whenever I ran the shopvac and the ShapeOko simultaneously, the program would hang a couple minutes into it. I assume this has something to do with power quality. Luckily we have the homing switches, so this isn’t a disaster — you just reboot, rehome, reload the coordinate offsets, and try again. The repeatability isn’t 100% but it’s a couple tenths of a mm so good enough.
The second solution to the chip problem was to cut out two cardboard pieces and mount them against the Y-axis rails to shield them from the chips. Unfortunately you can’t make them high enough that they completely cover the top wheels, because then the X-axis will run into the cardboard before it hits the limit switch (don’t ask me how I figured this out) so there’s still stuff getting on them (and it doesn’t help the X and Z rails), but it sufficed for the moment. However, at the end of the job, the machine looks like it’s covered in snow:

See the “snow drifts” of Delrin chips everywhere. It’s also a bit static, so it clings to everywhere it lands.
The end result isn’t perfect, but it’s pretty good. The second plate is a lot better than the first one, so it appears I’m learning. They certainly seem to hold the router “ridgidly”.
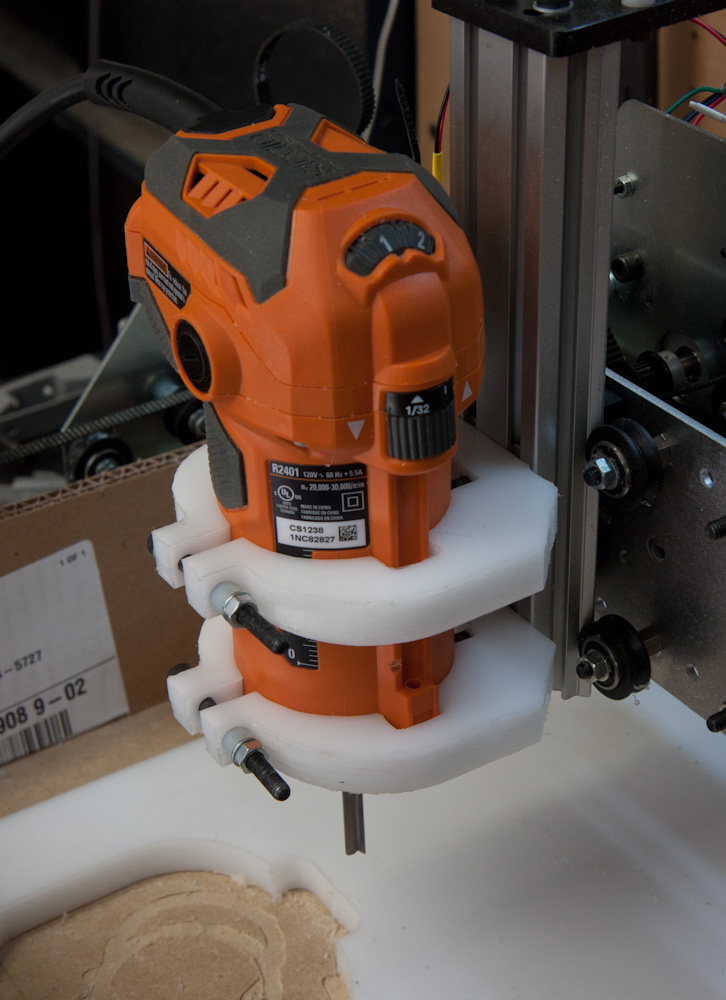
The router mounted with the new mounting plates.
The next thing to address is the stiffness of the machine, but I’ll leave that to the next post.
Pingback: More ShapeOko upgrades | Patrik's projects
I got a solution for the chips and debris problem. I am currently working with makerslide, I came up with an idea to solve the delrin roller bearing. I spent the last three weeks trying to make a better slide, and an er11 spindle and finally got it completed. I did several test over and over, it work beautiful, 100% better then those roller bearing and Dremel tool. Now I have accuracy and the ability to cut metal with precise.
Can you post the source files for your router mount?
Yeah. Edward asked for them, too, I just wanted to make sure they worked first. I’ll give them to him so he can add them to the library on the Shapeoko page.
Hi – I was wondering if you were willing to share your mount files. I am deciding between the ridgid router and the machete right now but leaning more towards the Ridgid.
Thanks!
I would also love to have the mount plans. I’ll make it myself – apparently I have to – but I’ve seen quite a few post by people that have done this, and haven’t shared their work product. Help a guy out!
Sure. This was a while ago and I no longer use Cambam but I can give you what I think is the right Cambam file.
Sorry it took a while but I finally found the Ridgid mount file. You can download it at https://www.dropbox.com/s/0lpplzd2q4c6tkn/Ridgid_mount2.cb?dl=1
Any chance someone might be able open and export this as STL file?