Since the NC30 wasn’t idling on all cylinders and generally was misfiring at low rpm, I figured it wouldn’t hurt to take the carburetors apart and make sure everything was cleaned and adjusted right. This turned out to be a good decision… While the insides were pretty clean, things were pretty garbled. There’s a good guide to NC30 jetting on 400greybike.com, and it points out that several parts are different between the front and rear carbs so it’s a good thing to check that they haven’t been swapped. Mine were…
The first thing I noticed were that the main jets were #110, which isn’t right. Only the first gen ’89 NC30 had #110 main jets, the later models should have #115 front, #118 rear. The numbers on the carburetors also matched that they were from a ’89 model. Since my NC30 is a later ‘N’ model, I can only assume that someone swapped the carbs at some point and didn’t know the later models had different jetting. This didn’t start promising. The next thing the guide says to check is the needle and needle jet, as they are also different. Sure enough, my front carbs had one front and one rear setup.
At this point I’d decided that I was going to disassemble the carburetors, something they generally don’t recommend unless necessary. Well, it was necessary: there are short pieces of tubing between them for the air pipes, and those were just totally coming apart. They weren’t the original pieces, either, but some generic hose pieces held on with a zip tie. Since you really don’t want hard-to-find vacuum leaks in this area which takes a lot of disassembly to get to, I decided to just start over. A lot of the O-rings were quite stiff so I even decided to buy a new gasket set. These aren’t easy to find and cost their weight in gold. (Probably a lot more than gold, actually.) I found a set on ebay that shipped from Japan.
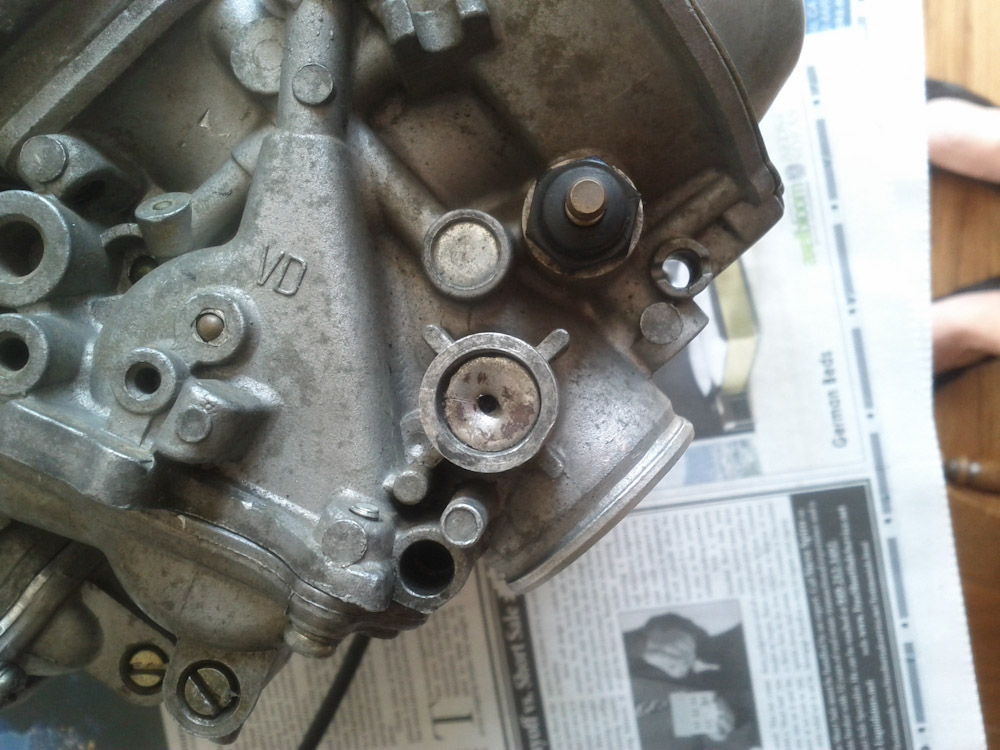
So far so good. Then I discovered the following while doing some general cleaning:
There’s a metal cover at the end of the throttle axis, and after getting a bunch of gunk out of that area, I discovered an actual hole straight through the metal! How do you manage to do that? This actually goes through, you can see movement through the hole when you turn the throttle, so it’s going to have to be sealed up or there’ll be another vacuum leak. The gunk in that area was probably epoxy or something that some previous owner had “fixed” it with. I guess I’ll have to cover the hole with JB Weld or something. It’s supposed to be fuel resistant so hopefully it’ll last.
Finally, the air hoses were cracking, and rather than try to find new ones for something like $20 each I decided to get some silicone vacuum hose from Hosetechniques.com. I used their vacuum hoses in the Passat and after 7 years they look like new, plus I realized they are practically down the street from here!
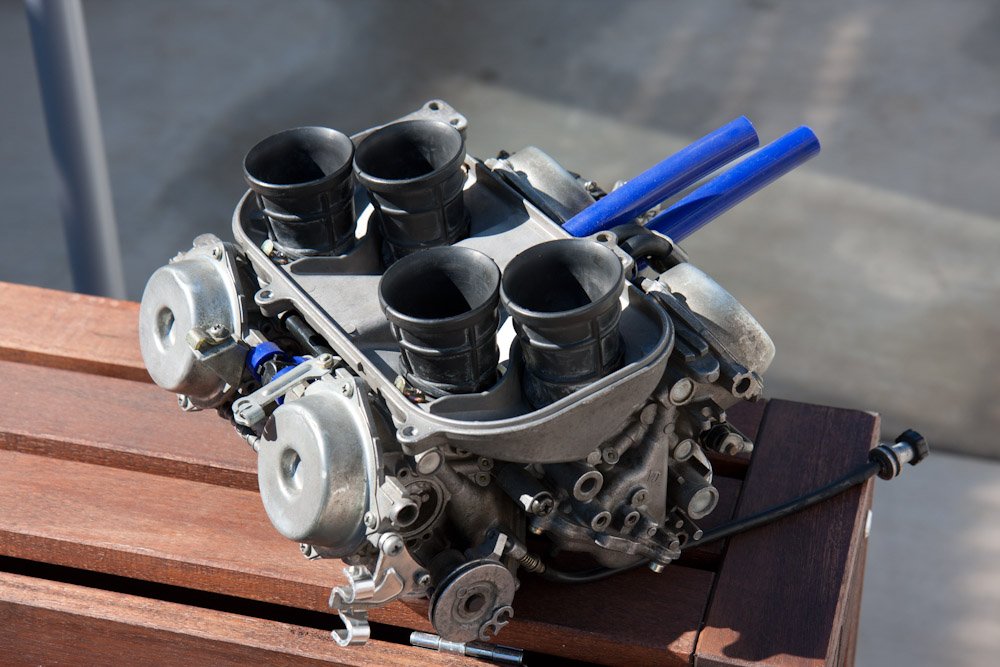
So finally, this is the reassembled stack, ready to go back in the bike. The blue hoses are the new vacuum hoses, and I also used short sections of the same hose to replace the ones that were coming apart. They’re visible between the carbs on the left in the picture.
While I had everything apart, I also replaced the throttle, choke, and clutch cables which were in bad shape. The new ones definitely feel better. Getting the carbs remounted was a bit of a challenge. Each carb in connected to the intake with a short rubber tube, and since the engine is a “V”, they aren’t all parallel so getting them in takes a bit of flexing of the intake rubbers. Luckily I also had gotten new ones of these as the old ones looked cracking and were also more like hard plastic than rubber. The new ones were a lot more flexible so I’m sure it would have been a lot harder without new ones.

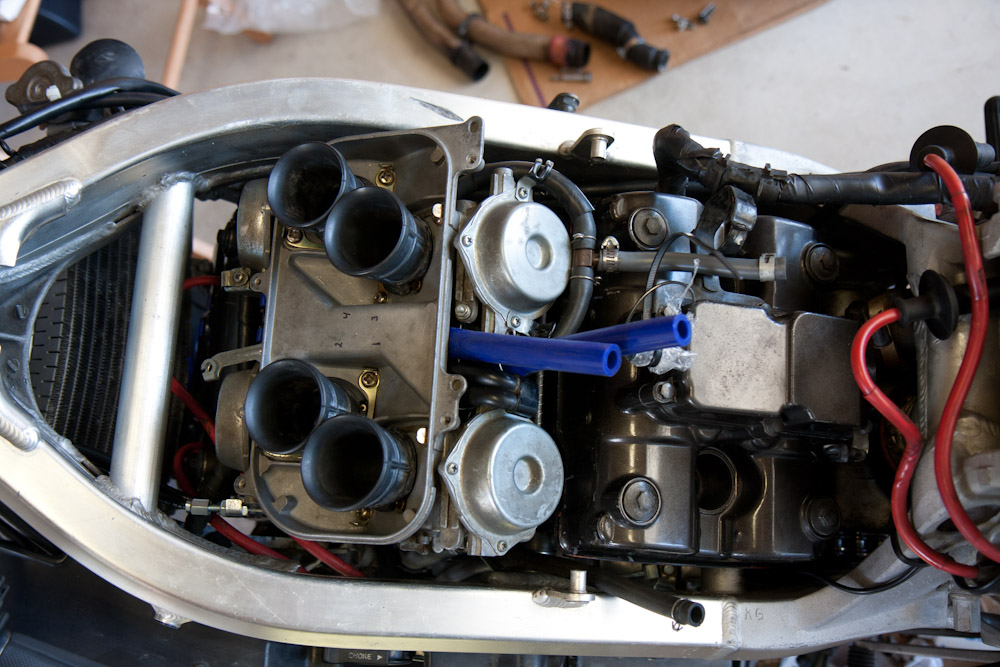
The carb assembly back on the bike. Getting them to seat properly in the intake rubbers was a bit of a challenge, but at least these were new and pliable.
Everything is now mounted back on the bike and awaiting test. In parallel, I’m adjusting the valve clearances and I’m waiting for some shims to be able to finish that. The front cylinders are done so it’s safe to remount everything. (Accessing the front camshafts is a lot harder than the rear. You can see the rear valve cover plainly exposed in the image below.) Once that’s done, a carb synchronization is in order and then I hope it’ll run like new!


I just hope it runs finally.
Well done! Good work!
Pingback: NC30 Carb overhaul part 2 « Patrik's Projects