We’ve hit the point of no return: perforated pipe is in the ground!
It was finally time to add some actual drainage. With the transport sections laid down and covered, it was now time to start adding the perforated pipe. This posed a small dilemma: there’s this “pipe sock” of filter fabric that goes around it, which comes pre-wrapped around a big piece of cardboard. This piece won’t go around the bends, so I waffled a bit until I decided that I’m just going to start on the uppermost section I’ve laid down and deal with the problem later. The sock is big enough for 4″ pipe, so there’s quite a lot of slack so it won’t be hard to thread it along the pipe after gluing the bends on.
Gluing the pipe sections in the trench, by the way, is not so easy. You can’t stand in the trench, because the pipe is going there, so you end up splaying yourself on your knees across the trench, bending down to the pipe, and then trying to get the pipe glue on and the pipe in position. Highly frustrating.
Around the sock goes the gravel. Once I started shoveling the gravel, I noticed that even though it’s “drain rock”, it still has quite a lot of grit in it. I ended up washing it with the hose in the wheelbarrow. This would work better if the wheelbarrow was perforated so the grit just drained out. I’m not ready to start drilling holes in it yet, though, even though it was ~$35…
Finally, around the gravel, goes this “soil separator” fabric. This part is kind of a pain in the ass. You’re supposed to put this under the pipe, then add gravel until the pipe is covered, and then fold it over so grit and dirt can’t get into the gravel. The problem is that with the fabric in the trench, it folds over on itself automatically, so how are you supposed to get the gravel down? It took another good dose of frustration before this was done.

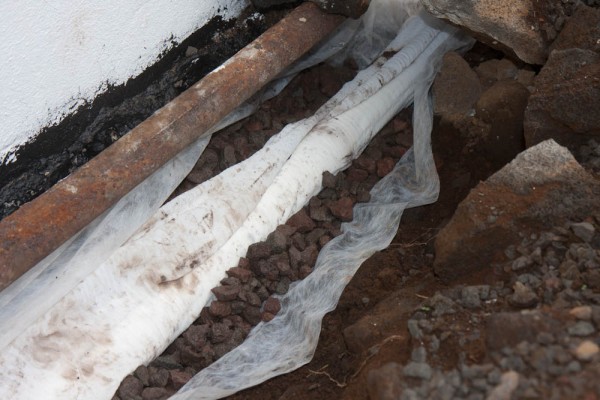
This shows the layout: the sock around the pipe in the center, then the gravel, and then the soil separator fabric on the outside.
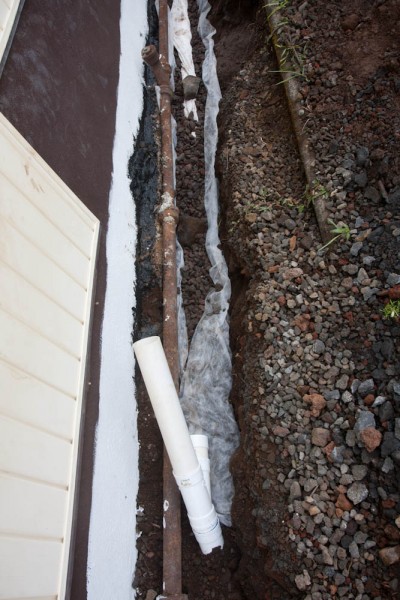
Once the fabric is folded over on itself, you can finally lock it in place with some gravel and then start filling with more gravel in a slightly more efficient manner. This is what it looks like currently:

At this point, the pipe along the side of the house is fully covered. Remains to hook up the downspout to the T in the bottom of the picture.
The pipe is now sufficiently covered that it’s possible to walk on it, so the next step is to hook up the downspout to the T below the perforated pipe so it can drain down to the bottom of the lawn instead of through the super-temporary pipe in the top of the picture.
