Our new house has a very nice garage that measures 8.4m deep by 7.4m wide internally. This equates to a two-car garage with extra depth, not a ton of space. But because it was built to house machinery, it has 3.7m high ceilings and garage ports going up to that full height. As such, there’s plenty of opportunity to use vertical space.
The garage is heated, but did not have any ventilation when we moved in. This is suboptimal since it often leads to high humidity, especially if you park a wet or snowy car in it, so one of the first improvements I did over the winter was to add an FTX ventilation system. This is a ventilation that both sucks and blows, so to speak. It has fans for air supply from the outside and for air evacuation back to the outside, with a heat exchanger that heats the supply air from the exhaust air. This is quite common in modern houses here in Sweden since it makes it possible to get good airflow without wasting a ton of energy by just exhausting the warm inside air in the winter.
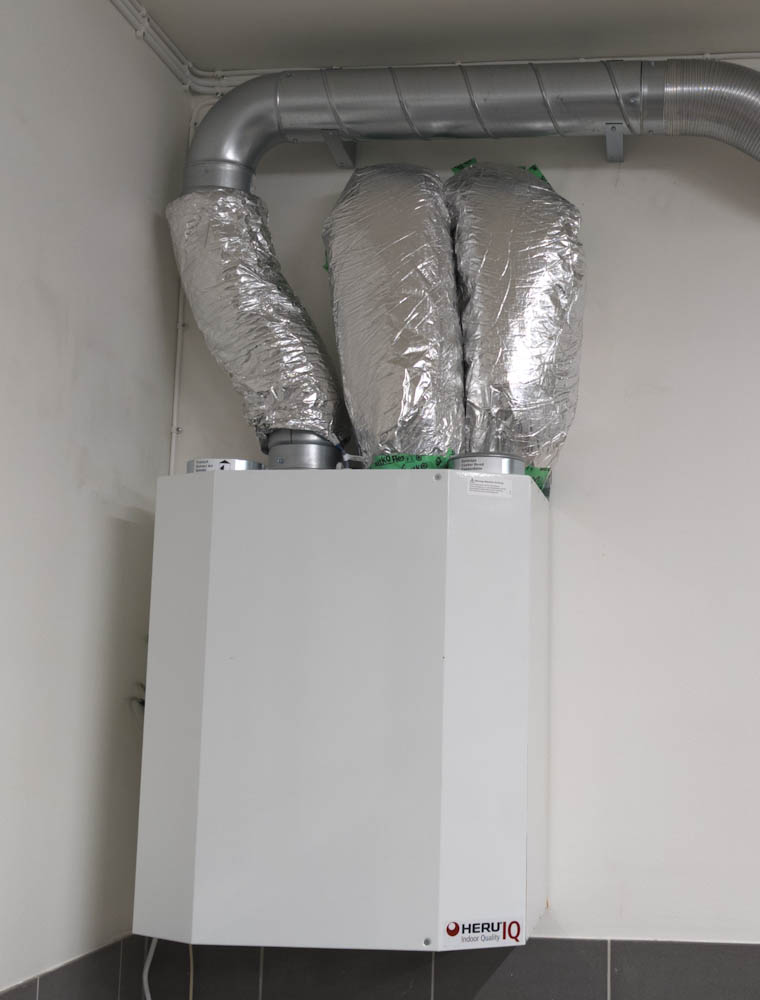
The ventilation unit, with three of the four air connections completed. The insulated pipes on the right are the outside connections.
The installation of the ventilation was a bit nerve racking since it required drilling two giant 150mm (6″) holes straight through the wall. Then the cold air pipes need to be insulated inside the garage since otherwise water will condense on them. Never having done anything like this before it took me a while but by November last year the ventilation was up and running, significantly improving the air quality in the garage.
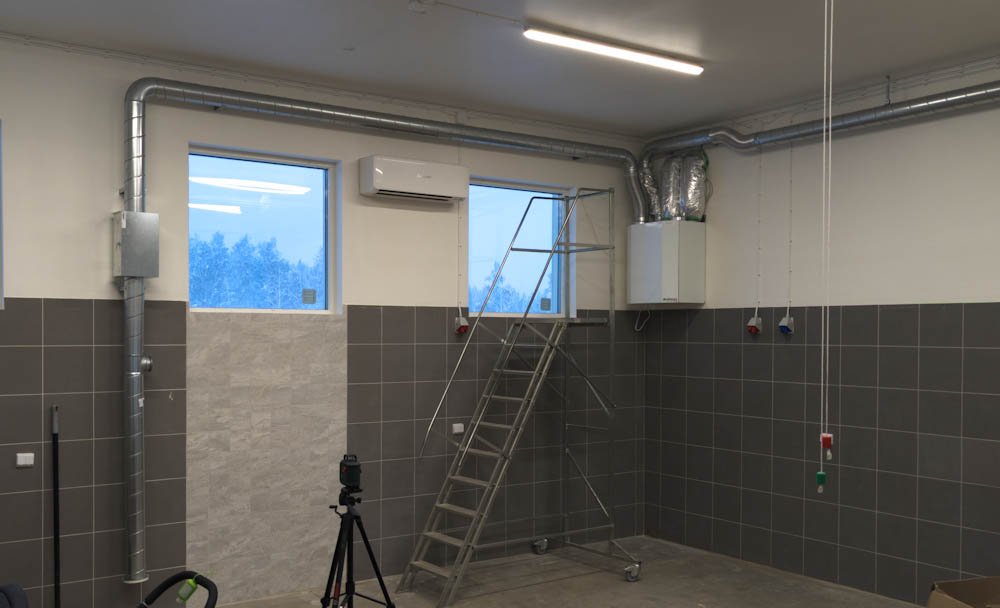
The completed installation, with the exhaust intake near the floor on the left and the supply air going off to the right along the ceiling.
Another improvement to the garage was the lighting, which was not very good. This was replaced with 6 7800 lumen LED luminaires, which should result in an illumination consistent with what’s recommended for “precision industrial work”. I don’t have a lux meter, so I can’t confirm this, but the lighting is good enough that I haven’t felt the need for any additional lighting.
The garage has water, a water heater, and a floor drain. There were also two extra drain pipes coming up out of the floor, and an old IKEA counter with a sink left over. I snagged a couple of IKEA cabinets in their second hand store and mounted the counter and hooked up the water and drain to the sink, which not only meant we have a sink but also some more storage space.
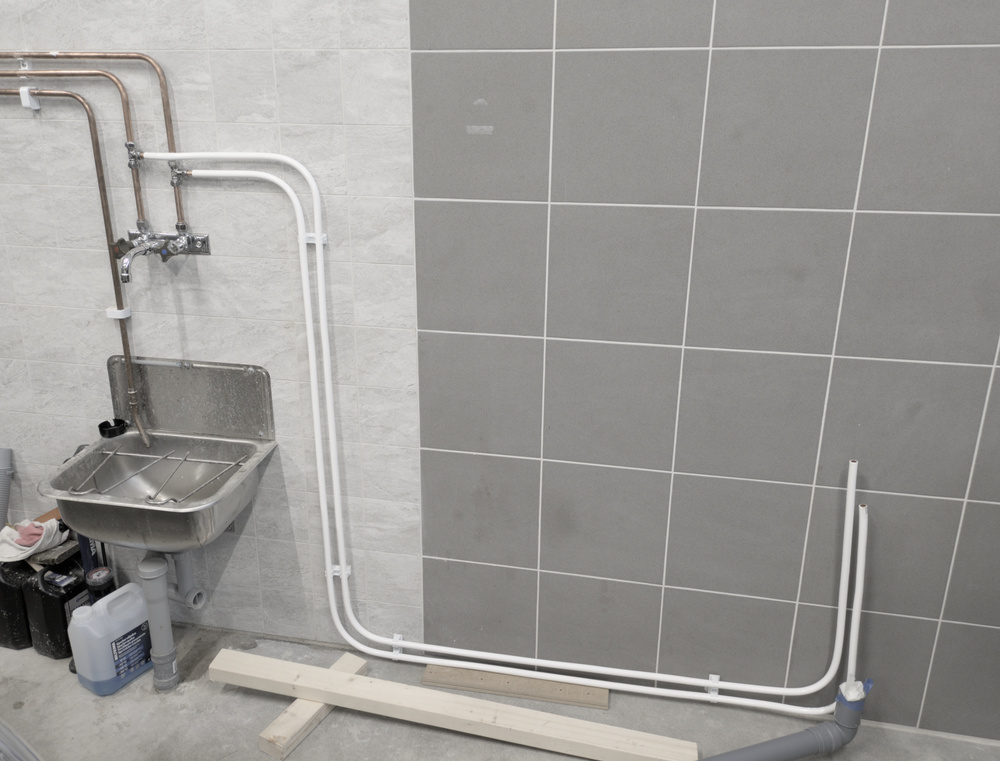
The water for the sink was branched off from the existing utility sink.
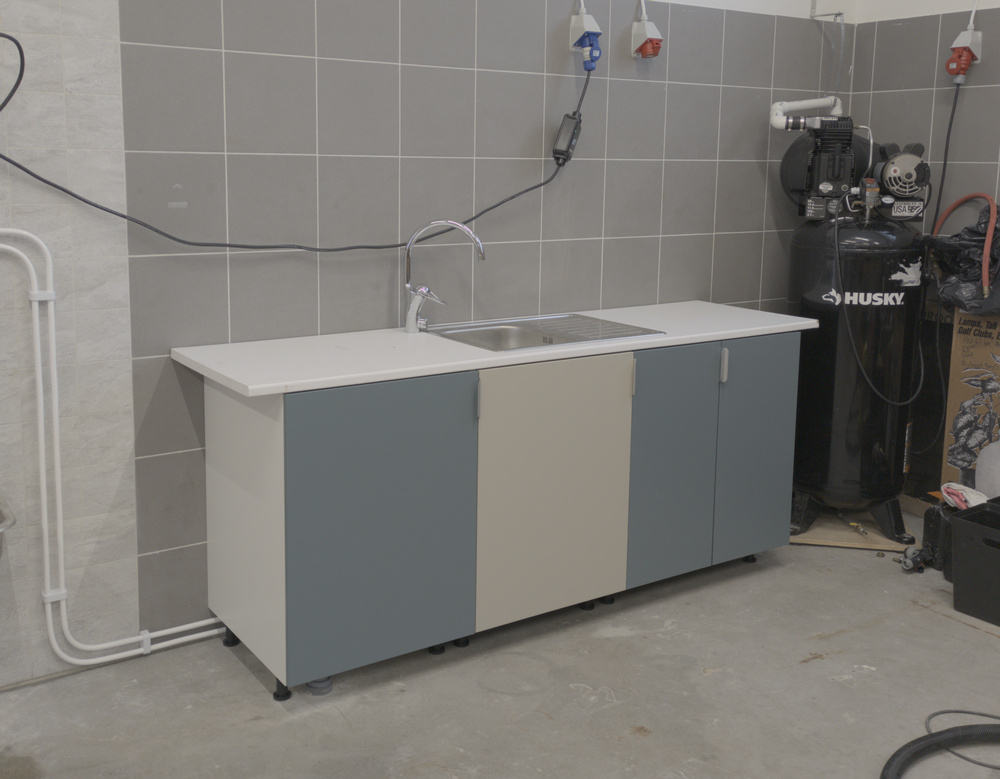
The counter with the three second-hand IKEA cabinets, hence the diversity of colors.
Speaking of storage, the biggest challenge was to try to organize everything to fit in the garage and still have sufficient space to work on the plane. The crates themselves are very large and will be around at least until you’ve completed the wings and start the fuselage. They take up a lot of floor space, so I came up with this idea of building a “bridge” of sorts over them to be able to use the vertical height of the garage. We also mounted some shelf braces high up on the wall and put the wing spar crate there.
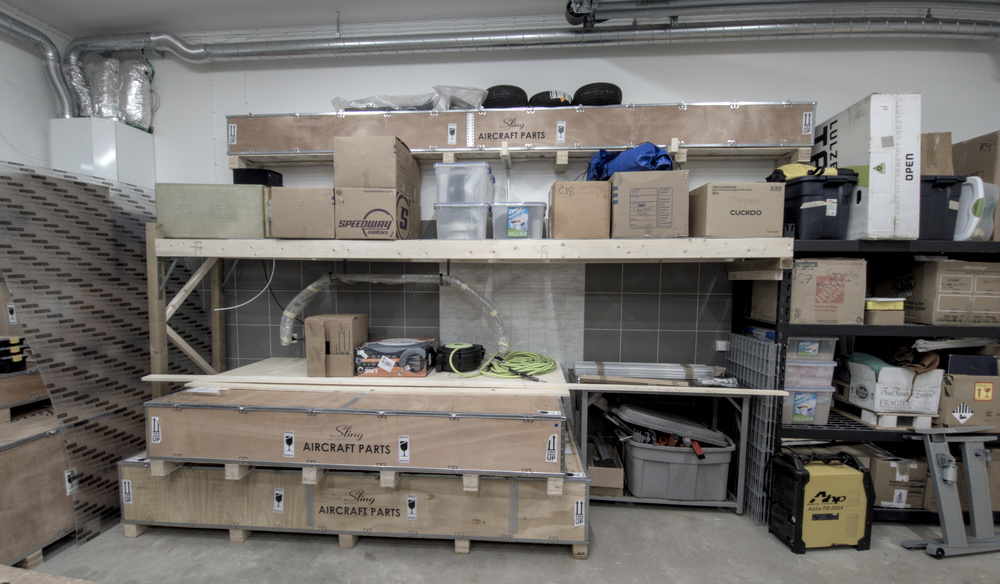
The wing spar crate was stuck up on the wall onto three large shelf braces.
Using two 2×8’s and a latticework of 2×2’s, we then built a “bridge” over the wing and fuselage crates, which gave us storage space for stacking boxes on top. The landing gear crate was also unpacked. The landing gear itself is hanging against the wall under the “bridge”.
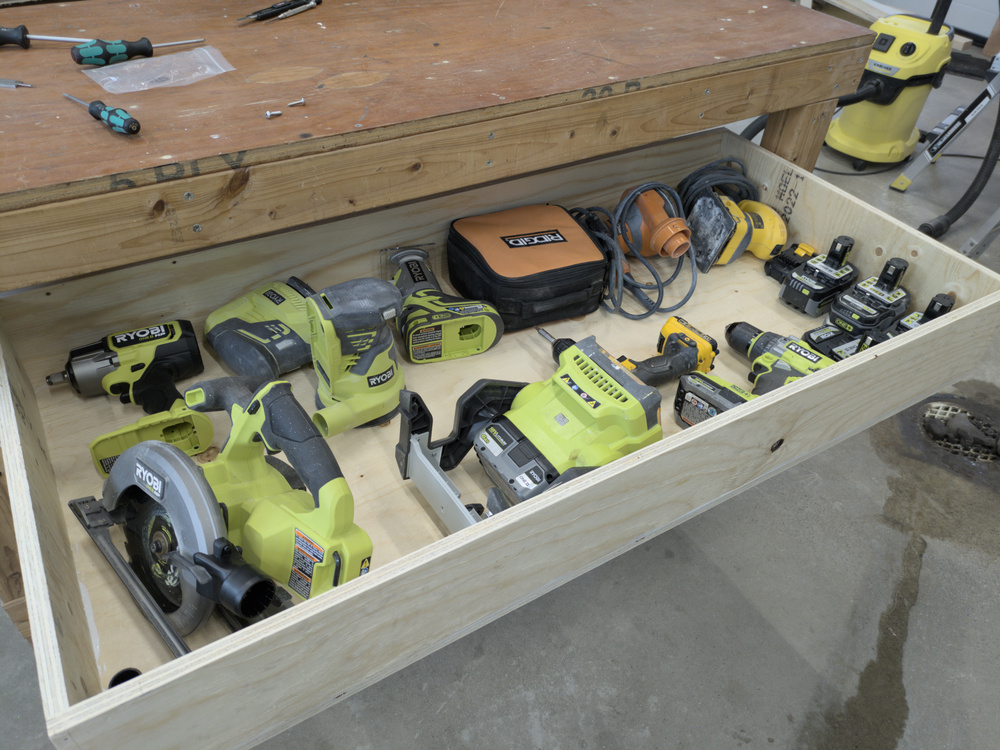
I also bought some undertable drawers and mounted under the work benches. One holds the CNC tools under bench with the CNC mill, the other will hold airplane tools. I also made use of a pair of drawer rollers that we had left over from Hilo and made a large drawer under another bench for Ryobi tools.
I built a large drawer under one of the workbenches for storing all the power tools and batteries.
This all took a lot longer than I had hoped (story of my life) but the garage should now be ready to actually start building!
Pingback: New heating system – Patrik's projects